
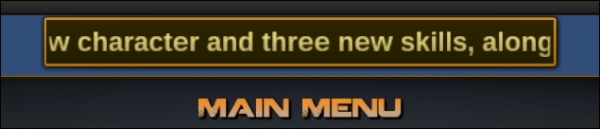
Let's now create some welcome text that scrolls horizontally like this:
In order to achieve this, we will need clipping, which consists of displaying only a specific area of a panel. It can be set up using the Clipping parameter of UIPanel.
We'll be working on the main menu again, so let's show it in the editor: disable our UI Root | Options GameObject, and enable our UI Root | Options GameObject.
Before we configure the panel's clipping, we must create the welcome text box.
Let's use our main menu's background as the base for this new welcome textbox:
- Select our
Main|BackgroundGameObject and duplicate it with Ctrl + D. - Rename this new child to
Welcome. - Drag our new
WelcomeGameObject inside theUI RootGameObject. - Change its Transform position to {0, 500, 0}.
- For its attached
UISpritecomponent:- Change Sprite to the Window sprite
- Change Size to 800 x 100
- Set Depth to 1
- Select the
Welcome|StripesGameObject and delete it. - Select our
Welcome|BorderGameObject, and for itsUISpritecomponent:- Change Sprite to the Window sprite
- Set Depth to 2
Now that we have our welcome textbox, let's add the scrolling text.
We can create the new label that will display the welcome message:
- Select our
UI Root|WelcomeGameObject. - Hit Alt + Shift + N to create a new empty child GameObject.
- Rename this new empty child to
Text. It will be our label container. - With
Textselected, hit Alt + Shift + L to create a new label.
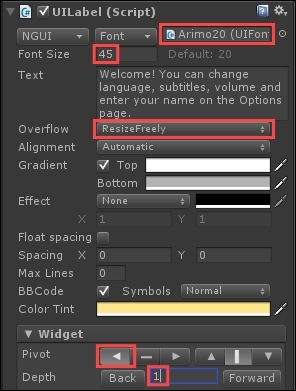
So, we have our label. Let's set up its attached UILabel component:
- Change Text to the following:
Welcome! You can change language, subtitles, volume, and enter your name on the Options page. - Set Color Tint to {R: 255, G: 230, B: 140, A: 255}.
- Set the following values for its other parameters:
Now, set our Text | Label GameObject's Transform position to {400, 0, 0}. Your welcome text should now be displayed on the right-hand side of the textbox:
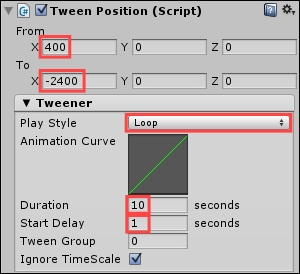
Let's animate it to move towards the left until it is completely out of the textbox. Positioning the tween towards {-2400, 0, 0} will do the trick:
- Select our
Text|LabelGameObject. - In the Inspector view, click on the Add Component button.
- Type
positionto search for components with that word. - Select Tween Position and hit Enter or click on it with your mouse.
Now, configure TweenPosition like this:
Hit Unity's play button. Our text scrolls towards the left-hand side and does that indefinitely. No clipping is set up, so it is visible even outside our textbox. Let's correct that.
For now, our scrollable text is visible even outside the message box. We'll use clipping to make sure the text outside the box's bounds is hidden. The clipping option is available on panels, thus we need to add the UIPanel component to our T
ext container:
- Select our
Welcome|TextGameObject. - In the Inspector view, click on the Add Component button.
- Type
panelto search for components with that word. - Select the NGUI Panel and hit Enter or click on it with your mouse.
We've added the UIPanel component to our Label container. Configure it like this:

With this configuration, the panel will only display its content within a box of 760 x 100 pixels. Since we have set Clipping to Soft Clip, there will be a fade out of the content over 4 pixels. We have set Depth to 1 to make sure it is displayed over both our main menu and options window.
Hit Unity's play button. That's it! The text seems like it's contained inside the box!
Now, we can see how we can easily add a close button on each window.