
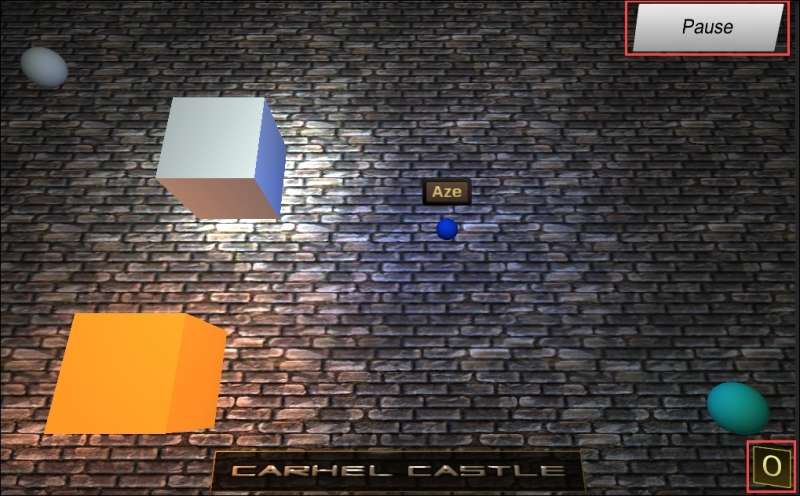
A very interesting feature that we will add to our game is the possibility for the players to choose where their in-game UI elements are displayed. This ensures a much greater flexibility of the user interface.
The player can simply touch and hold their finger on any in-game UI element, and the game pauses and the touched element becomes draggable. The game resumes as soon as the player has dropped its UI element at their required location.
We will use the UIDrag Object component along with Box Colliders to make our UI elements draggable. These colliders will be attached to the widgets' sprites so that their Collider auto-adjust to match option becomes available.
First, we have to add box colliders on our UI elements:
- Select our InGame3DUI | Score | Background GameObject:
- In the Inspector panel, click on the Add Component button.
- Type
boxto search for components with that name. - Select Box Collider and hit your keyboard's Enter key.
- Select both InGame3DUI | Score | Background and TopButtons | Pause:
- In the Inspector panel, click on the Add Component button
- Type
objto search for components with that name - Select Drag Object and hit your keyboard's Enter key
Follow these steps to configure their drag targets individually:
- Select our InGame3DUI | Score | Background GameObject:
- Drag InGame3DUI | Score in the Target field of
UIDragobject
- Drag InGame3DUI | Score in the Target field of
- Select our InGame3DUI | TopButtons | Pause GameObject:
- Drag InGame3DUI | TopButtons | Pause (itself) in the Target field of
UIDragobject
- Drag InGame3DUI | TopButtons | Pause (itself) in the Target field of
Now, we can configure these components. Select both InGame3DUI | Score | Background and TopButtons | Pause GameObjects:
- Check the
UISpritesCollider auto-adjust to match option. - Check the Is Trigger option of the box collider.
- Set Movement of
UIDragobject to {1,1,1}. - Set Drag Effect of
UIDragobject to None.
Ok. Now, both the UI elements are draggable around the screen. We must make sure that they aren't draggable at start, and become draggable after the player holds his finger on them.
We will create a new CustomizableUIElement component, which will be attached to all draggable user interface widgets. It will make sure they aren't draggable at start and handle the touch-and-hold process. After that, we'll have to do a few modifications on the GameManager component to make sure that the hold process handles draggable UI elements.
Follow these steps to create the new CustomizableUIElement component:
- Select both InGame3DUI | Score | Background and TopButtons | Pause.
- In the Inspector panel, click on the Add Component button.
- Type in
CustomizableUIElementand hit the Enter key. - Make sure Language is set to CSharp and hit Enter again.
Open our new CustomizableUIElement.cs script and declare this global variable:
// We'll need the widget's UIDragObject
private UIDragObject dragObject;
Now, replace the default Start() method with this one to retrieve UIDragObject and disable it when the game begins:
private void Start()
{
  // Retrieve the widget's UIDragObject
  dragObject = GetComponent<UIDragObject>();
  // Make sure the widget isn't draggable
  SetDraggable(false);
}
OK. In the preceding code, we call the SetDraggable() method to make the widget not draggable by default. Add the following SetDraggable() method before we continue:
// Sets the widget draggable or not
public void SetDraggable(bool draggable)
{
  // If draggable and hovered object is still this one
  if(draggable && UICamera.hoveredObject == gameObject)
  {
    // Disable the UIDragObject's movement
    dragObject.dragMovement = Vector3.one;
    // Make the widget transparent
    TweenAlpha.Begin(gameObject, 0.2f, 0.4f);
    // Make the widget slightly bigger
    TweenScale.Begin(gameObject, 0.2f, Vector3.one * 1.15f);
    // Pause the game
    GameManager.Instance.SetPause(true);
  }
  // If it's now not draggable
  else
  {
    // Re-enable the UIDragObject's movement
    dragObject.dragMovement = Vector3.zero;
    // Reset the widget's alpha value
    TweenAlpha.Begin(gameObject, 0.2f, 1f);
    // Reset the widget's original size
    TweenScale.Begin(gameObject, 0.2f, Vector3.one);
    // Cancel the hold feedback if there is one
    GameManager.Instance.CancelHoldFeedback();
    // Unpause the game
    GameManager.Instance.SetPause(false);
  }
}
Good. Now, we must implement the OnPress() event to make sure that the hold-feedback process starts when the UI element is pressed and cancelled on release:
void OnPress(bool pressed)
{
  // If widget has just been pressed, show hold feedback
  if(pressed)
  {
    // Parameters to pass to the Coroutine
    object[] parameters = new object[2]{transform, 0.35f};
    // Cancel hold feedback if there is one
    GameManager.Instance.CancelHoldFeedback();
    // Start the HoldFeedback routine
    GameManager.Instance.StartCoroutine("HoldFeedbackRoutine", parameters);
  }
  // If widget has just been released
  else
  {
    // Make sure the widget isn't draggable
    SetDraggable(false);
  }
}
In the preceding OnPress() method, we start HoldFeedbackRoutine() with the clicked widget and a hold duration of 0.35 seconds as parameters.
We have a small modification to apply to the GameManager component's HoldFeedbackRoutine() coroutine. Indeed, for now, we have configured it to call to show the elemental switch UI when the hold action is completed. We must now add a few lines to handle draggable UI elements.
Open the GameManager.cs script and add this variable declaration within the HoldFeedbackRoutine() coroutine, just below the float delay = 0.2f; declaration:
// Retrieve concerned object's CustomizableUIElement
CustomizableUIElement customizableElement =
  concernedObject.GetComponent<CustomizableUIElement>();
Now, at the end of the same coroutine, add the following else if condition to handle customizable UI elements, just below the closing bracket of the if(powerSourc
e != null) statement:
// If it's a customizable UI element
else if(customizableElement != null)
{
  // Make it draggable
  customizableElement.SetDraggable(true);
}
Save all the scripts. Build and run the game on your device. You can notice that the process works, and the score counter and pause button can now be dragged after a long touch.
Surprisingly, the HoldFeedback sprite doesn't appear over the concerned widget but at the bottom of the screen, as follows:
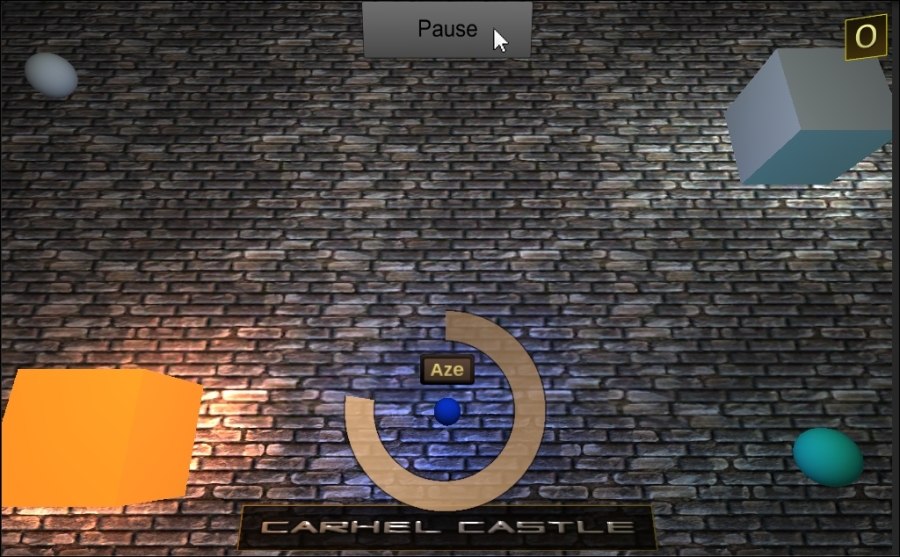
The FollowObject component attached to our HoldFeedback sprite has the GameCamera component set as mainCamera. With that configuration, the hold feedback icon follows the power sources correctly since they are 3D environment objects viewed by GameCamera.
Unfortunately, our 3D UI widgets aren't viewed by the GameCamera component but by InGame3DUI | Camera.
In order to have the HoldFeedback sprite follow in-game 3D widgets, we need to set through code its FollowObject component's mainCamera parameter to InGame3DUI | Camera.
Add these two Camera declarations as global variables of GameManager.cs:
// Game Main Camera
Camera gameMainCamera;
// 3D UI Camera
Camera inGame3DUICamera;
OK. Initialize the preceding variables by adding these two lines in the Start() method:
// Retrieve the game's Main Camera
gameMainCamera = Camera.main;
// Retrieve the 3D UI Camera
inGame3DUICamera = NGUITools.FindCameraForLayer(10);
Now, let's create a new HoldFollowsEnvironment() method to switch the mainCamera parameter between gameMainCamer
a and inGame3DUICamera:
// HoldFeedback either follows env 3D object or 3D UI
public void HoldFollowsEnvironment(bool follows3DObject)
{
  // If HoldFeedback must follow a 3D env object
  if(follows3DObject)
  {
    // Set the FollowObject's camera to the env cam
    holdFeedbackFollowObject.mainCamera = gameMainCamera;
  }
  // If it must follow a 3D UI widget
  else
  {
    // Set the FollowObject's camera to the 3DUI cam
    holdFeedbackFollowObject.mainCamera = inGame3DUICamera;
  }
}
Good. We can now request to switch between these cameras when necessary. Open the PowerSource.cs script and add this line within the OnPress() method, just above the GameManager.Instance.StartCoroutine("HoldFeedbackRoutine", p
arameters) instruction:
// Set the HoldFeedback to follow 3D Object
GameManager.Instance.HoldFollowsEnvironment(true);
Now, open CustomizableUIElement.cs and add this line within the OnPress() method just below the GameManager.Instance.CancelHold
Feedback() instruction:
// Set the HoldFeedback to follow a 3D UI widget
GameManager.Instance.HoldFollowsEnvironment(false);
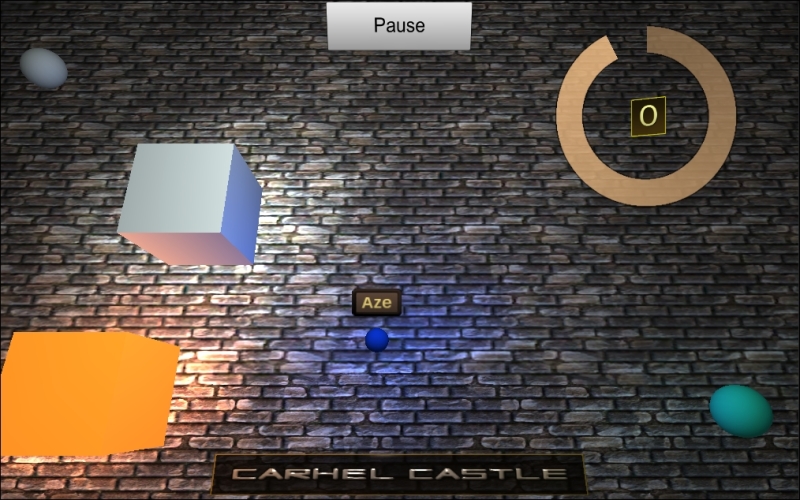
Save all the scripts and return to Unity. Then, build and run the game on your mobile device.
We've corrected the problem: the hold feedback icon is now correctly displayed above the power sources and 3D widgets when the player holds their finger on them:
Great. The player can now move their in-game UI widgets around and place them where they want. Now, we can discuss a great way to test your game easily.