
Let's create our own atlas to hold our new sprites and fonts. In order to do this, we will use the Atlas Maker wizard.
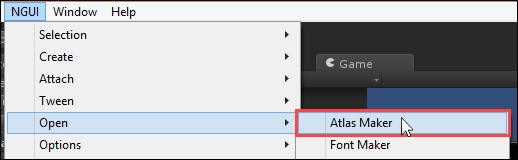
First, we can open Atlas Maker:
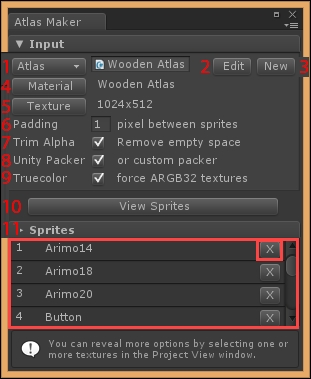
The preceding Atlas Maker window has the following parameters:
- Atlas: This is the currently selected atlas prefab. Click on this button to select the atlas you want to view and edit.
- Edit: This button is only displayed if the atlas is not selected in the Project view. Clicking on this button will automatically select the atlas prefab and display its parameters in the Inspector view.
- New: This button deselects the current atlas prefab, resets parameters, and displays a new
Createbutton. We'll use that to create a new atlas. - Material: By clicking on this button, the material used to draw all elements using this atlas will be selected. You will then be able to edit its parameters in the Inspector view. Usually, an unlit shader does the trick. The default one is
Unlit – Transparent Colored. - Texture: Click on this button to select the atlas's texture and display its import parameters in the Inspector view.
- Padding: Enter here the distance in pixels that separates each sprite.
- Trim Alpha: With this option checked, sprites that contain transparent pixels will be cropped to use less space.
- Unity Packer: With this option checked, the atlas will be handled using Unity's default Texture Packer. Uncheck this option if you use an external Texture Packer.
- Truecolor: This forces
ARGB32textures for both good quality and color fidelity. - View Sprites: Click on this button to show all the sprites in a separate window. From this sprite preview window, you can select any sprite by double-clicking on it. It will then display its parameters in the Inspector view.
- Sprites: This list represents all sprites contained within the atlas. You can select any sprite by clicking on it and delete it by clicking on its corresponding X button.
Now that we've seen Atlas Maker, let's use it to create our own atlas.
We will now create our new Game atlas, which will hold our custom sprites and fonts for our future game. We will still use some assets from the default Wooden Atlas in order to see how we can use multiple atlases within the same scene. In order to create a new atlas, we need sprites to fill it up with.
You can download the Assets.zip file from http://goo.gl/zbspHe
Once the aforementioned file has finished downloading, extract its content directly in your project's folder. You will now have all the necessary assets for the book added to the *YourProject*/Assets/Resources/Textures and Fonts folders.
Ok, now that we have the necessary assets, let's create a new atlas.
First, if you have an atlas currently selected in the Atlas Maker window's Input group, you must click the New button (1), as follows:
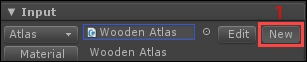
If no atlas was selected, the New button isn't available, which means that you can safely move on.
We'll use the Icon_Play sprite to create our new atlas. In the Project view, navigate to the Assets/Resources folder and select our Icon_Play file. With the play icon file selected, you'll notice that the Atlas Maker window now has a Create button available, and notifies that the Icon_Play sprite will be added, as follows:
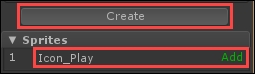
Click on the Create button. A Save As window appears, letting you choose where you want to save your future atlas prefab:
- Navigate to the
Assets/Resourcesfolder. - Create a new
Atlasfolder and access it. - Enter
Gamefor the prefab filename, and click on the Save button.
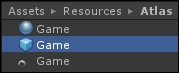
That's it. Our Game atlas has been created and is now selected automatically. In the Project view, you can notice our Game material, atlas prefab and texture:
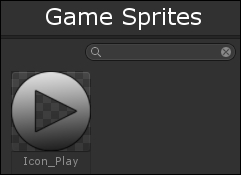
In the Atlas Maker window, click on the View Sprites button. The following sprite selection window appears, with our new Icon_Play sprite:
Good. Before we move on to see how we can add more sprites to our new atlas, let's add this play icon to our Play button.
Let's try out our new play icon. We'll need to create a new sprite widget as a child of our Play button to display it:
- Select our
UI Root|Main|Buttons|PlayGameObject. - Hit Alt + Shift + S to create a new sprite.
- Rename this new
SpriteGameObject toIcon. - In the Inspector view, click on the Atlas button of its
UISpritecomponent. - In the Select an Atlas pop-up window, select our Game atlas.
- In the Inspector view, click on the Sprite button of its attached
UISpritecomponent. - Double-click on our Icon_Play sprite to select it.
Ok, we now have our new play icon in our Play button, as shown in the following screenshot:
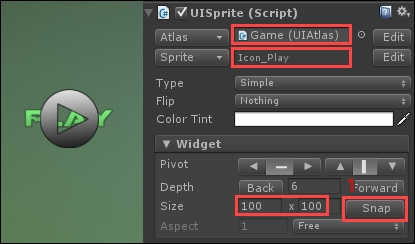
As you might notice in the preceding screenshot, our play icon is rather small. Its display size is 100 x 100 pixels, whereas its original file size is 384 x 384.
That's where the Snap button (1) comes in. Click on it, and it will snap it to its original size and look like this:

Now, that's better. This icon is black and white so that NGUI's color tint remains effective on it. Let's make sure it has a green tint to match the button's background:
- Select our
Main|Buttons|Play|IconGameObject. - Set Color Tint to {R:
175, G:255, B:190, A:255}.
Ok, we have finished integrating our first custom asset to our UI! Now, let's see how we can add more sprites to this new Game atlas.