
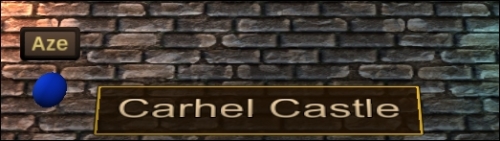
We can also add 3D widgets directly within the environment, as shown:
In order achieve this, we must create an empty GameObject as a child of the Ground GameObject, which has the UIPanel component attached to it for widget rendering.
After this, we can create our widget, place it at the desired location, and make sure it lies in the default environment camera layer instead of the usual UI layer.
Let's try it now:
- Select our
GroundGameObject. - Create a new empty child GameObject pressing Alt + Shift + N and select it:
- Rename this new child to
LevelName. - Set its Transform position to {0, 0, -3.8}.
- Rename this new child to
- Click on the Add Component button in the inspector.
- Type in
panelto search for components with this name. - Select NGUI Panel and hit Enter.
- Create a new child sprite by pressing Alt + Shift + S.
- Rename this new sprite to
Background. - Set Atlas to Wooden Atlas.
- Change Sprite to the Flat sprite.
- Make sure Type is set to Sliced.
- Set Size to 360 x 100.
- Rename this new sprite to
As you can see in the following screenshot of the Scene view, our 360 x 100 sprite is gigantic!
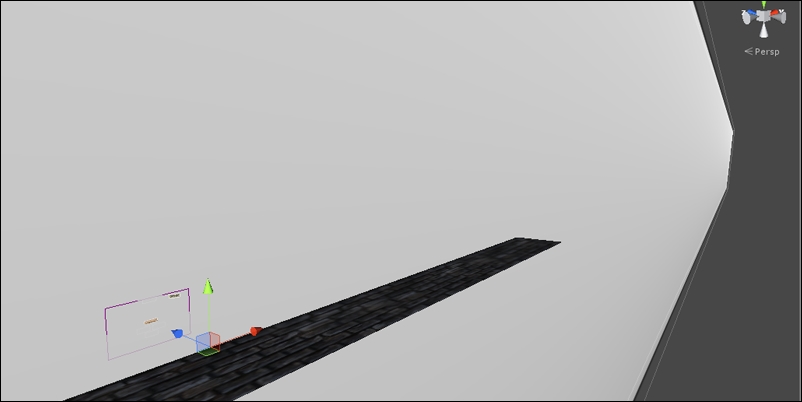
The large size of our sprite is simply due to the fact that the widget's scaling is handled by the UI Root component and our Ground does not have UI Root.
Instead of increasing the number of UI roots in our scene, we can simply set the LevelName container's scale to a very small value; our widgets will then be displayed at a manageable size. Their Size values won't be pixel perfect, but that's not a problem here since we are simply displaying widgets in the 3D environment:
- Select our
Ground|LevelNameGameObject. - Set the Transform scale to {0.005, 0.005, 1}.
- Change the Transform rotation to {90, 0, 0}.
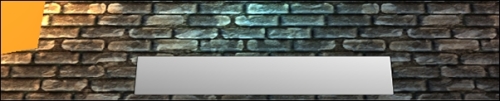
Ok, you should now have a reasonably-sized Background sprite in the Game view, with a rotation, as if it were painted on the ground:
Good! We can now add a border sprite and a label to display the level's name:
- Select our
Ground|LevelNameGameObject. - Create a new label by pressing Alt + Shift + L. For this new label:
- Set the font type to Unity, with the Arial font to size 50.
- Change the Text value to
Carhel Castle. - Change its Overflow to ResizeFreely.
- Set a black Outline effect with the values of X and Y as 1.
- Change Color Tint to {R: 255, G: 220, B: 170, A: 255}.
- Select our
Ground|LevelName|BackgroundGameObject:- Change Color Tint to {R: 40, G: 20, B: 0, A: 200}.
- Change Anchor Type to Unified.
- Drag our
Ground|LevelName|Labelin the Target field.
- Duplicate our
Backgroundsprite pressing Ctrl + D.- Rename this new duplicate to
Border. - Change Depth to 1.
- Uncheck the Fill Center option.
- Change Color Tint to {R: 255, G: 200, B: 40, A: 255}.
- Rename this new duplicate to
Ok, great! We now have the level's name displayed in the 3D world, and the background and borders will adjust to always wrap the label. We can now move on to the lighting effects!