
- First, add a second WAN interface to the firewall:
- Navigate to Interfaces | (assign) | Interface Assignments.
- On the Interface Assignments tab, the Available network ports drop-down menu lists the unassigned network interfaces.
- Click on the Add button.
- The new interface will initially be assigned a generic name (for example, OPT1, OPT2). Click on the interface's name in the table (or navigate to the configuration page via the interfaces menu).
- On the interface configuration page, check the Enable interface checkbox.
- Enter a brief description in the Description text field (for example, OPT_WAN).
- In the IPv4 Configuration Type dropdown, select DHCP. pfSense will automatically configure this interface as a gateway.
- Enter a brief, non-parsed description in the Description text field.
- Check the Block private addresses and loopback addresses checkbox.
- Check the Block bogon networks checkbox.
- When you are done making changes, click on the Save button.
- Click on the Apply Changes button.
- Now we must configure DNS servers for each of the newly added WAN-type interfaces:
- Navigate to System | General Setup.
- In the DNS Server Settings section, enter a DNS server for the new gateway. Enter the DNS server IP address in the text field on the left side, and select the gateway in the adjacent drop-down menu:
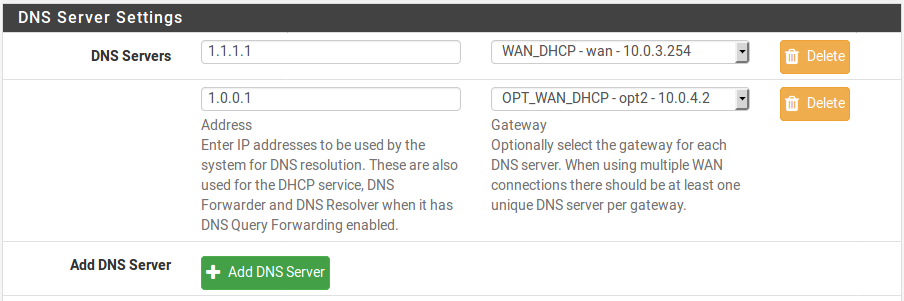
-
- Make sure there is at least one unique DNS server per gateway.
- When you are done, click on the Save button.
- Now, we can begin gateway configuration:
- Navigate to System | Routing | Gateways.
- Click on the edit icon (the pencil) for the default gateway.
- Scroll down to the Monitor IP text field and enter the IP address of the gateway’s DNS server:

-
- Click on the Save button.
- Click on the edit icon (the pencil) for the newly created gateway.
- Scroll down to the Monitor IP edit box and enter the IP address of the gateway’s DNS server.
- Click on the Save button.
- Click on the Gateway Groups tab.
-
- Click on the Add button.
- Enter the gateway group name in the Group Name text field:
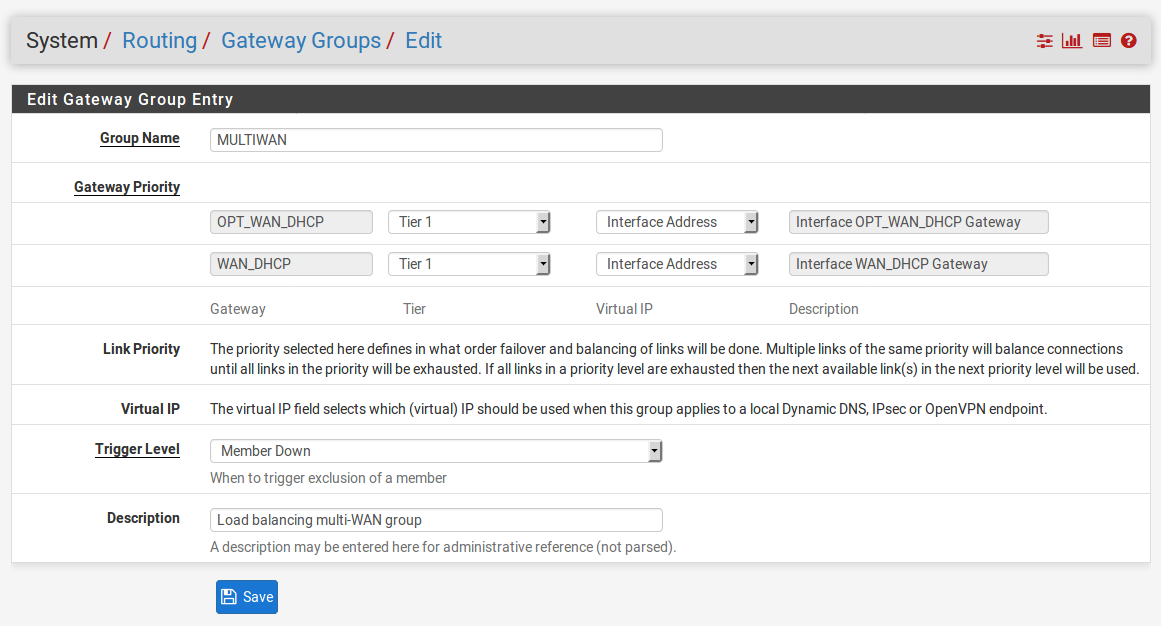
-
- Under Gateway Priority, select Tier 1 for all gateways in the gateway group.
- Leave Trigger Level set to Member Down.
- Enter a brief description in the Description text field.
- When you are done, click on the Save button.
- Click on the Apply Changes button:

- Finally, we must create a firewall rule to ensure outbound traffic utilizes the new gateway group:
- Navigate to Firewall | Rules | Floating.
- From the Floating tab, click on the first Add button.
- Leave the Action set to Pass:
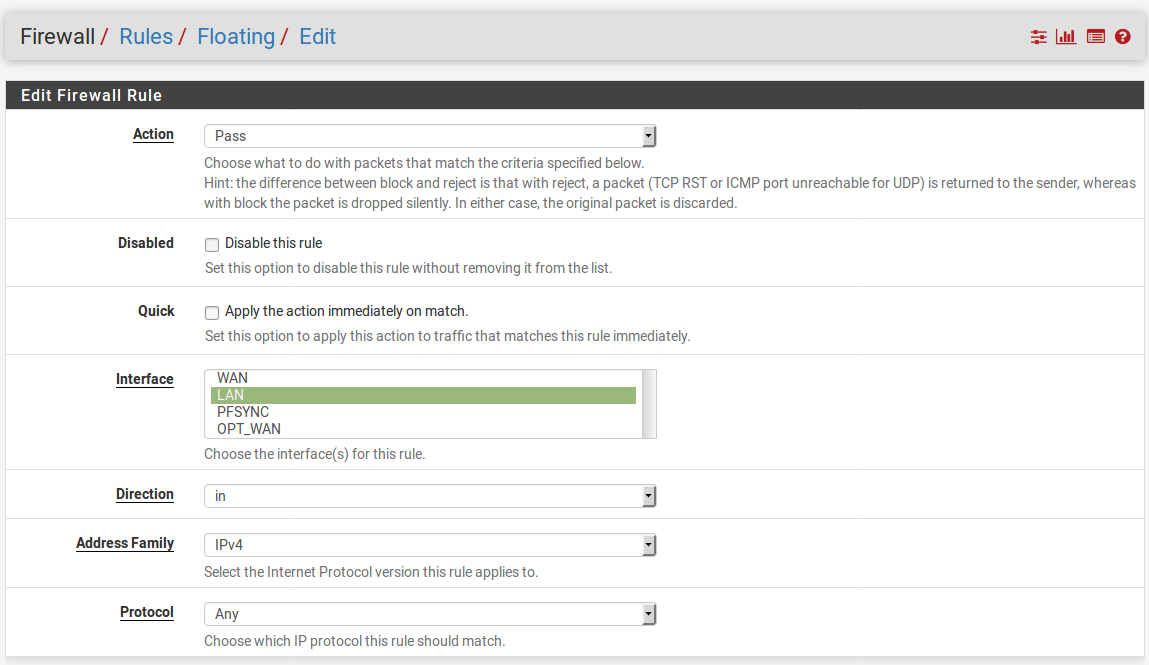
-
- In the Interface drop-down menu, select every non-WAN interface you want to utilize the gateway group (at a minimum, you probably want to select LAN, but there may be others).
- In the Direction drop-down box, select in.
- In the Protocol drop-down box, select Any.
- Leave the Source and Destination set to Any.
- Enter a brief, non-parsed description in the Description edit box (for example, Multi-WAN rule).
- In the Extra Options section, click on the Show Advanced button.
-
- In the Advanced Options section, scroll down to the Gateway drop-down box and select the newly created gateway group:

-
- When you are done making changes, click on the Save button.
Make sure the new rule is at the top of the list of floating rules.