
First, we must create the CA and certificates on the server:
- Navigate to System | Cert. Manager.
- From the default tab, CAs, click on the Add button to create the CA.
- In the Descriptive name text field, enter a brief name:

- In the Method drop-down menu, select Create an Internal Certificate Authority.
- In the Internal Certificate Authority section, make sure the required fields are completed. You can also complete the optional fields (Country Code, State or Province, and so on).
- When you are done, click on the Save button.
- Click on the Certificates tab. We need to create two certificates: one for the server, and one for the client.
- Click on the Add/Sign button to add a new certificate.
- Enter a name in the Descriptive Name text field (for example, OpenVPN server certificate):

- In the Certificate Authority drop-down menu, select the CA we created in the earlier steps.
- Make sure the Certificate Type is set to Server Certificate:

- Click on the Save button.
- Click on the Add/Sign button to add a new certificate.
- Enter a name in the Descriptive Name text field (for example, OpenVPN client certificate).
- In the Certificate Authority drop-down menu, select the CA we created in the earlier steps.
- Make sure the Certificate Type is set to User Certificate.
- Click on the Save button.
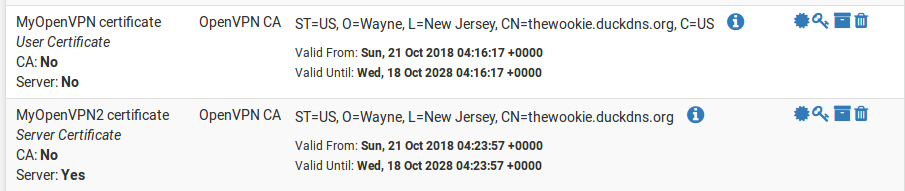
- The table on the Certificates tab should list both the newly created server certificate and user certificate. Click on the Export Certificate button for the user certificate and save the certificate to a safe place:
- Click on the Export Key button for the user certificate and save the key to a safe place. You will need to import both the certificate and the key onto the client later.
- Click on the CA tab and click on the Export CA button for the CA we created earlier. Save the CA.
- Repeat this process for the CA’s key. We will need to import the CA onto the client, and we need both the CA and the key.
Now we can begin configuration of the OpenVPN server:
- Navigate to VPN | OpenVPN.
- From the Servers tab, click on the Add button.
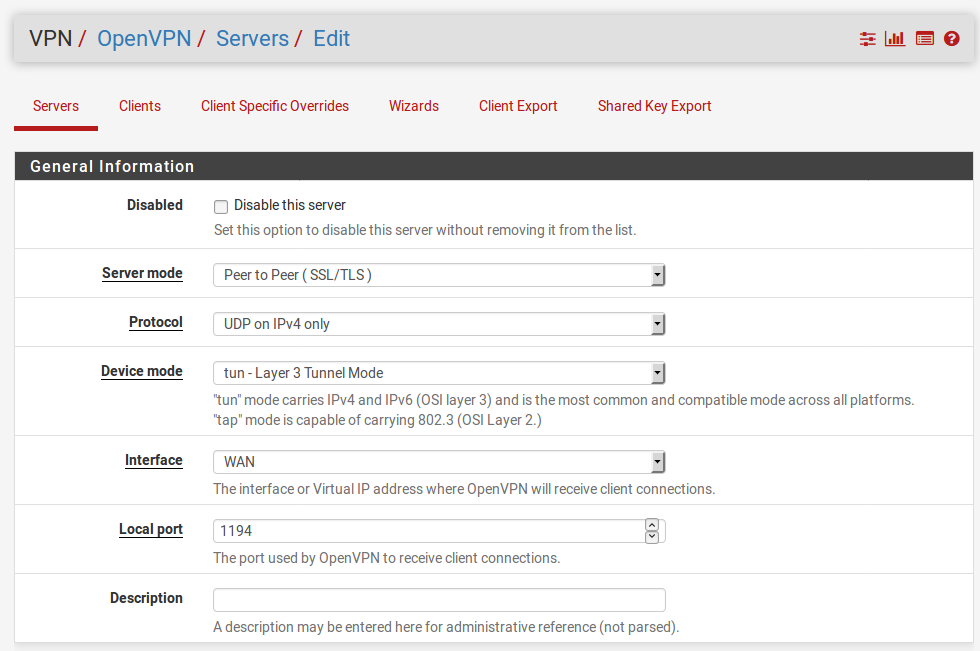
- In the General Information section, we can leave all settings at their default values. Be sure that Server mode is set to Peer to Peer (SSL/TLS). You can keep Local port set to 1194 (the default OpenVPN port) unless you have reason to select a different port. You can enter a brief description in the Description text field:
- In the Cryptographic Settings section, make sure the Use a TLS Key and Automatically Generate a TLS Key checkboxes are checked. You will need to paste the autogenerated key into the client settings later:

- In the Peer Certificate Authority drop-down menu, select the CA created in step 1.
- In the Server certificate drop-down menu, select the server certificate created in step 1.
- The remaining settings in Cryptographic Settings can remain unchanged.
- In the Tunnel Settings section, specify a virtual IPv4 network in the IPv4 Tunnel Network text field. The virtual network must be big enough to accommodate the server virtual address and at least one client, so the smallest IPv4 network you can specify is a /30 network.
- In the IPv4 Local network(s) text field, specify the IPv4 networks that will be accessible from the remote endpoint. Usually you should just specify the LAN network, but you may specify more than one network, separated by commas.
- In the IPv4 Remote network(s) text field, specify the IPv4 remote networks that will be routed through the tunnel. As with IPv4 Local network(s), you can specify more than one network, separated by commas.
- In the Client Settings section, for Topology, select net30 in the drop-down menu.
- When you are done making changes, click on the Save button.
OpenVPN server configuration is complete, but we still need to create firewall rules to allow OpenVPN traffic to pass:
- Navigate to Firewall | Rules.
- On the WAN tab, click on the first Add button (the one with the up arrow). The Firewall Edit page will load.
- For Protocol, select UDP in the drop-down menu.
- For Destination, select WAN address in the drop-down menu.
- Enter a brief description in the Description text field (for example, OpenVPN rule for WAN).
- When you are done, click on the Save button.
- Click on the Apply Changes button.
- Click on the OpenVPN tab.
- We only need to create one rule for the OpenVPN tunnel, so click on either Add button. The Firewall Edit page will load.
- For Protocol, select any in the drop-down menu.
- Enter a brief description in the Description text field.
- Click on the Save button.
- Click on the Apply Changes button:

Next, we switch to the other firewall and import the CA and client certificate:
- Navigate to System | Certificate Manager.
- From the CAs tab, click on the Add button.
- In the Descriptive name text field, enter the same name for the CA as you did on the server.
- Make sure Import an existing Certificate Authority is selected in the Method drop-down menu.
- Paste Certificate data and Certificate Private Key into the corresponding text boxes.
- When done, click on the Save button.
- Click on the Certificates tab.
- Click on the Add/Sign button to add the client certificate.
- For Method, make sure Import an existing Certificate is selected.
- In the Descriptive name text field, enter the name used when the certificate was created on the server.
- Paste Certificate data and Certificate Private Key (for the user certificate) into the corresponding text boxes.
- When done, click on the Save button.
Next, we begin OpenVPN client configuration:
- Navigate to VPN | OpenVPN.
- Click on the Clients tab.
- Click on the Add button.
- In the General Information section, enter the IP address of the OpenVPN server in the Server host or address text field.
- All other settings in the General Information section can be kept at their default values. Make sure Server mode is set to Peer to Peer (SSL/TLS), and make sure Server port is set to 1194. You may enter a brief description in the Description edit box.
- In Cryptographic Settings, make sure Use a TLS Key is checked. Uncheck Automatically Generate a TLS Key; this will cause the TLS Key text box to appear. Paste the TLS Key generated by the OpenVPN server into this box.
- In the Peer Certificate Authority drop-down menu, select the CA created in step 1 (and imported to the client in step 4) as the CA.
- In the Client Certificate drop-down menu, select the client (user) certificate created in step 1 (and imported to the client in step 4).
- In the Tunnel Settings section, in the IPv4 Tunnel Network edit box, specify the same virtual IPv4 network you specified for this setting on the server side in step 2.
- In the IPv4 Remote network(s) text field, specify the remote IPv4 networks that will be routed through the VPN tunnel. This is typically identical to the IPv4 networks specified for IPv4 Remote network(s) on the server side in step 2.
- In the Topology drop-down menu, select net30.
- When you are done making changes, click on the Save button.
Next, we need to create a firewall rule to allow OpenVPN traffic to pass:
- Navigate to Firewall | Rules and click on the OpenVPN tab.
- Click on one of the Add buttons to add a new rule.
- Keep the Action set to Pass.
- Set the Protocol to any.
- Leave the Source and Destination set to any.
- Enter a brief description in the Description text field (for example, Allow OpenVPN traffic).
- Click on the Save button.
- Whereas we have to explicitly connect IPsec tunnels, with OpenVPN, the tunnel will connect automatically as soon as we complete configuration, assuming the OpenVPN service is running. To verify that this is the case, navigate to Status | OpenVPN on the client. The newly created tunnel should be listed in the table with a Status of up. If the tunnel is not up, there are several possible reasons:
- The OpenVPN service is not running.
- The CA and certificates were set up incorrectly.
- A configuration error was made.
Note that when we added firewall rules for the server, we had to add a rule to allow traffic through the WAN interface on the server side, but we did not have to add such a rule on the client side. This is because the client is initiating the VPN connection; therefore, the client’s traffic must be allowed through the WAN interface. Return traffic is allowed, so we don’t need a corresponding client-side rule; rather, we only needed a rule to allow OpenVPN traffic on the client.