
SharePoint features provide a mechanism to add our custom branding elements to the SharePoint farm at four different scopes. Features can be scoped to the farm level, web application level, site collection level, or site (web) level. In addition to adding content, they can run custom code when activated, upgraded, deactivated, and so on in feature event receivers.
In this recipe, we will create a site (web) scoped feature that adds and configures our branding elements on the site.
Follow these steps to create a feature event receiver:
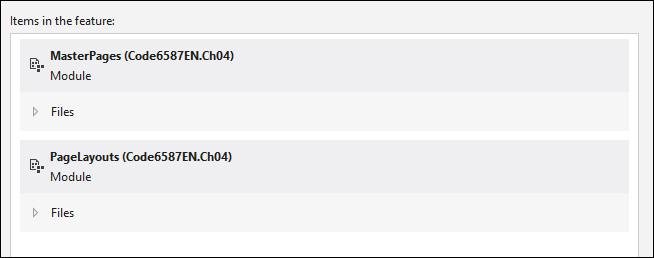
- Open the SiteBranding feature that was created when creating for our
MasterPagesandPageLayoutsmodules. - Verify that both the modules are listed in the Items in the feature section.
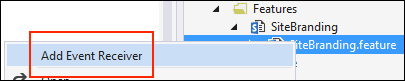
- Right-click on SiteBranding.feature in the
Featuresfolder. - Select Add Event Receiver as shown in the following screenshot:
- In our new
SiteBrandingEventReceiverclass, add the following constant strings that we will use for property names and master page URLs:public class SiteBrandingEventReceiver : SPFeatureReceiver { private const string PropertyOldMasterUrl = "CustomProp::OldMasterUrl"; private const string PropertyOldCustomMasterUrl = "CustomProp::OldCustomMasterUrl"; private const string TacomaMasterUrl = "_catalogs/masterpage/Tacoma.master"; private const string SeattleMasterUrl = "_catalogs/masterpage/Seattle.master"; - Uncomment the
FeatureActivatedandFeatureDeactivatingmethods as shown in the following code:public override void FeatureActivated(SPFeatureReceiverProperties properties) { } public override void FeatureDeactivating(SPFeatureReceiverProperties properties) { } - In the
FeatureActivatedmethod, get the site in ausingstatement as follows:using (var web = properties.Feature.Parent as SPWeb)
- Ensure the site is not null using the following line of code:
if (web != null)
- Get the current value for the
AllowUnsafeUpdatesproperty on the site and set the value totrueas follows:var allowUnsafeUpdates = web.AllowUnsafeUpdates; web.AllowUnsafeUpdates = true; web.Update();
- Using the following code, remove our custom master page properties if they already exist on the site:
if (web.AllProperties.ContainsKey(PropertyOldMasterUrl))
web.AllProperties.Remove(PropertyOldMasterUrl);

if (web.AllProperties.ContainsKey(PropertyOldCustomMasterUrl))
web.AllProperties.Remove(PropertyOldCustomMasterUrl);
- Get the current master page settings for the site using the following code:
var masterUrl = web.MasterUrl;

var customMasterUrl = web.CustomMasterUrl;
- Set the current master page settings as the values to our custom master page properties.
web.AllProperties.Add(PropertyOldMasterUrl, masterUrl);

web.AllProperties.Add(PropertyOldCustomMasterUrl, customMasterUrl);
- Set the
Tacoma.mastermaster page as the master page for the site and system master pages using the following code:web.MasterUrl = TacomaMasterUrl; web.CustomMasterUrl = TacomaMasterUrl; web.Update();
- Set the
AllowUnsafeUpdatesproperty of the site back to its original value.web.AllowUnsafeUpdates = allowUnsafeUpdates; web.Update();
- In the
FeatureDeactivatingmethod, get the site in ausingstatement.using (var web = properties.Feature.Parent as SPWeb)
- Ensure the site is not
null, using the following code:if (web != null)
- Get the current value for the
AllowUnsafeUpdatesproperty on the site and set the value totrue.var allowUnsafeUpdates = web.AllowUnsafeUpdates; web.AllowUnsafeUpdates = true; web.Update();
- Get the default
Seattle.mastermaster page URL using the following code:var masterUrl = SeattleMasterUrl; var customMasterUrl = SeattleMasterUrl;
- Using the following code, check the site properties for the original master page settings we added in the
FeatureActivatingmethod:if (web.AllProperties.ContainsKey(PropertyOldMasterUrl)) { var propertyValue = web.AllProperties[PropertyOldMasterUrl] as string; if (!string.IsNullOrEmpty(propertyValue)) masterUrl = propertyValue; web.AllProperties.Remove(PropertyOldMasterUrl); } if (web.AllProperties.ContainsKey(PropertyOldCustomMasterUrl)) { var propertyValue = web.AllProperties[PropertyOldCustomMasterUrl] as string; if (!string.IsNullOrEmpty(propertyValue)) customMasterUrl = propertyValue; web.AllProperties.Remove(PropertyOldCustomMasterUrl); } - Set the original master page as the master page for the site and system master pages.
web.MasterUrl = masterUrl;

web.CustomMasterUrl = customMasterUrl;

web.Update();
- Set the
AllowUnsafeUpdatesproperty of the site back to its original value, using the following code:web.AllowUnsafeUpdates = allowUnsafeUpdates; web.Update();
SharePoint features may include event receivers that execute at different points in the life cycle of the feature. In our example, we created FeatureActivated and FeatureDeactivating event receivers to configure the master page settings when activated or deactivated. In addition, we stored the old master page settings as properties on the site to allow us to restore the settings when the feature is deactivated.
- The Creating SharePoint Features article on MSDN at http://msdn.microsoft.com/en-us/library/vstudio/ee231541(v=vs.110).aspx
- The How to: Create an Event Receiver article on MSDN at http://msdn.microsoft.com/en-us/library/vstudio/ee231563.aspx
- The SPFeatureReceiver.FeatureActivated method topic on MSDN at http://msdn.microsoft.com/en-us/library/microsoft.sharepoint.spfeaturereceiver.featureactivated.aspx
- The SPFeatureReceiver.FeatureDeactivating method topic on MSDN at http://msdn.microsoft.com/en-us/library/microsoft.sharepoint.spfeaturereceiver.featuredeactivating.aspx
- The Walkthough: Add Feature Event Receivers article on MSDN at http://msdn.microsoft.com/en-us/library/vstudio/ee231604.aspx