
Delegate controls provide a mechanism for adding ASP.NET user controls. As such, to create, compile, and package custom controls, we will use a Visual Studio solution. In this recipe, we will create the Visual Studio SharePoint project that we will use for this chapter. For simplicity, we will add each subsequent recipe to this single project.
In order to create a custom SharePoint solution with Visual Studio, we will need to have Visual Studio 2012 with the Office Developer Tools or Visual Studio 2013 applications installed on a computer running SharePoint Server 2013. In addition, we will need local computer administrator and SharePoint farm administrator access.
Tip
If using PowerShell to deploy the custom SharePoint solution, SharePoint shell access to the SharePoint configuration database in SQL will also be required. Refer to http://technet.microsoft.com/en-us/library/ff607596.aspx for more information on adding a SharePoint shell administrator.
Follow these steps to create a Visual Studio solution for custom-delegate controls:
- Open Visual Studio running as administrator.
- From the File menu, select New Project.
- Select the SharePoint 2013 – Empty Project template by navigating to Templates | Visual C# | Office/SharePoint | SharePoint Solutions as shown in the following screenshot:
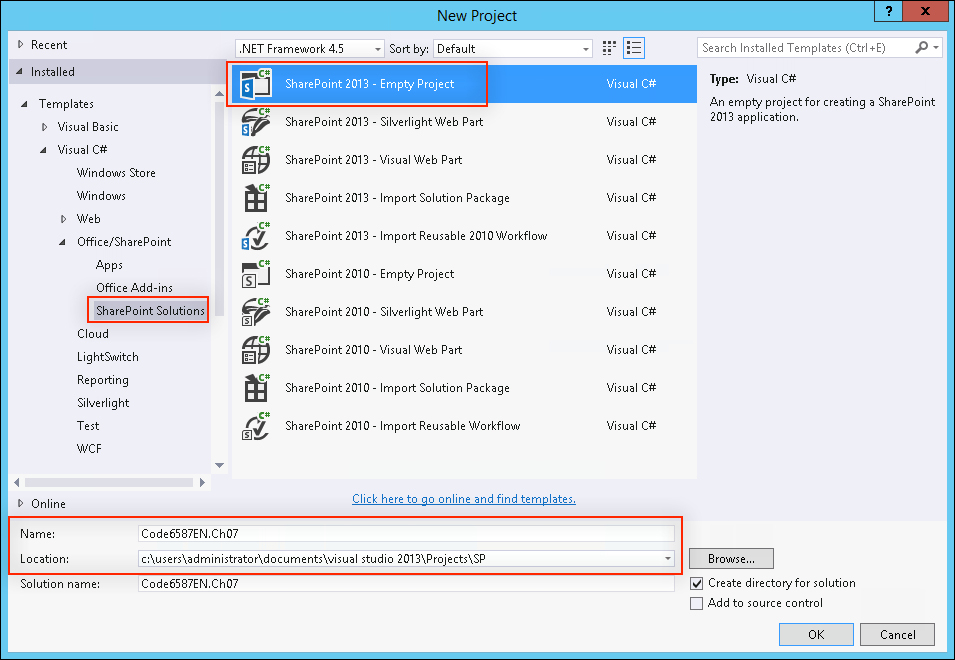
- Provide values in the Name and Location textboxes for the project and click on OK.
- Provide the URL to the local SharePoint site you will be testing with:
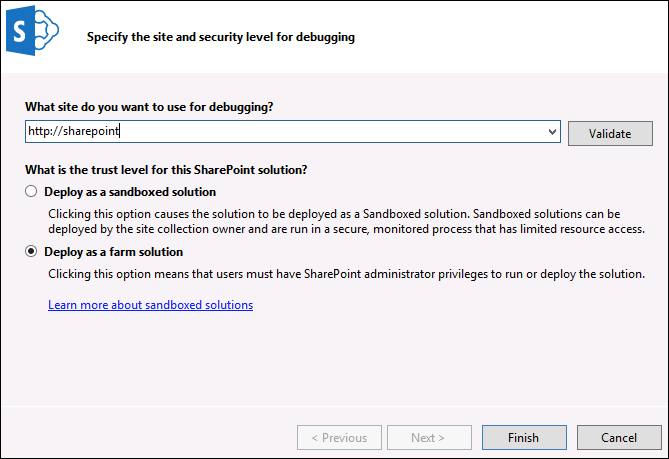
- Select Deploy as a farm solution and click on Finish.
- Add project references to
System.ConfigurationandMicrosoft.SharePoint.Publishing. TheMicrosoft.SharePoint.Publishingassembly can be found atC:Program FilesCommon FilesWeb Server Extensions15ISAPI.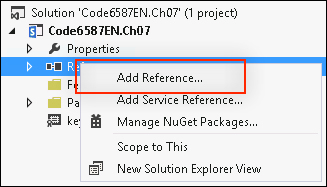
- Right-click on the project name in the Solution Explorer pane.
- Navigate to Add | New Folder as shown in the following screenshot:
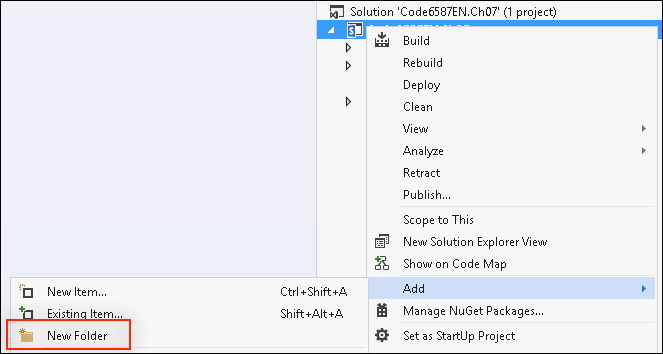
- Create a folder named
Controls. We will use theControlsfolder later in the chapter to store all of our code-only user controls. - Right-click on the project name.
- Navigate to Add | SharePoint Mapped Folder… as shown in the following screenshot:
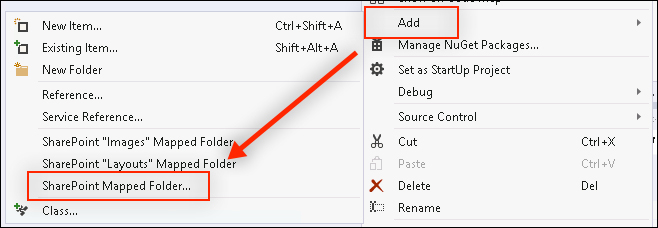
- Select the
CONTROLTEMPLATESfolder under theTEMPLATEfolder. We will use theCONTROLTEMPLATESmapped folder to store all of ourASCXuser controls later in the chapter.
- Click on OK.
- Add a folder in the
CONTROLTEMPLATESmapped folder with the same name as the project. When working with mapped folders, it is important to place items in a subfolder that is unique. This will alleviate any collisions with files of the same names included with SharePoint or provided by other custom solutions. - Click on the SharePoint "Layouts" Mapped Folder option to add the
Layoutsmapped folder, which we will use later in the chapter to store our application page, stylesheets, and JavaScript: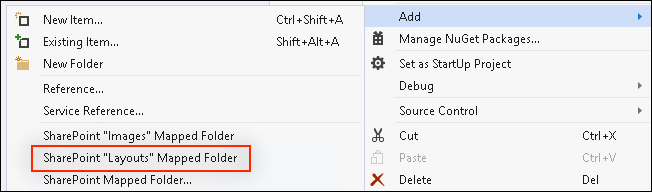
- Click on Save All from the toolbar or File menu.
Our Controls folder will act like a folder does in a standard .NET class library to provide organization and namespaces. The CONTROLTEMPLATES mapped folder will instruct SharePoint to deploy the ASCX files for our user controls to the appropriate place on the filesystem (C:Program FilesCommon FilesMicrosoft SharedWeb Server Extensions15TEMPLATECONTROLTEMPLATES). The Layouts mapped folder will instruct SharePoint to deploy our application page, stylesheets, and JavaScript to the appropriate place on the filesystem to allow them to be accessed from the client web browsers (C:Program FilesCommon FilesMicrosoft SharedWeb Server Extensions15TEMPLATELAYOUTS).
- The Add-SPShellAdmin topic on TechNet at http://technet.microsoft.com/en-us/library/ff607596.aspx
- The Developing SharePoint Solutions article on MSDN at http://msdn.microsoft.com/en-us/library/vstudio/ee231517.aspx
- The How To: Add and Remove Mapped Folders article on MSDN at http://msdn.microsoft.com/en-us/library/vstudio/ee231521(v=vs.110).aspx