
SharePoint provides two primary navigation structures by default: the quick launch displayed vertically on the left-hand side of the page and the top navigation displayed horizontally at the top of the page. The items displayed in these navigation structures may be customized in a variety of methods, including manually per site, using managed metadata, and using custom site map providers. The following screenshot shows the horizontal navigation provided by SharePoint at the top of the page:

In this recipe, we will create a custom site map provider and register it with the TopNavigationDataSource delegate control. There are a variety of techniques to create custom site map providers from code. The site map providers used by SharePoint are derived from the SiteMapProvider class provided by the .NET framework in the System.Web assembly. For the purpose of this recipe, we will create a very simple class derived from the PortalSiteMapProvider class.
We should have already created our Visual Studio project in the Creating a Visual Studio solution for custom delegate controls recipe of this chapter before starting this recipe.
Follow these steps to customize the top navigation with a delegate control:
- Open the project created in the Creating a Visual Studio solution for custom delegate controls recipe of this chapter in Visual Studio.
- Add a new class to our
Controlsfolder. - Set the access modifier for our new class to
publicand inherit from thePortalSiteMapProviderbase class:public class CustomSiteMapProvider : PortalSiteMapProvider
- Add a field to the class containing the list of links to return from the custom site map provider using the following code:
private Dictionary<string, string> links = new Dictionary<string, string>() {
  { "Bing", "http://www.bing.com" },
  { "Google", "http://www.google.com" },
  { "Yahoo", "http://www.yahoo.com" }
};
If you were always using a constant list of links, this would be sufficient. However, if you had a dynamic source for the link data, you could replace this with your own method for getting links.
- Add a
boolfield to the class to determine whether or not we should include the SharePoint configured navigation data in the list of links we will return. In our method to return the collection of links, we will use this to indicate whether or not we should include the SharePoint-provided links, along with our own links. You could remove this or make it configurable depending upon your circumstances.private bool renderSharePointLinks = false;
- Override the
GetChildNodesmethod and add a monitored scope as follows:public override SiteMapNodeCollection GetChildNodes(SiteMapNode node) { using (new SPMonitoredScope("Code6587EN.Ch07.Controls.CustomSiteMapProvider::GetChildNodes")) { } }The
GetChildNodesmethod will be called by SharePoint when looking for the links to render for each navigation node. We will return our links when the node provided is for the current SharePoint site. - In our monitored scope, instantiate a new
SiteMapNodeCollectionobject:var nodes = new SiteMapNodeCollection();
- Cast the provided node as
PortalSiteMapNode:PortalSiteMapNode portalNode = node as PortalSiteMapNode;
- Ensure the casted node is not null:
if (portalNode != null)
- Ensure the node is for the current SharePoint site with the help of the following code:
if (portalNode.Type == NodeTypes.Area && portalNode.WebId == SPContext.Current.Site.RootWeb.ID)
- For each link in our collection of links, add a new node to the nodes collection:
foreach (var link in links)
nodes.Add(new SiteMapNode(this, link.Key, link.Value, link.Key));
- If we are adding the SharePoint configured links, add the nodes from the
GetChildNodesmethod of thePortalSiteMapProviderbase class:if (renderSharePointLinks) nodes.AddRange(base.GetChildNodes(portalNode));
- Return our collection of nodes:
return nodes;
- Add a new Empty Element item to our project.
- In the
Elements.xmlfile of our new element, register theSiteMapDataSourceclass from theSystem.Webassembly with theTopNavigationDataSourcedelegate control. Add our custom site map provider as the value for theSiteMapProviderproperty of the control using the following code snippet:<?xml version="1.0" encoding="utf-8"?> <Elements xmlns="http://schemas.microsoft.com/sharepoint/"> <Control Sequence="1" Id="TopNavigationDataSource" ControlClass="System.Web.UI.WebControls.SiteMapDataSource" ControlAssembly="System.Web, Version=2.0.0.0, Culture=neutral, PublicKeyToken=b03f5f7f11d50a3a"> <Property Name="ID">topSiteMap</Property> <Property Name="SiteMapProvider">CustomSiteMapProvider</Property> <Property Name="EnableViewState">false</Property> <Property Name="ShowStartingNode">true</Property> </Control> </Elements> - Open the feature created previously, Code6587EN.Ch07 for instance. Ensure that the new element is included in the feature.
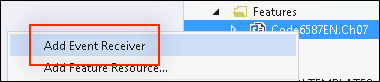
- Right-click on the feature in the Solution Explorer pane and select Add Event Receiver as shown in the following screenshot:
- Uncomment the
FeatureActivatedandFeatureDeactivatingevent receiver override methods. - In our
FeatureActivatedoverride method, add a scope to run with elevated privileges:SPSecurity.RunWithElevatedPrivileges(() => { });Tip
Executing our code with elevated privileges runs the code as the farm account rather than as the current user. This helps to prevent access denied errors if the current user does not have direct access to perform the current action. It is only recommended to use this methodology when performing actions that affect a SharePoint web application or the farm itself. Allowing code to run with full control over the farm can open potential security risks if we are allowing users who do not have farm administrator access to make farm-level changes.
If elevated permissions only to the current site or site collection are required, open the site collection with the user token of the system account instead. See http://msdn.microsoft.com/en-us/library/office/microsoft.sharepoint.spusertoken.systemaccount.aspx for more information on retrieving the system account user token.
- In our elevated scope, get the current content web service:
SPWebService service = SPWebService.ContentService;
- With the help of the following code, create a new
web.configmodification record to add our custom site map provider to the configured site map providers:SPWebConfigModification myModification = new SPWebConfigModification(); myModification.Path = "configuration/system.web/siteMap/providers"; myModification.Name = "add[@name='CustomSiteMapProvider']"; myModification.Sequence = 0; myModification.Owner = "Code6587ENCustomSiteMapProvider"; myModification.Type = SPWebConfigModification.SPWebConfigModificationType.EnsureChildNode; var typeName = typeof(CustomSiteMapProvider).FullName + ", " + typeof(CustomSiteMapProvider).Assembly.FullName; myModification.Value = "<add name="CustomSiteMapProvider" type="" + typeName + "" NavigationType="Global" />";
- Add our new modification to the collection of modifications:
service.WebConfigModifications.Add(myModification);
- Update the content web service and apply the
web.configmodifications:service.Update(); service.ApplyWebConfigModifications();
- In our
FeatureDeactivatingoverride method, add a scope to run with elevated privileges:SPSecurity.RunWithElevatedPrivileges(() => { }); - In our elevated scope, get the content web service:
SPWebService service = SPWebService.ContentService;
- Get the collection of
web.configmodifications from the content web service:Collection<SPWebConfigModification> modsCollection = service.WebConfigModifications;
- Iterate through each configuration. If you have added the modification, remove it using the following code:
int modsCount1 = modsCollection.Count; for (int i = modsCount1 - 1; i > -1; i--) { if (modsCollection[i].Owner.Equals("Code6587ENCustomSiteMapProvider")) { modsCollection.Remove(modsCollection[i]); } } - Update the content web service and apply the
web.configmodifications:service.Update(); service.ApplyWebConfigModifications();
- Click on Start from the toolbar to deploy the solution and attach the debugger.
- Once the SharePoint site is loaded in the web browser (after clicking on Start), observe the links displayed in the top navigation.
A SiteMapProvider class provides the data for the top navigation control in SharePoint. In our recipe, we created a custom SiteMapProvider class based on the PortalSiteMapProvider base class. Rather than replacing the TopNavigationDataSource delegate control with a custom control, we registered the default SiteMapProvider control and configured it to use our custom site map provider. In addition, we registered our custom site map provider in the web.config file of the SharePoint web application programmatically.
- The SiteMapProvider Class topic on MSDN at http://msdn.microsoft.com/en-us/library/system.web.sitemapprovider.aspx
- The PortalSiteMapProvider class topic on MSDN at http://msdn.microsoft.com/en-us/library/sharepoint/microsoft.sharepoint.publishing.navigation.portalsitemapprovider.aspx
- The How To: Add and Remove Web.Config Settings Programmatically article on MSDN at http://msdn.microsoft.com/en-us/library/bb861909(v=office.14).aspx
- The SPWebConfigurationModification class topic on MSDN at http://msdn.microsoft.com/en-us/library/microsoft.sharepoint.administration.SPWebConfigModification.aspx
- The SPSecurity.RunWithElevatedPriviliges method topic on MSDN at http://msdn.microsoft.com/en-us/library/microsoft.sharepoint.spsecurity.runwithelevatedprivileges.aspx
- The SPSite constructor (String, SPUserToken) topic on MSDN at http://msdn.microsoft.com/en-us/library/ms469253.aspx
- The SPUserToken.SystemAccount property topic on MSDN at http://msdn.microsoft.com/en-us/library/microsoft.sharepoint.spusertoken.systemaccount.aspx