
Though SharePoint includes some analytic features, many still prefer to use third-party web analytics providers such as Google Analytics. These analytics providers use a snippet of JavaScript code that is added to each page in most cases.
In this recipe, we will create a settings page to allow site collection administrators to store the JavaScript code on a per site collection basis.
We should have already created our Visual Studio project in the Creating a Visual Studio solution for custom delegate controls recipe of this chapter before starting this recipe.
Follow these steps to create a settings page for our tracking code:
- Open the project created in the Creating a Visual Studio solution for custom-delegate controls recipe of this chapter in Visual Studio.
- Add a new Application Page item to the subfolder we created in the
Layoutsmapped folder as shown in the following screenshot: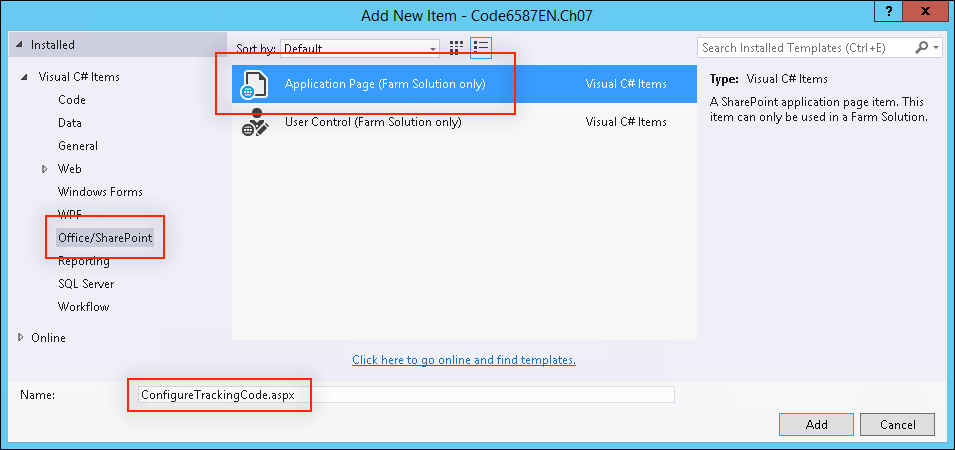
- In the
ASPXpage, register the settings page user controls as follows:<%@ Register TagPrefix="wssuc" TagName="InputFormSection" src="/_controltemplates/InputFormSection.ascx" %> <%@ Register TagPrefix="wssuc" TagName="InputFormControl" src="/_controltemplates/InputFormControl.ascx" %> <%@ Register TagPrefix="wssuc" TagName="ButtonSection" src="~/_controltemplates/ButtonSection.ascx" %>
- In the title content placeholders, add the title for our settings page as follows:
<asp:Content ID="PageTitle" ContentPlaceHolderID="PlaceHolderPageTitle" runat="server">
Configure Analytics Tracking Code
</asp:Content>
<asp:Content ID="PageTitleInTitleArea" ContentPlaceHolderID="PlaceHolderPageTitleInTitleArea" runat="server" >
Configure Analytics Tracking Code
</asp:Content>
- In the main content placeholder, add a
<table>element to contain our settings page sections:<asp:Content ID="Main" ContentPlaceHolderID="PlaceHolderMain" runat="server"> <table width="100%"> <tr> <td> </td> </tr> </table> </asp:Content>The settings page user controls were designed to be placed inside a
<table>element. - In our
<table>element, add anInputFormSectioncontrol with aTextBoxcontrol to input our analytics tracking code as follows:<wssuc:InputFormSection Title="Analytics Tracking Code" id="trackingCodeSection" runat="server" Description="The script block entered here will be rendered on each page in this SharePoint site."> <template_inputformcontrols> <wssuc:InputFormControl LabelText="Analytics Tracking Code Script Block" runat="server" LabelAssociatedControlId="txtScriptBlock"> <Template_control> <asp:TextBox runat="server" Width="100%" ID="txtScriptBlock" TextMode="MultiLine" Height="300px" /> </Template_control> </wssuc:InputFormControl> </template_inputformcontrols> </wssuc:InputFormSection> - Add a
ButtonSectioncontrol with aButtoncontrol to submit our analytics tracking code:<wssuc:ButtonSection runat="server"> <Template_Buttons> <asp:Button UseSubmitBehavior="false" runat="server" class="ms-ButtonHeightWidth" OnClick="BtnSubmit_Click" Text="OK" id="BtnSaveChanges" accesskey="<%$Resources:wss,okbutton_accesskey%>"/> </Template_Buttons> </wssuc:ButtonSection>
- In the code-behind file of our application page, add a constant string for the name of the property we will save our analytics code within:
private const string PropertyName = "CustomAnalyticsCode";
- In a monitored scope within the
Page_Loadmethod, set theTextBoxcontent to the existing value of the analytics property:protected void Page_Load(object sender, EventArgs e) { using (new SPMonitoredScope("Code6587EN.Ch07.Layouts.Code6587EN.Ch07.ConfigureTrackingCode::Page_Load")) { if (!IsPostBack) if (SPContext.Current.Site.RootWeb.AllProperties.ContainsKey(PropertyName)) txtScriptBlock.Text = SPContext.Current.Site.RootWeb.AllProperties[PropertyName].ToString(); } } - Add the
BtnSubmit_Clickmethod with a monitored scope to execute when the Submit button is clicked:protected void BtnSubmit_Click(object sender, EventArgs e) { using (new SPMonitoredScope("Code6587EN.Ch07.Layouts.Code6587EN.Ch07.ConfigureTrackingCode::BtnSubmit_Click")) { } } - If the root site of the site collection already contains the analytics property, set its value as follows:
if (SPContext.Current.Site.RootWeb.AllProperties.ContainsKey(PropertyName))
  SPContext.Current.Site.RootWeb.AllProperties[PropertyName] = txtScriptBlock.Text;
- If the root site of the site collection does not already contain the analytics property, add it and set its value as follows:
else
  SPContext.Current.Site.RootWeb.AllProperties.Add(PropertyName, txtScriptBlock.Text);
- Update the root site of the site collection and redirect to the Site settings page:
SPContext.Current.Site.RootWeb.Update(); SPUtility.Redirect(SPContext.Current.Web.ServerRelativeUrl.TrimEnd('/') + "/_layouts/15/Settings.aspx", SPRedirectFlags.Default, HttpContext.Current); - Add an Empty Element item to the project.
- In the
Elements.xmlfile of the new element, register our custom action with the URL to our application page:<?xml version="1.0" encoding="utf-8"?> <Elements xmlns="http://schemas.microsoft.com/sharepoint/"> <CustomAction Id="AnalyticsCode" GroupId="SiteCollectionAdmin" Location="Microsoft.SharePoint.SiteSettings" Sequence="1000" Title="Configure Analytics Code"> <UrlAction Url="~sitecollection/_layouts/15/Code6587EN.Ch07/ConfigureTrackingCode.aspx"/> </CustomAction> </Elements>
- Open the feature created previously. Ensure that the new element is included in the feature.
- Click on Start from the toolbar to deploy the solution and attach the debugger.
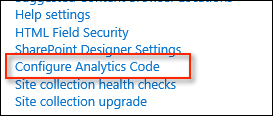
- Once the SharePoint site is loaded in the web browser (after clicking on Start), navigate to the Site settings page, and select the Configure Analytics Code link under Site Collection Administration, as shown in the following screenshot:
- Add your analytics tracking code including the
<script>tags and submit by clicking on OK: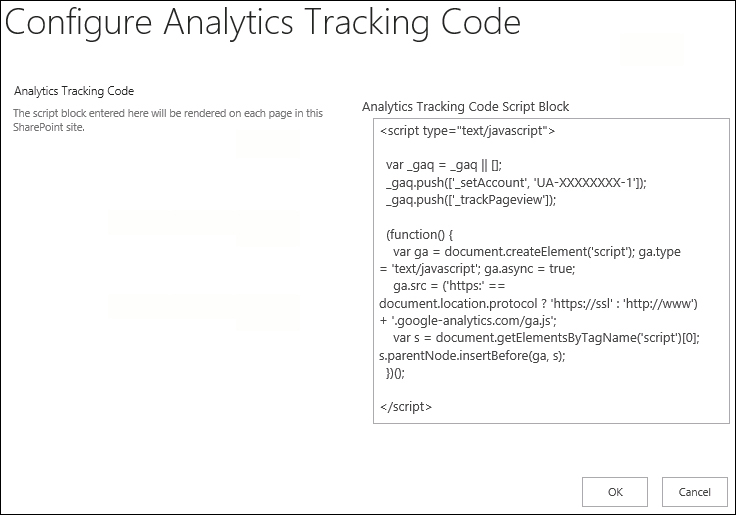
In this recipe, we have created a basic settings page that allows us to store our analytics tracking code as a property of the root site in the current site collection. This page uses the settings page user controls used by the majority of SharePoint settings pages. In addition, we used a custom action registration to add our settings page to the list of links on the Site settings page in the Site Collection Administration section.
- The Custom Action topic on MSDN at http://msdn.microsoft.com/en-us/library/ms458635(v=office.14).aspx
- The SPWeb.AllProperties property topic on MSDN at http://msdn.microsoft.com/en-us/library/microsoft.sharepoint.spweb.allproperties.aspx