
Let's store the steps for creating a file metadata through File Comparer inside a manual test. The folder that is going to contain the entire set of manual tests is called
Manual Test Scripts; therefore, right-click on the FileComparer.Test project node, choose Create Folder from the context menu and rename it.
Test Studio has a dedicated template for manual testing, having its specialized toolkit and runner. The template will appear among the list of available templates when attempting to create a new test as follows:
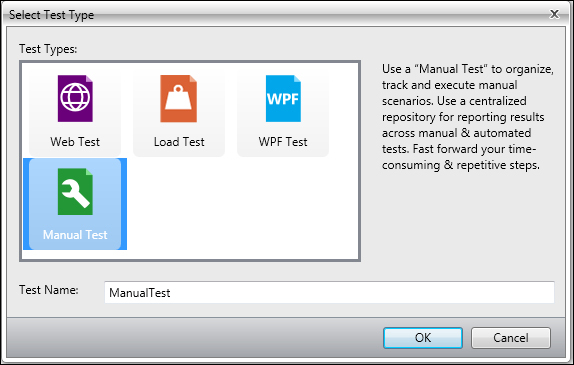
Creating a manual test
Create a manual test under the recently added test. Enter Func-6_FileInfo_Create_Successful_Manual in the
Test Name field and then click on OK. Enter the test edit mode by double-clicking on the test entry. The test initially looks as follows:
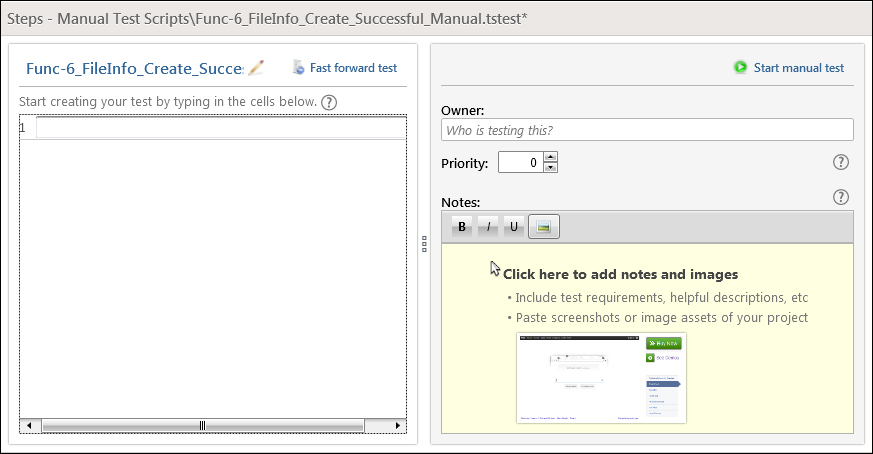
The manual test workspace
The pane to the left is the workspace for creating and editing the manual steps. It currently has the mouse focus. We will input the manual steps starting with launching the application, so enter Start File Comparer and press Enter. Repeat the same steps to add the subsequent test steps as follows:
- Map the default path to:
C:File Comparer Files. - Go to the File Info tab.
- Enter
Incident Reportin File Name. - Enter
Jack Thomasin Creator Name. - Set File Extension to DOC.
- Set Effort to 2.
- Click on the Create button.
- Verify that the result contains the word, allowed.
This is all that is required to create manual test steps. Let's pass this test for Bill Tester to run. Conveniently, he is the new tester in the team and seems very excited to start with his testing tasks.
The right pane shown in the preceding screenshot captures metadata for the test. Enter Bill Tester in the field allocated to enter the name of the owner. Since a failure in this test could signify a blocked feature, let's set the test priority to 9 where 10 refers to the highest priority.
Now Bill opens his assigned test to run it and finds himself wondering about the way to execute certain steps. He thinks that this difficulty is due to his lack of experience, where in fact it is due to the inadequate precision of the manual steps' instructions. This sheds light on one disadvantage of manual testing, that is, high-level procedures are well suited only for experienced testers, especially knowledgeable in the application under test. For new testers, some application-specific vocabulary such as the map default folder can be ambiguous. On the other hand, providing too many details during a test case generation can be time consuming. Test Studio resolves this conflict by offering a rich text editor that allows attaching additional description and snapshots in order to decrease chances of step misinterpretations only when they are needed. Hence, in the Notes section, inside the right panel, we can leave the following message:
To map the application folder click on the Set Path button as depicted in this snapshot:
Test Studio alleviates the repetitive nature of the manual test step creation through its integration with MS Excel. If you already have your tests stored in Excel workbooks, converting them into manual tests is effortless as you will see.
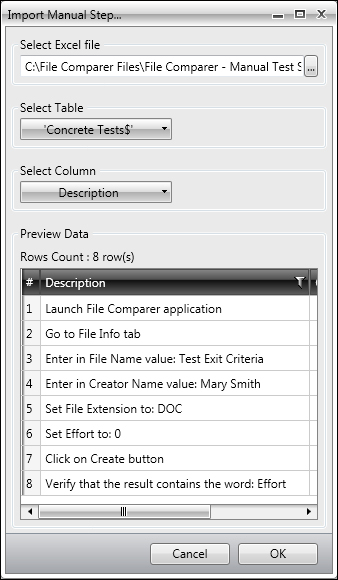
The File Comparer – Manual Test Scripts.xlsx workbook has the manual test cases generated by applying various testing techniques on the File Comparer application. In this example, we will see how to import a test case from the Concrete Tests sheet. Before we get into this, we will create a manual test called Func-10_FileInfo_Create_Failing_Manual and place it under the Manual Test Scripts folder. Double-click on it to enter its edit mode and then locate the Excel Import option from the Excel ribbon highlighted in the following screenshot:

The Excel Import button
An Import Manual Step… window is launched. This window allows you to specify the location from which Test Studio will retrieve the test description. Browse for the Excel workbook location by clicking on the ellipsis button of the Select Excel File field. Select Concrete Tests$ and Description for Select Table and Select Column comboboxes respectively.
Upon setting the window parameters, the Preview Data section of the Import Manual Step… window shown in the following screenshot retrieves the filled rows of the Description column.
Importing manual steps
After clicking on OK, the steps for importing manual tests are concluded and the manual test steps are inserted into the newly created test. This test covers the equivalence partitions highlighted in dark red in the Design sheet. Equivalence partitioning is a testing technique used to divide the system input or output into sets such that any value belonging to the same input set will result in the same system output behavior, and vice versa. Any value belonging to the output set will be induced by applying the equivalent input. Finally, the test should look as follows:
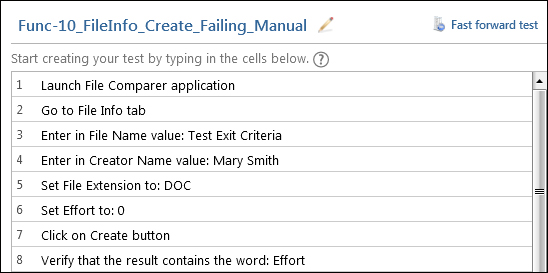
Steps of the Func-10_FileInfo_Create_Failing_Manual test
The Excel integration inside Test Studio is a two-way process. We have seen how to import test cases, and now we will see the reversed process, which is exporting. This means that if you had your manual tests initially created directly inside Test Studio, you have a way to extract the contained steps and save them in an Excel workbook.
To do so, from the Export ribbon, click on the Excel Export option. The Save As dialog is invoked which allows you to specify the destination directory.
So far we have seen how to create raw tests by entering the underlying steps and how to create tests by importing the underlying steps. Test Studio offers more flexibility while creating tests, such as adding an existing one. This feature applies on all the test types.
Right-click on the Manual Test Scripts folder and choose Add Existing Test from the context menu. Browse for the Func-13_Login_Failing_Hybrid.ts test and then click on OK. Following this action, a new entry for the existing test is added to the Manual Test Scripts folder.