
So far you have been working alone on designing and crafting the tests. The same process will get complicated when many persons are collaborating on the same file instance, or even worse when creating updated instances of that file. Problems such as overwriting each other's versions or losing track of the correct order of the file versions may arise—not to mention other risks such as completely losing the accomplished work following the unexpected event of a machine failure.
Source control systems are created to resolve the aforementioned conflicts by offering a centralized monitored repository where all files are backed up. Each change on these files is audited, starting from check out until check in, where at that point, the discrepancies between the local and the server versions are resolved by choosing which change to overwrite with what. Alternatively, some source control systems give you the option to forbid operations on a file from the beginning unless that file is not checked out by any other party. Changes are usually submitted in incrementing versions, where the ability to revert back to a previous version is allowed. In addition to that, it is possible for all parties working on the document to retrieve each other's work to alter or append it.
Source controls could have additional benefits; however, in this section, we will be concerned only with working around the preceding problems in Test Studio through its integration with TFS (Team Foundation Server). In addition to TFS, Test Studio offers integration with other source controls such as SVN, Git, and Vault.
In order to bind your project to TFS, you need to start by connecting Test Studio to it. To define the connection, go to the Project tab, and click on the Connect button from the TFS section. The Bind to Source Control window shown in the following screenshot is invoked:

Binding to TFS
Enter the values for Server Name, Port, and TFS version depending on the deployed instance of your TFS and then click on the Connect button.
If the connection is successful, TFS projects are retrieved and listed in the blank area allowing you to pick the one that is going to hold the File Comparer automated solution. Select a project node and then click on the OK button.
Subsequently, you can start committing the project items. Note that the icons marking any node of the project tree are important in indicating the state of the Test Studio item with respect to TFS; their significance will be explained with each source control operation. Currently, all the nodes are marked with a yellow plus sign, which means that they are still only bound to a source control. They will maintain this sign until they are committed. The following screenshot shows the File Comparer solution after binding it to TFS:
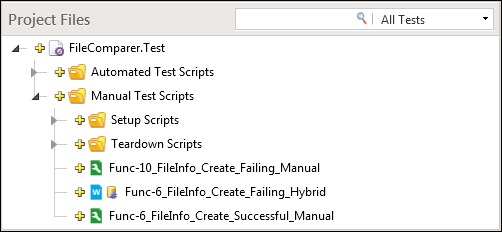
The FileComparer.Test project bound to TFS
The context menu for any source-control-bound test contains in its last section the operations that are specific to source management. Right-click on the Func-10_FileInfo_Create_Failing_Manual test and choose Check In to Source Control as shown in the following screenshot:
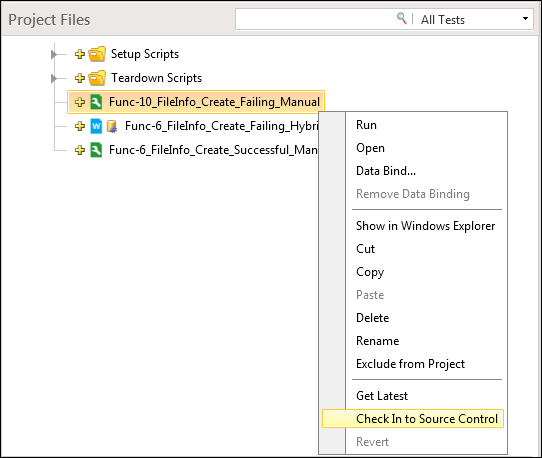
Checking in a test to a source control
A dialog is invoked requesting a confirmation on the set of tests to be committed and a comment on these versions of the tests. If you notice, this window displays two entries. The file with the .tstest extension contains the test definitions for the steps of Test Studio, whereas the file with the .resx extension contains the images for the storyboard, and both files can be committed to TFS. Enter the comment Checking in version 0 for Func-10_FileInfo_Create_Failing_Manual and then click on OK.
Note
The Storyboard is the visual representation of the steps defined in the test. Each step is represented by a snapshot taken at the time of recording. Tests can be viewed in the storyboard mode by clicking the corresponding button from the Test Views tab. The storyboard view also allows you to export the steps into HTML documents.
The test icon is changed to a lock symbol, as shown in the following screenshot, signifying that the test is now locked to TFS and that no local changes are present:
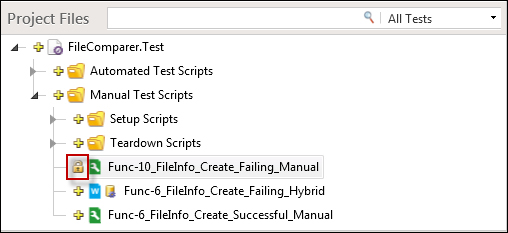
Test checked in to TFS
Double-click on the test and add any manual step; go back to the Project pane and notice how the icon has changed to a green tick signifying that there are local uncommitted changes:
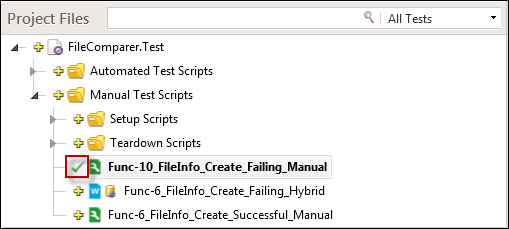
A test with local uncommitted changes
This summarizes the states a test can be found in with respect to a source control. Next you will see, the three source-control-specific operations that will alternate the test between these states.
Right-click on the Func-10_FileInfo_Create_Failing_Manual test and choose Check in to Source Control again. This will send the applied changes locally and commit them to the server.
Open the test and add another manual step. From the Project pane, choose Get Latest from the context menu. This option is responsible for pulling the latest test version from the TFS committed by you or any other party working on the file, and then merging it with the local test without overwriting them. This means that the step that was lastly added will not be removed.
Go to the Project tab again and, this time, choose the Revert option from the context menu. A dialog prompts you to choose whether you want to abandon the local changes and overwrite them with the latest version present on the server. Click on the Yes button and notice how the last added step is now deleted.
Since Test Studio projects are fully portable into Visual Studio and can in fact be developed within it, versioning is also an induced benefit. As a result, Test Studio tests can be controlled with TFS through Visual Studio as well.
At any point after creation of the testing project inside Test Studio, this project is migratable using the export to Visual Studio feature. From the Test Studio main menu, select the Export to Visual Studio option as shown in the following screenshot:
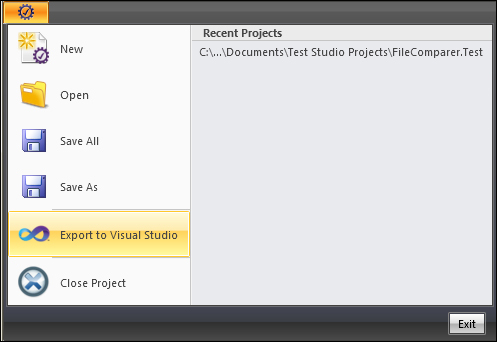
Exporting a test project to Visual Studio
The Select Visual Studio Selector window prompts you for the Visual Studio version to which the solution is going to be exported. Choose the latest available version on your machine and click on OK.
Open the exported solution in Visual Studio, and after configuring TFS from the Team menu, perform the following steps:
- Right-click on the solution node from the Solution Explorer window, and then select the Add Solution to Source Control option from the context menu.
- Once completed, click on the node again, and this time, choose the Check In option.
- In the ensuing window, choose the items you want to check in and click on the Check In button.
The project is now committed to TFS; right-click on the project node to view the available source control operations that are depicted in the context menu of the following screenshot:
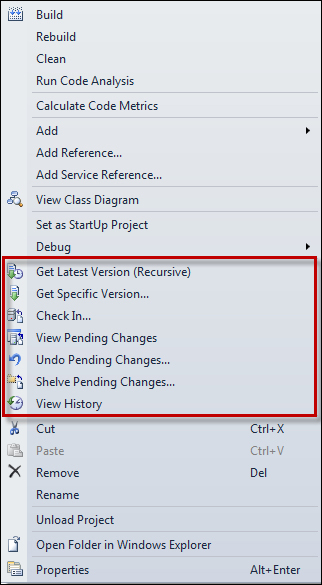
TFS source control operations
The two options available for retrieving the changes from the server are: Get Latest Version and Get Specific Version. The former gets the last committed version, whereas the latter allows retrieval of a history version based on some criteria, for example, date. To commit the changes, use the Check In option. Finally, the Undo Pending Changes option reverts the local changes to the version present on the server.