
All of our tools are installed and we have exported the game from ShiVa, so we are now ready to create the deployment project and see our game work on a phone for the first time!
We'll need to put the Android into development mode so that we can load applications. On Droid Charge, this is done by going to Settings | Applications | Development and check the USB Debugging checkbox This allows the Authoring Tool to directly install development mode apps. Make sure that you plug the phone into the computer using the USB cable.
Open Authoring Tool and click on the Setting button to see the following options:
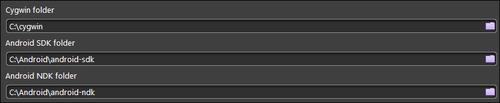
We are concerned with the settings shown in the previous screenshot, so point Cygwin, the Android SDK folder path and the Android NDK folder path to the installation locations and Click Ok to save the settings.
Now we need to set the specific Android project settings, so click the Android tab on the left-hand side of the screen and click the Or get started now... option; some options are displayed as shown in the following screenshot:
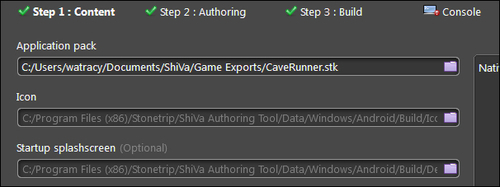
Here we browse to the location of our game export. We also have the option to specify an icon and a splash screen. ShiVa will provide them for us and they are sufficient for our purposes, so leave them blank.
On the Step 2 : Authoring tab, the Authoring type information gives us the ability to specify the project which will create all the files needed to import the game into Eclipse. This allows us to make modifications before building. We will do the simple APK Package because we don't need access to any advanced features and we aren't customizing the code produced by ShiVa.
The Bundle identifier name is a name that will uniquely identify your game. It is a good idea to use the same first part to identify you as a developer and then append your game name. Keep in mind that each application that you install must have a unique name, that is, you won't be able to install multiple versions of the same game if the name is the same.
On the Build tab, we will keep the defaults—make sure Build type is Development and that the Install on connected device option is checked. Also, if you installed multiple Android APIs, you may need to specify the one you are currently targeting in the Minimum Os Supported field.
To deploy the debug application, click on the Build button. Authoring Tool will switch to the Console tab and we'll begin to see the build process. Hopefully, it will tell you that the build finished successfully. If you run into problems, try posting your problem in the platform-specific section of the ShiVa forums at http://www.stonetrip.com/developer/forum/.