
A lightmap is a lighting information that is baked right into the textures. Since lightmaps are pre-computed, they are very useful in freeing up resources that would otherwise be spent computing lighting at runtime. To set up a lightmap, we simply add a static light source such as the default one included with ShiVa. Make sure that the direction of the light is the same as the dynamic lights that you will be using—you don't want static shadows going one way and dynamic shadows going in the other direction. In our case, the tunnel was too big to generate a lightmap. It threw an error, but we can create the individual obstacles. The following screenshot shows one of the obstacles before (left-hand side of the screenshot) and after (right-hand side of the screenshot) the lighting effects are added:
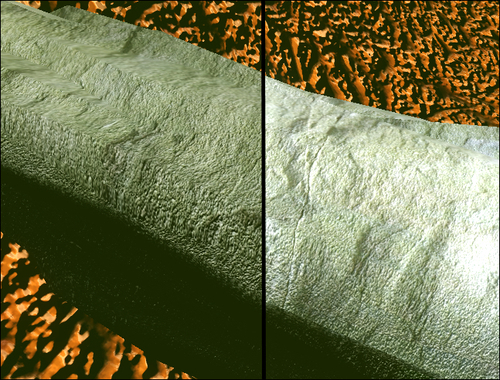
You can see that the image on the right has more detail brought out by the light. It is definitely worth the effort, especially in games where all of the static assets can be baked in this way. The following steps will show you how it's done:
- Add a static light; it can be helpful to hide the dynamic lights so that the scene is completely black. Once the objects have their lightmaps generated, they will show up out of the unlit scene so that we can check that it worked.
- Once we have the lights set, we need to make sure that the materials that we are working with have the static light properties set, as shown in the following screenshot:
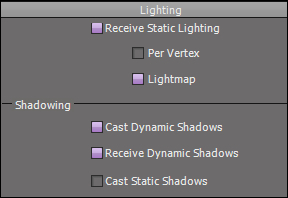
- Set the object to Receive Static Lighting and enable Lightmap. We won't enable Cast Static Shadows, because we are computing the static lighting on each object individually.
- Now that the materials are set, open the Ambience Editor window and go to the Lighting tab. There are a lot of options, but the defaults will do, so skip to the bottom of the tab.
- If you have an object selected, the Calculate button will be enabled and you can compute the lightmap for only that object. Otherwise, the All button will calculate the maps for the entire scene.
The process can take quite a while, especially if you set the quality to higher levels. The Reset button is handy for removing the lightmap and starting over again.
Tip
Lightmap quality
It's worth mentioning that it is very helpful to keep the lightmap quality low during development so that you can make changes as needed and recompute the lighting quickly. Once you have things looking the way you want, crank the quality up so that you have high quality in the final game.