
You have to admit that while we have made great progress, the game is still a bit boring. You can't even tell if the ship is moving. We are going to add in the tunnel that we are going to fly through and even add some obstacles. Once that is done, the basic framework of the game will be done!
The tunnel is pretty basic and low poly because it is just a box. I went into Blender, created a box without the front and back, used the Displace modifier and made sure it was big enough to fly the ship through. Then, I applied a cool looking rock material that I found at http://www.cgtextures.com/texview.php?id=4404. Because of their license, you will need to download the texture yourself, but it is free—download Image 1, whose size is small. Once I had this segment done, I used the Mirror modifier to make the tunnel tileable. Go to Data Explorer | Import | Model. Let's take a look at how I imported it, as shown in the following screenshot:
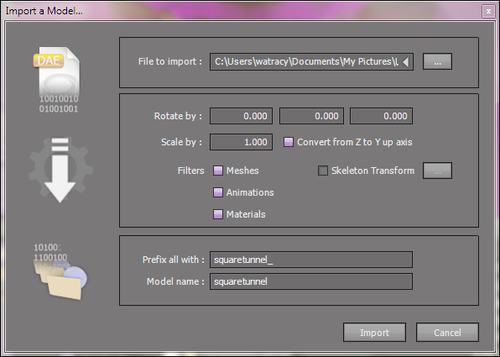
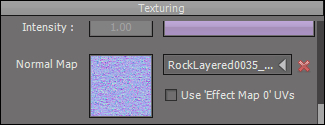
These are the same settings from Chapter 1, Getting Started—make sure you check the Convert from Z to Y up axis checkbox. With the import done, we need to adjust the materials like last time. Go to the Designer desktop and in the Materials Editor window, click Material | Open | squaretunnel_Material-material. On the Texturing tab, select the texture that was imported with the model, as shown in the following code:

I also set up a normal map in Gimp. Normal maps fake depth to materials so that they appear three dimensional. The normal map is included in the downloadable content as RockLayered0035_5_Sn.png, this Normal Map is shown in the following screenshot:
Moving down to the Lighting tab, set the lighting, as shown in the following screenshot:
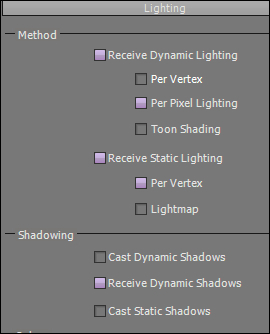
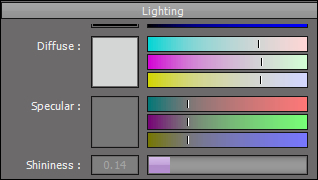
I set the static lighting in case we wanted to add static at some point. Don't forget to enable the shadows so we can see the shadow of our ship. Also on the Lighting tab, I turned down the Shininess setting because I didn't think a cavern should be shiny. The Shininess setting is lowered in the following screenshot:
With those settings, we can save the material and return to the General desktop. Make sure the scene is loaded and that the Data Explorer window is showing, then drag-and-drop the tunnel into the scene—it will be in the Models folder. When I imported it, I adjusted the rotation of the tunnel in the Attributes Editor window and scaled it by 2 in the x and z directions to make it a bit more roomy, as shown in the following screenshot:
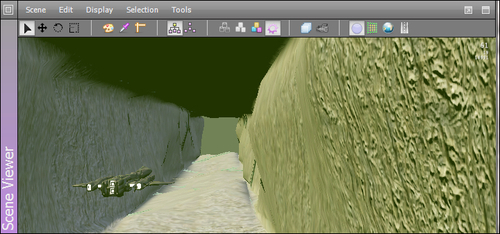
You can see how big the tunnel is in comparison to the ship. Now, if we play the game, we have some scenery!