
In Chapter 1, Getting Started, we worked in the ShiVa editor extensively, but we didn't take time to stop and look around. Let's take a moment to get familiar with the editor and the different modules found in ShiVa. Doing so will help you understand the tools you have been given, so that you can let your creativity loose. To this end, we will first take a look at the ShiVa editor itself and see how you can customize it. We will also spend time with each of the modules in the editor and then focus on the Material Editor and Sound Editor windows in order to add improved audio and visual elements to our game. Unfortunately, we won't be covering every aspect of every module as there are just too many options to cover in an introductory book. The name of the game is experimentation! If something catches your attention, see what you can figure out by testing the settings—you'll learn much more this way.
The ShiVa3D editor is actually a collection of distinct modules. Each module gives us a way to create or edit assets for our game. The editor organizes the modules and provides controls and settings that unify the individual parts.
Program menu seems like as good a name as any and it is the standard menu found in most Windows applications. This menu is shown in the following screenshot:
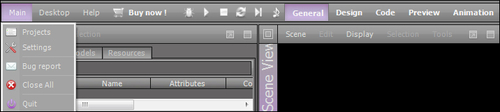
The left-hand side of the menu bar has the program menus for basic settings, customization, and help, while the right-hand side has the mute button and the different desktops that are configured.
The Main menu has the following options:
- Projects: We've already seen this one—it opens the project explorer allowing us to manage our projects
- Close all: Closes any games, scenes, assets, and so on
- Quit: Self explanatory
The Desktop menu allows us to configure desktop options such as custom layouts. However, this is beyond the scope of this book, so feel free to visit the ShiVa documentation at http://www.stonetrip.com/developer/doc/editor/introduction for further information.
When a game is loaded, a third subsection becomes available just to the left of the desktop configurations. This is shown in the following screenshot:

The new buttons give us control over running the game. The buttons from left to right are as follows:
- Debug: This button puts the game into debug mode, which enables stepping through the code one line at a time.
- Play/Pause: Starts the game in the Scene Viewer window. Switches to pause when the game is being played.
- Stop: Stops the game.
- Restart: Starts the game over again.
- Run one frame: Plays only the next frame (only available when the game is stopped or paused).
- Mute: Mutes the game sounds during preview.
When the game is in debug mode, the game controls change to allow you to step through the code, as shown in the following screenshot:

The debug, play/pause, and stop buttons function in the same way as explained previously. The remaining buttons from left to right are explained as follows:
- Step over: Increments the code by one line. If the current code is a call to another script, the code in the other script will execute without stepping through each line. Only shows up when the game is paused.
- Step in: Increments the code by one line. When another script is encountered, the other script will load so that you can continue stepping through the other script. Only shows up when the game is paused.
- Step out: If you are stepping through a secondary script, this will return execution to the previous script. Only shows up when you have stepped into a secondary script.
These commands can be very helpful when trying to debug our script. Often, it is difficult to find errors in our script by just reviewing the code. With this functionality, we can step through the code line by line and discover the cause of many problems.
The only other thing in the General editor that we should cover before jumping into the individual modules is the log notifications:
These notifications provide a tally of warnings and errors that have occurred as the game is running. The Log module allows you to see what the messages are, so we will cover that in more detail a bit later in the chapter.