
Okay, the truth is that overlays are not any different from menus except for the fact that they tend to give feedback to the player rather than provide the player with a means to choose between a set of options. Overlays are also built from components and use actions to interact with the game. Our overlays will simply be a health bar and a button for launching the in-game menu. Let's start with the button since it is the easiest and most familiar.
Create a custom event handler named LaunchMenu in MainAI. The code will be as follows:
this.MenuState ( )
We've seen this format before—we are just using a button to trigger a transition between game states. In this case, we are loading MenuState. What should happen when we load MenuState? Well, we just set that code up and it pauses the game and loads InGameMenu. Armed with this one event handler, we can set up the menu button. Import the texture Settings.png and then do the following steps:
- Create a new HUD named
Game. - Create a new action named
LaunchHelpand add a command with the following settings:- Command Type:
SendEventToUser - AIModel:
MainAI - Event:
onLaunchMenu
- Command Type:
- Create a new component with the following settings:
- Name:
btnHelp - Type:
Button - Position:
100and0 - Origin:
Bottom Right - Size:
15and15 - Check Viewport aspect ratio independent
- BackTexture:
Settings - BorderColor : Under the Alpha heading, enter
0 - Click Action:
LaunchHelp
- Name:
- The following screenshot shows what happens after these parameters are set:
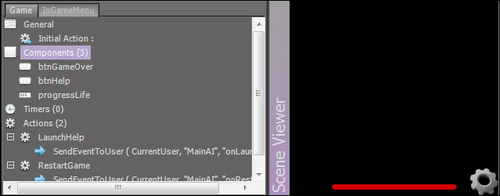
The BackTexture field uses a texture named Settings, which is simply a picture of a gear and is included in the downloadable files. Next, we need to add the health bar. The progress bar component is perfect for this because we can manually control the progress from 1 to 255. Add a new component named progressLife with the following settings:
- Type:
Progress - Position:
50and5 - Size:
64and3 - Check Viewport aspect ratio independent
- Check Ignored by mouse
- Shape:
RoundRectangle - BackColor:
100,0,0, and255 - BorderColor:
0,0,0, and255 - Value:
255 - Type:
Left to Right
The last component that we will add to this HUD is a button that appears when the game is over. The steps to do this are as follows:
- Create a new action named RestartGame with the settings:
- Command Type:
SendEventToUser - AIModel:
MainAI - Event:
onRestart
- Command Type:
- Create a new component named btnGameOver with the following settings:
- Type:
Button - Visible:
false - Active:
false - Position:
50and50 - Size:
55and18 - Check Viewport aspect ratio independent
- Shape:
RoundRectangle - BackColor:
0,0,0, and255 - BorderColor: Under the Alpha heading, set
0 - Text:
Game Over / Tap to Continue - Text Alignment:
Center - Clicked Action:
RestartGame
- Type:
Now there's something different! We created the button to be invisible and inactive. This button won't show up until the game is over. Since the button is set to call RestartGame when it is clicked, it takes the player back to the title screen. All this work will be in vain, however, if we don't load the new HUD when gameplay starts, so add the following line in GameState state's onEnter:
hud.newTemplateInstance ( application.getCurrentUser ( ), "Game", "Game" )
This loads the overlay whenever we begin playing. Similarly, let's make sure the overlay goes away whenever we move into another game state by putting the following code in GameState state's onLeave:
hud.destroyTemplateInstance ( application.getCurrentUser ( ), "Game" )
How do we get to the end of the game, though? Well, the health bar and the game over button are related so let's set up the health bar so that it tracks the current health of the ship and then when it reaches 0, we can trigger the game over button.
If you remember in Chapter 4, Physics and the Environment, we set up the tunnel and obstacles with sensors, set the asteroids as dynamic objects, and then added some explosions in Chapter 5, Lighting and Special Effects, when a collision occurs. Now we just have to add code to detect sensor collisions and add damage to the ship. We can then update the progress bar based on the amount of damage done. Let's start by adding a few more AI variables to help us out. Since the collision code is in ShipAI, add the following variables:
nAsteroidDamage: Number with initial value of25nShipHealth: Number with initial value of255
Obviously, one sets the damage an asteroid does when it hits the ship and the other keeps track of the damage. Now, create a new function named TakeDamage (nDamage) and enter the following code:
local hUser = application.getCurrentUser ( )
-- Get a handle to the progress bar in the HUD
local hProgress = hud.getComponent ( hUser, "Game.progressLife" )
-- Calculate the new ship health
this.nShipHealth ( this.nShipHealth ( ) - nDamage )
-- Update the progress bar
hud.setProgressValue ( hProgress, this.nShipHealth ( ) )
-- Check for fatal damage
if(this.nShipHealth ( ) <= 0) then
    this.DestroyShip ( )
end
Here, we get a handle to the current user. Next, we see how we can access components in our HUD at runtime. Using the getComponent function, we just specify the user and then identify the component. The component name is determined by the name we set when loading the HUD followed by . and then the component name. We then update the health of the ship by subtracting the damage specified in the function argument. To update the progress bar, we use the setProgressValue function in which we tell it the component and the new value. The last thing we need to check is whether this was the fatal blow. If so, we call DestroyShip, which hasn't been defined yet, but we'll see it soon. First, let's take a look at where we call TakeDamage.
There are two categories of damage, asteroid and cave obstacles. We already have a function that processes asteroid collisions, so let's look at DoCollision and what we need to change:
this.DoExplosion ( )
this.TakeDamage ( this.nAsteroidDamage ( ) )
this.ClearHorizontalMovement ( )
this.ClearVerticalMovement ( )
this.MakeInvulnerable( true )
We just slip in this one line and suddenly the asteroids actually do damage. Because we set nAsteroidDamage to 25, getting hit will do 25 points of damage, although we may want to change this later when we adjust the difficulty. Next, we need to process damage due to hitting the walls and obstacles. Let's use the onSensorCollision event handler of the ShipAI AI that fires the entire time that the sensors are in contact with each other; the code is as follows:
if(object.getModelName ( hTargetObject ) ~= "AsteroidSensor") then
     this.TakeDamage ( 1 )
end
Don't forget that we have sensors that trigger asteroids, so we first check that the target object is not an AsteroidSensor
. If it isn't, we cause 1 point of damage—it seems small, but it really adds up quickly, so watch out! Now that our ship is taking damage, let's see how to put it out of its misery when the time comes.