
All this talk of syntax and APIs is meaningless unless we put it to good use, right? Let's do that now and in the process we will be completing the basic structure of our game—the rest will be eye and ear candy. Excited? I am, let's jump in!
It's the third chapter and we are just getting to the input? Handling the input is a bit complicated and it's better to tackle it now that we have a background in scripting. The reason that input gets tricky is that user input gets passed to MainAI and has to be routed to the appropriate AI from there. This is because our MainAI is a user AI as opposed to an object AI. Object AIs are assigned to actual objects and so their functions are tied to that object. It makes sense that the user AI would be directly receiving user input, so we handle it there and distribute it as needed. Once the right AI gets the input, we usually want to set AI variables and then act on the change in the onEnterFrame handler. Each object that will need to consume user input will need to have this same process.
Starting with MainAI, let's add the input handlers. Go to the Code desktop in the AIModel Editor window and then click AI Model | Open and select MainAI. Find the Handlers section and click Add Handler | User Handler | onKeyboardKeyDown. The new event handler will open in the Script Editor window—delete the filler comments and enter the following code:
-- Check that we have a valid object
if( this.hShip ( ) ~= nil ) then
    -- Send the event to the Ship's AI for processing.
    object.sendEvent ( this.hShip ( ), "ShipAI", "onKeyboardKeyDown", kKeyCode )
end
It really is that simple. First, we make sure that the handle to our ship is valid, then we use the sendEvent function of the object class, which requires the object we are sending the event to, the name of the AI of that object, and what I call the event signature. We are going to create AI for the ship, so we send the event to the ship object by calling this.hShip() as the target and specify that it will go to ShipAI—we need to remember that the ship AI must be called ShipAI or this won't work. The event signature is the name of the event handler followed by the arguments that the event handler needs. In this case, we are simply passing the onKeyboardKeyDown event and the only argument will be kKeyCode—which is the same as the event handler in MainAI. We'll have to go back and do the same for onKeyboardKeyUp, but, of course, we will change the event signature to match the event name, as shown in the following code:
-- Check that we have a valid object
if( this.hShip ( ) ~= nil ) then
    -- Send the event to the Ship's AI for processing.
    object.sendEvent ( this.hShip ( ), "ShipAI", "onKeyboardKeyUp", kKeyCode )
end
The explanation is the same as the previous code. With those two event handlers finished, we are now ready to create the ship AI.
In the AIModel Editor window, click on AI Model | Create and create an AI named ShipAI. There will be a lot that we will need to create in the ship AI, but for now we'll keep it simple. The first thing I like to set up in all of my AI models is a handle back to the object that the AI is assigned to. Click Add Variable and create a variable named hShip of type object with an initial value of nil. Just as in Chapter 1, Getting Started, we are going to initialize this variable in the onInit handler. Click Add Handler | onInit and enter the following code:
this.hShip ( this.getObject ( ) )
By using the object, we can get a handle to the parent object. I like to do this, so that I have references to hShip instead of getObject everywhere—it's more readable.
Now that we have our object initialized, let's continue by adding the onKeyboardKeyDown handler in the same way that we added it in the main AI. Don't get scared when you see the following code, we are using functions that we haven't created yet so that we can look at setting up user input without getting lost in the implementation. Don't worry, we will handle the function definitions soon and it's pretty simple once we break it down:
-- If the up or down arrows are pressed, move in that direction
if( kKeyCode == input.kKeyUp ) then
    this.MoveUp ( )
elseif( kKeyCode == input.kKeyDown) then
    this.MoveDown ()
end

-- Move left or right
if( kKeyCode == input.kKeyRight) then
    this.MoveRight (  )
elseif( kKeyCode == input.kKeyLeft) then
    this.MoveLeft (  )
end

-- Rotate the ship into the vertical position when the spacebar is pressed
if( kKeyCode == input.kKeySpace) then
    this.GoVertical ( true )
end
The code is split into three conditionals that cover the three basic controls we will have for our ship. The first block detects whether we are going up or down and the elseif condition ensures that they are mutually exclusive—in case both the keys are pressed at the same time, the code will interpret that as up, since the check condition for kKeyUp comes first in the if statement.
Next, we check for the left and right movements, which are also mutually exclusive. The last check is for the spacebar which will determine if the ship goes into what I have chosen to call vertical mode—the ship will turn completely vertical in order to fit through tight squeezes. We should also notice that each conditional makes a call to another function that processes the movements. Breaking up the code this way makes it more readable and easier to debug and modify.
Now, create an event handler for onKeyboardKeyUp and enter the following code:
-- Up or Down arrow released, so stop moving up or down
if( kKeyCode == input.kKeyUp or kKeyCode == input.kKeyDown ) then
    this.ClearVerticalMovement (  )
end

-- Left or Right arrow released, so stop left or right
if( kKeyCode == input.kKeyRight or kKeyCode == input.kKeyLeft ) then
    this.ClearHorizontalMovement (  )
end

-- Spacebar released, so leave vertical position
if( kKeyCode == input.kKeySpace) then
    this.GoVertical ( false )
end
Basically, what we want to do is clear our movement when a key is released, and we need to keep track of which ones are released so that we can keep the movement of other keys that may still be pressed. The first if statement checks for either up or down keys being released and clears any vertical movement—we can check for either up or down because we made them mutually exclusive in the first handler. The next two if statements do the same for both left and right movements and the space bar.
We've intentionally made things a bit more difficult for ourselves, but only when it comes to entering this stuff in. The problem is that we referenced all of these functions before we defined them in the AI. Once you define something in the code or the UI, it becomes available in the typeahead. Normally, the best thing would be to design the code in advance before actually entering it into the editor, which is what I did and now I am presenting it to you in the order that makes the most sense. Of course, in a book it's hard to capture the process—I did the design and you get to see the end result—and enter things manually.
Never mind! We have more coding to do and these functions won't write themselves. But, I have good news—we are going to use typeahead here by creating the variables we will need first. Moving in order, we need a MoveUp() function, so let's create the variables bUp and bDown. Variables are also attributes of an AI Model and as such are created in the same manner as the handlers. In the AIModel Editor window, click on Add Variable. We already saw this in Chapter 1, Getting Started, when we created a handle to the ship object. Enter bUp for the name, select boolean for the type and false for the initial value (otherwise, the ship would be turning when the game starts). As long as we are here, we may as well do the same for all of our movement variables. Do the same process for bDown, bRight, bLeft, and bVertical. The idea behind these variables is that a player will push a control and the Boolean values will be set accordingly. Later in the onEnterFrame handler, we will check the Boolean flags to determine where the ship should move to for that frame. Now, we'll create the function that will use these variables.
We create new functions just like event handlers and variables, except that we do it in the Functions area. In the AIModel Editor window, click on the Add Function option and enter MoveUp as the name. We can see that a function gets created and opened. As function arguments are needed, we can put them in the function header as we will see when we declare the GoVertical function. For now, let's enter the following code:
this.bUp ( true )
this.bDown ( false )
Yeah, it's that easy. This code just sets bUp to true and bDown to false. Why code both if the function is for moving up? Just to be safe. When there are variables that are paired such as these are, I just like to make certain that we aren't getting nonsense data propagating through our game. I bet you can guess what the other functions are going to look like.
For the MoveDown function, add the following code:
this.bDown ( true )
this.bUp ( false )
For the MoveRight function, add the following code:
this.bRight ( true )
this.bLeft ( false )
For the MoveLeft function, add the following code:
this.bRight ( false )
this.bLeft ( true )
I hope that was predictable and makes sense. In each case, we set the proper direction to true and set the opposite to false. The last control function is different and isn't technically needed. In fact, all of these functions are not strictly necessary, but there may come a time when the code for turning gets a bit more complex. It is worth my time now to build in a bit of flexibility and save myself from refactoring later. Also, the functions make the code more readable, which is a big plus in my book. The following is the vertical function:
function ShipAI.GoVertical ( vertical )
--------------------------------------------------------------

  this.bVertical ( vertical )

--------------------------------------------------------------
End
I did the entire function, because this is a case where we have a function argument. We have to manually enter vertical in the function header, but now a this.GoVertical( true ) method call will pass in the value so that we can then set the AI variable. As I said, the function is pretty extraneous, but there could come a time when a vertical move may also trigger effects or something similar and we will be glad that we have a function set aside to control that.
All of this for handling three control sets and we aren't even done yet. It's not nearly so bad when you don't have to write it all down in a book. But it's worth it when we're trying to learn something. Three more functions and we can move on to the final event handler.
Next is the ClearHorizontalMovement function that does just what it says and is very similar to the move functions, except that this one sets both Boolean values to false to clear out the horizontal movement, as shown in the following code snippet:
this.bRight ( false )
this.bLeft ( false )
We have the same thing for the ClearVerticalMovement function, as shown in the following code snippet:
this.bDown ( false )
this.bUp ( false )
The last function is where it all comes together. Before we dive in though, let's set some more model variables. For most of the numbers I use in my AI, I like them to be AI variables so that I can change them easily later—both manually as I am designing, and on the fly during the game. We know how to do this stuff now, so the following is a table of the variables we need—I'll let you do the work:
|
Name |
Type |
Value |
|---|---|---|
|
|
|
|
|
|
|
|
|
|
|
|
|
|
|
|
|
|
|
|
|
|
|
|
Create a new function named CalculateMovement that has no arguments. We are going to go over this code a chunk at a time so we don't lose anybody along the way. Afterwards, I will show the code as one block.
The first block of code declares some variables and initializes them, as shown in the following code snippet:
-- Elapsed time during last frame
local nFrameTime = application.getLastFrameTime ( )

-- Declare variables for rotation and velocity
local nRx, nRz = 0, 0
local nVy, nVz = 0, 0

-- Use a local variable for the horizontal turn limit
local nHorizLimit = this.nHorizontalTurnLimit ( )
nFrameTime
is the amount of elapsed time during the last frame. We get this value because some of the rotations are distributed across multiple frames to allow a smoother transition. By factoring the frame time into these functions, it will mean that no matter what frame rate a particular device has, the animation will appear consistent.
Next, we declared two variables to control rotations around the x and z axes and set them to 0. We did something similar with the next two, except that these control translation units on the y and z axes. Finally, the amount the ship can bank is controlled by the horizontal turn limit and I have created a local reference to the AI model variable, as shown in the following code snippet:
-- If we are in vertical mode, make it so the ship can
-- turn 90 degrees (vertical)
if(this.bVertical ( )) then
    nHorizLimit = 90
end
This small block simply checks if the ship is in vertical mode. If so, the ship is now allowed to rotate ninety degrees so that it is positioned vertically from wing to wing, as shown in the following screenshot:
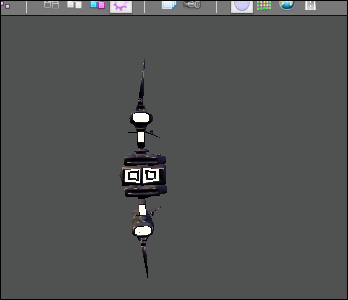
This vertical position will get us through the nooks and crannies.
-- Check for left and right and bank by setting the X
-- rotation (nRx) and the Z velocity (nVz)
if(this.bRight ( )) then
    nRx = -nHorizLimit
    nVz = -this.nHorizontalSpeed ( )
elseif(this.bLeft ( )) then
    nRx = nHorizLimit
    nVz = this.nHorizontalSpeed ( )
end
It isn't as bad as it looks. In plain terms, this code says that if we are turning right, we'll set the rotation on the x axis to the negative turn limit and move the ship along the z axis at a rate of the negative horizontal speed. Since the ship points along the x axis, rotating around the z axis will cause the ship to roll. Moving along the z axis will move it left and right. By combining the two, the ship will look like it is banking, as shown in the following screenshot:
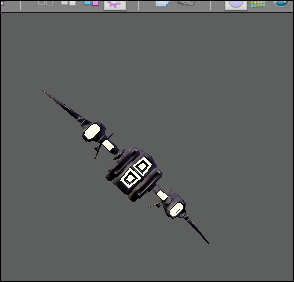
Too bad you can't see it move; it's pretty cool. Similarly, the vertical movement settings are done in the following code:
-- Check for up and down and bank by setting the Z
-- rotation (nRz) and the Y velocity (nVy)
if(this.bUp ( )) then
    nRz = -this.nVerticalTurnLimit ( )
    nVy = this.nVerticalSpeed ( )
elseif(this.bDown ( )) then
    nRz = this.nVerticalTurnLimit ( )
    nVy = -this.nVerticalSpeed ( )
end
This does the same thing except now that the rotation is around the z axis and the movement is up and down the y axis. There is one last thing we need to check before doing the actual movement, as shown in the following code snippet:
-- If in vertical mode we won't actually be able to move
-- and we won't have vertical rotation, so set them back
-- to 0.
if(this.bVertical ( )) then
    nVy, nVz = 0, 0
    nRz = 0
end
We are again checking if we are in vertical mode. If so, we are not only able to turn completely sideways, but we also don't turn—it would be very bad to turn while squeezing through a crevice. So we set the movement to 0 and also set the vertical rotation to 0—basically everything gets set to 0, except the lateral rotation.
Next, we take all the positional data that we have computed and use it to compute the new position of the ship, as shown in the following code snippet:
-- get the current ship position and calculate the new position
-- (nX, nY, nZ) by adjusting for velocity.
local nCurrentX, nCurrentY, nCurrentZ = object.getTranslation ( this.hShip ( ), object.kGlobalSpace )
local nX, nY, nZ = nCurrentX + this.nShipVelocity ( ), nCurrentY + nVy, nCurrentZ + nVz
We declare local variables to hold the current position of the ship and then we initialize them with a call to getTranslation. We supply function with the target object and then declare we are using the global coordinate system and it returns the location of the ship. We then use the current position to calculate our new position (nX, nY, and nZ) by adding our computed values. Now, all we have to do is move to nX, nY, and nZ, as shown in the following code snippet:
-- Set the new position, but have the ship move there over a
-- time period based on the frame rate.
object.translateTo ( this.hShip (), nX, nY, nZ, object.kGlobalSpace, nFrameTime * this.nMoveFactor() )
The first line translates the ship into Swahilli—okay, not really, but that's what I think of when I see translate. In this case, it means we are moving an object. We can see that the first argument of the translation is the standard—the object that will receive the translation, which is the ship. The next three numbers represent x, y, and z coordinates that determine the new location of the ship. The next argument is where we set the coordinate system reference that we want to use. The last argument is the time factor. Functions that end in "To" have this feature and allow us to have ShiVa spread the motion over several frames so that the movement appears more fluid. This is where we use the last frame time to make the movement consistent across frame rates. Now for the rotation, as shown in the following code:
-- Do the same for the rotation
object.rotateTo ( this.hShip ( ), nRx, 0, nRz, object.kGlobalSpace, nFrameTime * this.nMoveFactor() )
The rotateTo function is similar to translateTo, except the x, y, and z values refer to degrees of rotation around the given axis. We can now finish off with the onEnterFrame event handler that will make all of this happen. Click Add Handler | onEnterFrame and enter the following code in the new handler:
this.CalculateMovement ( )
A bit anticlimactic, I know, but before we try it out we need to get rid of the code that rotates the camera around the ship. Open the onEnterFrame handler of the main AI and delete the code so that only the function header and footer are left—we don't want to delete the handler completely because we will be coming back to it in just a bit.
Now go to the Design desktop and make sure the scene is loaded. Right-click on the ship in the viewer or in the Scene Explorer window and select Controllers | AI |Add AI | ShipAI to add the ship AI that we created. Now, press the Play button and cruise around a bit. Don't forget if you hold the Space bar down, the ship will go vertical!
You're probably bored with cruising around an empty scene especially since it is so easy to go off camera. Let's fix the camera—this is quicker than the last section and we are practically pros now, so we can breeze through this.
Go back to the Code desktop and create a new AI called CameraAI—yes, incredibly creative. Create variables of type object and put nil for the initial value—call these hTarget and hCamera. Next, create an onInit handler with the following code:
-- Get a handle to the camera and set the ship as the target
this.hCamera ( this.getObject ( ) )
this.hTarget ( application.getCurrentUserSceneTaggedObject ( "Ship" ) )
The first line is our standard reference to the parent object. The next line sets hTarget to the ship object because we want the camera to target the ship. The last bit of code will be in onEnterFrame, so create that and enter the following code:
-- Make sure the target exists
if( this.hTarget ( ) ~= nil ) then
    -- Get the position of the target(ship)
    local nX, nY, nZ = object.getTranslation ( this.hTarget ( ), object.kGlobalSpace )

    -- Point the camera at the ship and move the camera to a spot behind the ship
    object.lookAt ( this.hCamera ( ),nX, nY , nZ , object.kGlobalSpace, 0.5 )
    object.translateTo ( this.hCamera ( ),nX + 60, nY, nZ, object.kGlobalSpace, 1 )
end
I probably don't even need to go over this one, after all we've been through, but I wouldn't feel right, so here we go. The if statement checks if we have an actual target, otherwise the code we want to use would cause errors. Then, I put the current location of the target (the ship) into nX, nY, and nZ. The lookAt function causes an object to look at a location which is perfect for a camera, so we pass the camera as the object, the coordinates of the ship, set the coordinate system, and put a factor of 0.5 because we want a smooth transition. Last of all, we move the camera so that it is 60 units behind the ship.
That's it, go back to the General desktop and assign the CameraAI to the camera. Now when we play the game the camera actually follows the ship—pretty cool!