
So, now that we have some nice assets to build with, we can start building our first town.
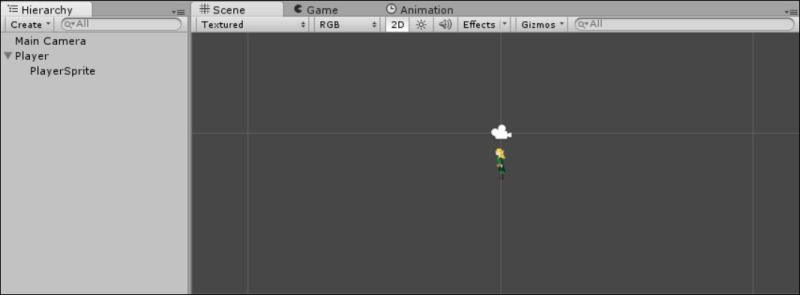
Returning to the scene view, you should see the following:
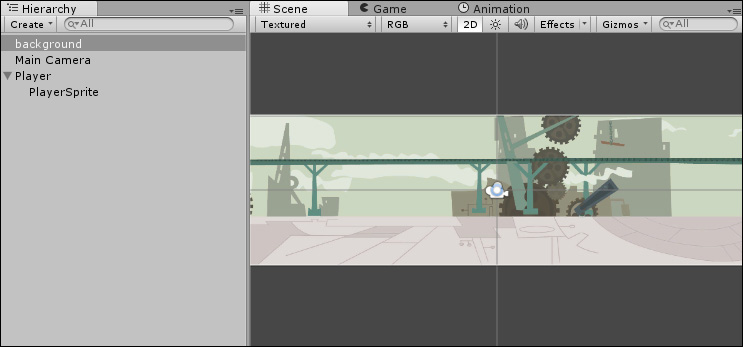
If, however, we add our town background texture (AssetsSpritesBackgroundsBackground.png) to the scene by dragging it to either the project hierarchy or the scene view, you will end up with the following:
Note
Be sure to set the background texture position appropriately once you add it to the scene; in this case, be sure the position of the transform is centered in the view at X = 0, Y = 0, Z = 0.
Unity does have a tendency to set the position relative to where your 3D view is at the time of adding it—almost never where you want it.
Our player has vanished!
The reason for this is simple: Unity's sprite system has an ordering system that comes in two parts.
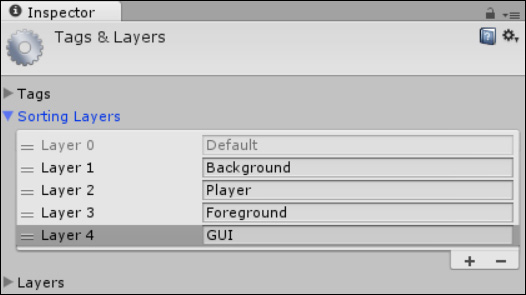
Sorting Layers (Edit | Project Settings | Tags and Layers) are a collection of sprites, which are bulked together to form a single group. Layers can be configured to be drawn in a specific order on the screen as shown in the following screenshot:

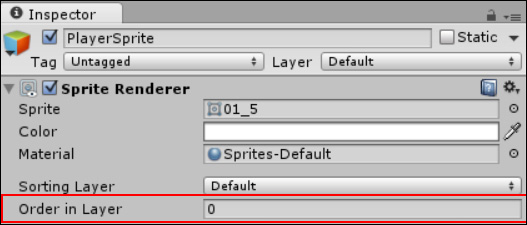
Sprites within an individual layer can be sorted, allowing you to control the draw order of sprites within that layer. The sprite Inspector is used for this purpose, as shown in the following screenshot:
So the reason our player is no longer seen is that it is behind the background. As they are both in the same layer and have the same sort order, they are simply drawn in the order that they are in the project hierarchy.
To resolve the update of the scene's Sorting Layers, let's organize our sprite rendering by adding some sprite Sorting Layers. So, open up the Tags and Layers inspector pane as shown in the following screenshot (by navigating to Edit | Project settings | Tags and Layers), and add the following Sorting Layers:
- Background
- Player
- Foreground
- GUI
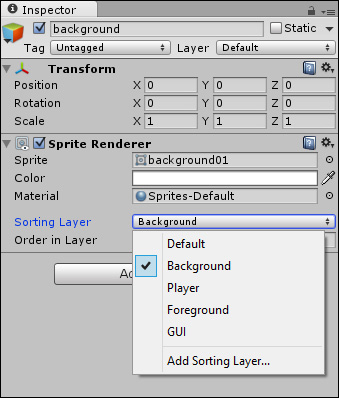
With the layers set up, we can now configure our game objects accordingly. So, set the Sorting Layer on our background01 sprite to the Background layer as shown in the following screenshot:
Then, update the PlayerSprite layer to Player; our character will now be displayed in front of the background.
Note
You can just keep both objects on the same layer and set the Sort Order value appropriately, keeping the background to a Sort Order value of 0 and the player to 10, which will draw the player in front. However, as you add more items to the scene, things will get tricky quickly, so it is better to group them in a layer accordingly.
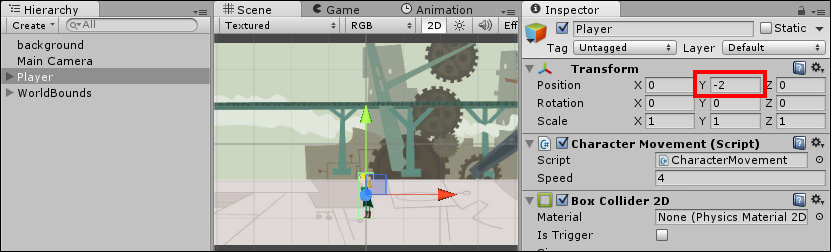
Now when we return to the scene, our hero is happily displayed but he is seen hovering in the middle of our village. So let's fix that next by simply changing its position transform in the Inspector window.
Setting the Y position transform to -2 will place our hero nicely in the middle of the street (provided you have set the pivot for the player sprite to bottom), as shown in the following screenshot:
Feel free at this point to also add some more background elements such as trees and buildings to fill out the scene using the environment assets we imported earlier.