
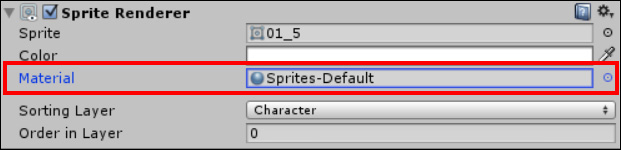
Believe it or not, all 2D elements (even in their default state) are drawn using a shader—albeit a specially written shader designed to light and draw the sprite in a very specific way. If you look at the player sprite in the inspector, you will see that it uses a special Material called Sprites-Default, as shown in the following screenshot:
Note
This section is purely meant to highlight all the shading options you have in the 2D system. Shaders have not changed much in this update except for the addition of some 2D global lighting found in the default sprite shader.
For more detail on shaders in general, I suggest a dedicated Unity shader book as it is more than I can cover here.
Clicking on the ![]() button will bring up the material selector, which also shows the two other built-in default materials, as shown in the following screenshot:
button will bring up the material selector, which also shows the two other built-in default materials, as shown in the following screenshot:
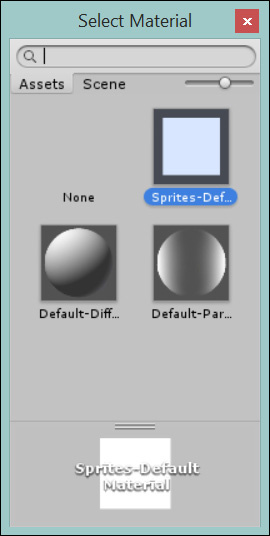
However, selecting either of these will render your sprite invisible as they require a texture and lighting to work; they won't inherit from the Sprite Renderer texture. You can override this by creating your own material and assigning alternate sprite style shaders.
To create a new material, just select AssetsMaterials (this is not crucial, but it means we create the material in a sensible place in our project folder structure) and then right click on and select Create | Material. Alternatively, do the same using the project view's Edit... menu option, as shown in the following screenshot:
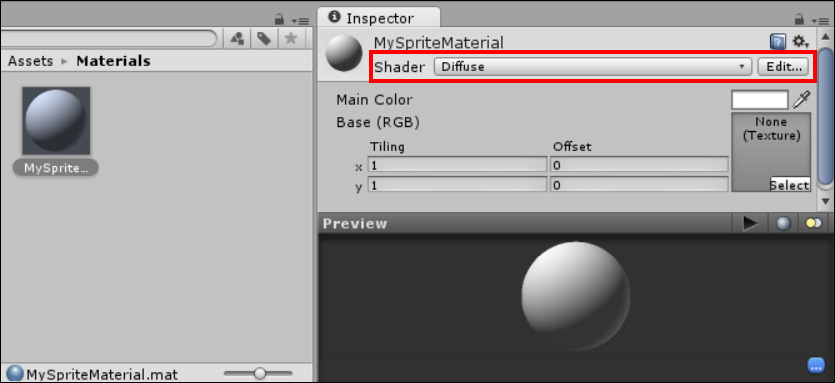
This gives us a basic default Diffuse shader, which is fine for basic 3D objects. However, we also have two default sprite rendering shaders available. Selecting the shader dropdown gives us the screen shown in the following screenshot:
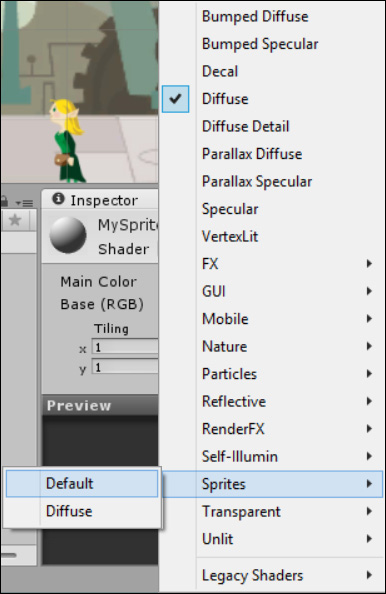
Now, these shaders have the following two very specific purposes:
- Default: This shader inherits its texture from the Sprite Renderer texture to draw the sprite as is. This is a very basic functionality—just enough to draw the sprite. (It contains its own static lighting.)
- Diffuse: This shader is the same as the Default shader; it inherits the texture of Default, but it requires an external light source as it does not contain any lighting—this has to be applied separately. It is a slightly more advanced shader, which includes offsets and other functions.
Creating one of these materials and applying it to the Sprite Renderer texture of a sprite will override its default constrained behavior. This opens up some additional shader options in the Inspector, as shown in the following screenshot:
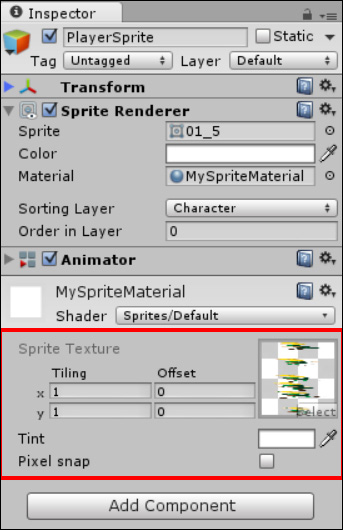
These options include the following:
- Sprite Texture: Although changing the Tiling and Offset values causes a warning to appear, they still display a function (even though the actual displayed value resets).
- Tint: This option allows changing the default light tint of the rendered sprite. It is useful to create different colored objects from the same sprite.
- Pixel snap: This option makes the rendered sprite crisper but narrows the drawn area. It is a trial and error feature (see the following sections for more information).
Tip
Achieving pixel perfection in your game in Unity can be a challenge due to the number of factors that can affect it, such as the camera view size, whether the image texture is a Power Of Two (POT) size, and the import setting for the image. This is basically a trial and error game until you are happy with the intended result.
If you are feeling adventurous, you can extend these default shaders (although this is out of the scope of this book). The full code for these shaders can be found at http://Unity3d.com/unity/download/archive.
If you are writing your own shaders though, be sure to add some lighting to the scene; otherwise, they are just going to appear dark and unlit. Only the default sprite shader is automatically lit by Unity. Alternatively, you can use the default sprite shader as a base to create your new custom shader and retain the 2D basic lighting.
Tip
Another worthy tip is to check out the latest version of the Unity samples (beta) pack. In it, they have added logic to have two sets of shaders in your project: one for mobile and one for desktop, and a script that will swap them out at runtime depending on the platform. This is very cool; check out on the asset store at https://www.assetstore.unity3d.com/#/content/14474 and the full review of the pack at http://darkgenesis.zenithmoon.com/unity3dsamplesbeta-anoverview/.