
So now that we have understood how to import our 2D assets into our project and how the sprite system works, let's look at building our game with it.
I'm going to talk about the usual thought process that is used to build such systems and highlight issues that you might commonly face and how to resolve them, rather than just pointing out fingers and saying do this and that.
Note
The lessons learned in the Classes section are very important lessons to learn early on as we are just starting out with the 2D features. We won't use them just yet but refer to this again when we hit Chapter 5, NPCs and Interactions, and start implementing them fully.
So with what we have learned, let us get our main character imported into our game.
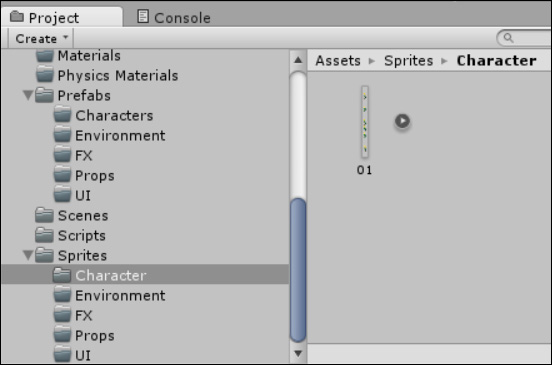
Select the image titled 01.png from the 01_characters folder under FANTASY_PACK from the free game art pack, then drag it to the Characters folder under AssetsSprites in your Unity project, as shown in the following screenshot:
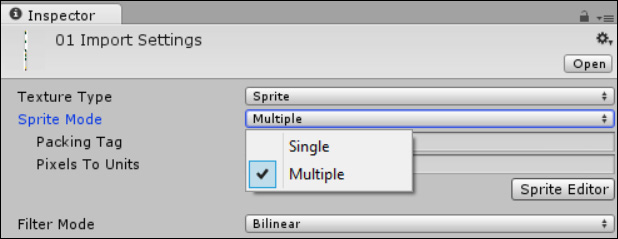
Next, as our image contains all the frames of the sprite's animation for our main character, we need to break it up. So select the image from the project view and change Sprite Mode in the Inspector to Multiple, as shown in the following screenshot:
You should now see that the Sprite Editor button is now enabled; click on it to bring up the Sprite Editor window, as shown in the following screenshot:
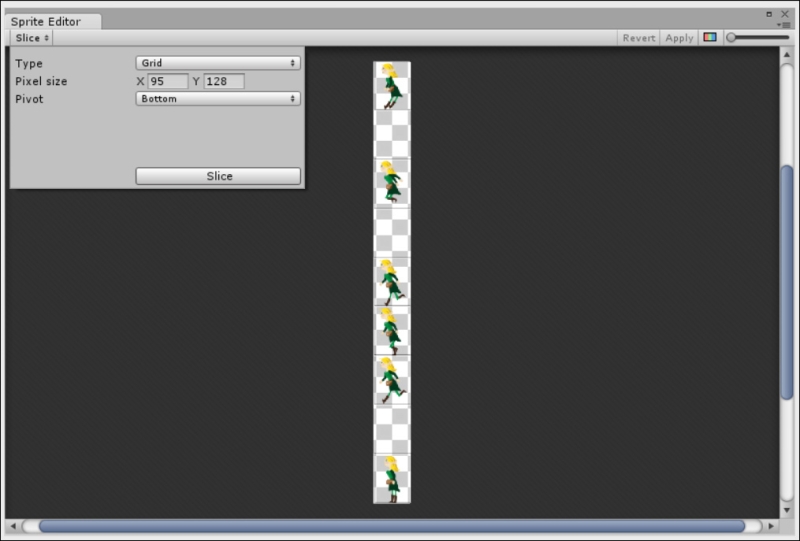
To carve up our sprites, change the slicing options to Grid and enter a width of 95 and a height of 128; then, click on Slice, as shown in the preceding screenshot. Leave the Pivot point as Bottom.
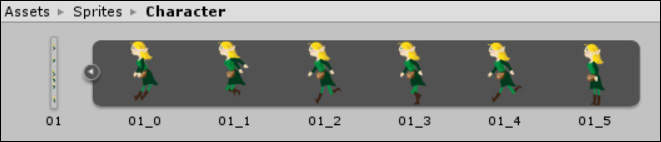
Now, click on Apply and close Sprite Editor. Upon returning to the project view, you should now see an arrow symbol next to the image asset we imported; clicking on it will show you all the individual sprites that were identified, excluding any blank spaces on the sheet as shown in the following screenshot:
Now that we have our character in our project and it is properly imported, let's put our hero into the scene.
Earlier, we imported our hero character's spritesheet into our project and carved up the sprites from that sheet to ensure they are ready to use. So, let's first just get him or her into the play area.
As with most things in Unity, there are two ways in which we can do this; first, we'll do this manually and then show you a shortcut route. The following steps describe the manual procedure:
- Create an empty game object in our game's hierarchy for our hero (by navigating to GameObject | Create Empty in the menu) and name it
Player. - Add a sprite renderer component to the player's game object by navigating to Add Component | Rendering | Sprite Renderer.
- Expand the
01asset in theSpritefolder so that you can see all the sprites in that spritesheet. - Drag the sprite named
01_5(the idle sprite) to theSpriteparameter of the sprite renderer on the player's game object.
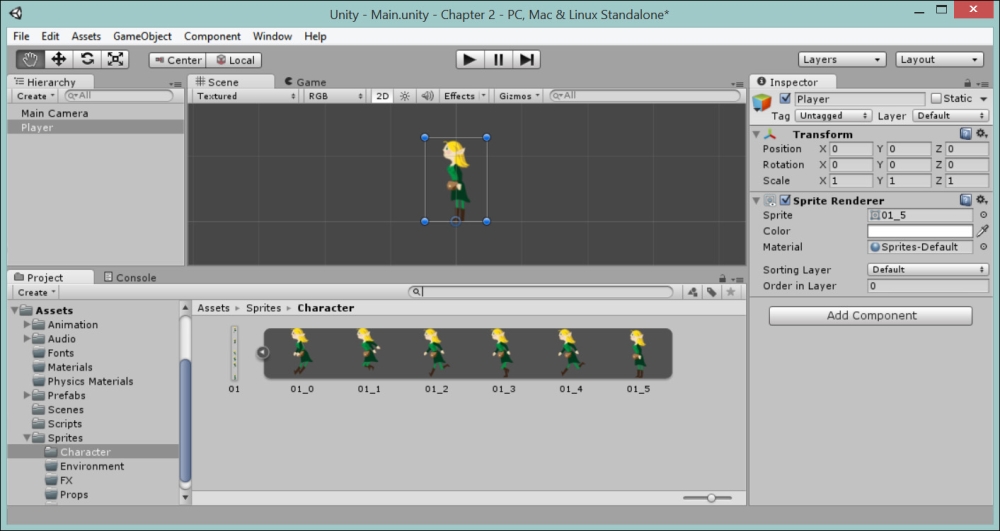
You should now have the same screen as shown in the following screenshot:
A sprite that only stands on the screen isn't going to make much of a game, so we'll add a script to allow the player to move the hero to the left or right.
First, we'll add the physics of the movements related to our hero; we don't need anything heavy, just a ridged body so that we won't pass through other objects in the world and a collider so that we know when we bump into things:
- Add a
RidgedBody2Dcomponent by navigating to Add Component | Physics2D | RidgedBody2D in the player'sGameObjectinspector. - Set the Gravity Scale parameter to
0(as we are not using gravity), and check the Fixed Angle checkbox (as we want the player to always remain in the standing position). - Next, add a
BoxCollider2Dcomponent by navigating to Add Component | Physics2D | BoxCollider2D, and scale down the Size X parameter to0.36(just to narrow the collision box to the width of the hero).
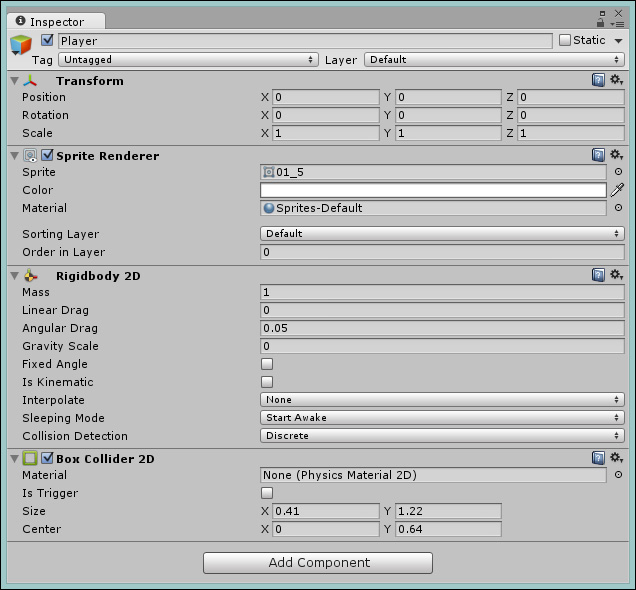
This should give you the view as shown in the following screenshot:
Note
As we are only setting up the basic physics and collisions, we won't be using the full range of RigidBody2D settings. For more details on what the rest of the RigidBody2D properties do, check the Unity RigidBody video at https://www.youtube.com/watch?v=rq6c2B_socs.
To finish off this chapter, add a new C# script to the Scripts folder by navigating to Create | C# script in the project window and saving it as AssetsScripts CharacterMovement.cs. Open the script in the editor and replace its contents with the following script:
using UnityEngine;

public class CharacterMovement : MonoBehavior
{
  // RigidBody component instance for the player
  private Rigidbody2D playerRigidBody2D;

  // For determining which way the player is currently facing.
  private bool facingRight;

  // Speed modifier for player movement
  public float speed = 4.0f;

  //Initialize any component references
  void Awake()
  {
    playerRigidBody2D = (Rigidbody2D)GetComponent(typeof(Rigidbody2D));
  }

  // Update is called once per frame
  void Update () {
    // Cache the horizontal input.
    float movePlayerVector = Input.GetAxis("Horizontal");

    playerRigidBody2D.velocity = new Vector2(movePlayerVector * speed, playerRigidBody2D.velocity.y);

    if (movePlayerVector > 0 && !facingRight)
    {
      Flip();
    }
    else if (movePlayerVector < 0 && facingRight)
    {
      Flip();
   }
  }

  void Flip()
  {
    // Switch the way the player is labeled as facing.
    facingRight = !facingRight;

    // Multiply the player's x local scale by -1.
    Vector3 theScale = transform.localScale;
    theScale.x *= -1;
    transform.localScale = theScale;
  }
}
The script is fairly basic; it simply has some parameters to control the speed and its facing direction. The update method checks if the player is controlling the game using the default horizontal keys (left and right) and then applies force to move the hero accordingly. Finally, we check which way the hero is facing, and based on the direction the player has pressed, it will flip the sprite to face the correct direction.
To finish off, add the script to the player's game object by either dragging it to the object in the hierarchy or navigating to Add Component | Scripts | Character Movement.
If you run the project now, you should see our hero on the screen, and using the left and right arrows on the keyboard, we will move the player to the left or right.
Note
An alternative approach to writing your own controller code is to make use of the built-in Character controller components of Unity. These components help you reduce the amount of code you need to control a player's movements and also add other recommended components such as physics.
You should also check out Unity's enhanced Sample Assets Beta, which introduces a new true multiplatform singular control system complete with touch controls. Check out http://blogs.unity3d.com/2014/01/17/new-sample-assets-beta/ for more details.