
To finish with our theory for this chapter, we need to cover serialization in Unity. Now, Unity already serializes just about everything from the editor to your scene automatically (with a few exceptions) when it saves and loads the scene.
Note
There are a few fringe cases where Unity will not serialize some data. These cases have to do with the current limitations of the Mono 2 framework that Unity uses under the hood. A full explanation of what doesn't work can be found in the following article; note that it is very technical and includes a link to the error report in Unity where it is recorded:
http://www.codingjargames.com/blog/2012/11/30/advanced-unity-serialization/
However, what if we want to actually use this serialization to our advantage within our game to save and load levels. We need bits of raw game data (or as we will continue with this later, saving conversations for our NPCs). To accomplish this, the best way is to use a Unity-inherited object named ScriptableObject.
The ScriptableObject entity allows you to save the data within the class that uses it for a .asset file in your project.
To achieve this, we simply need to create a script (named ScriptingObjects) with some properties we want to serialize; then, we change its class inheritance from MonoBehaviour to ScriptableObject as follows:
using UnityEngine;

public class ScriptingObjects : ScriptableObject {

  public Vector2[] MyPositions;
}
Great! So we have some serializable data. However, to use it in the editor, we need to create an option in the editor to create and save these assets for us. Create a new script named PositionManager in the Editor under AssetsScripts and replace its contents with the following code:
using UnityEngine;
using UnityEditor;

public class PositionManager : MonoBehaviour
{
  //Define a menu option in the editor to create the new asset
  [MenuItem("Assets/Create/PositionManager")]
  public static void CreateAsset()
  {
    //Create a new instance of our scriptable object
    ScriptingObjects positionManager = ScriptableObject.CreateInstance<ScriptingObjects>();

    //Create a .asset file for our new object and save it
    AssetDatabase.CreateAsset(positionManager, "Assets/newPositionManager.asset");
    AssetDatabase.SaveAssets();

    //Now switch the inspector to our new object
    EditorUtility.FocusProjectWindow();
    Selection.activeObject = positionManager;
  }
}There is a lot to explain, but it is all commented very well in short, as follows:
- We define a menu option from where we will call our creation code
- We set up a new object that we want to serialize and create the file where it is to be stored
- We change the view of the editor to focus the inspector on the new object
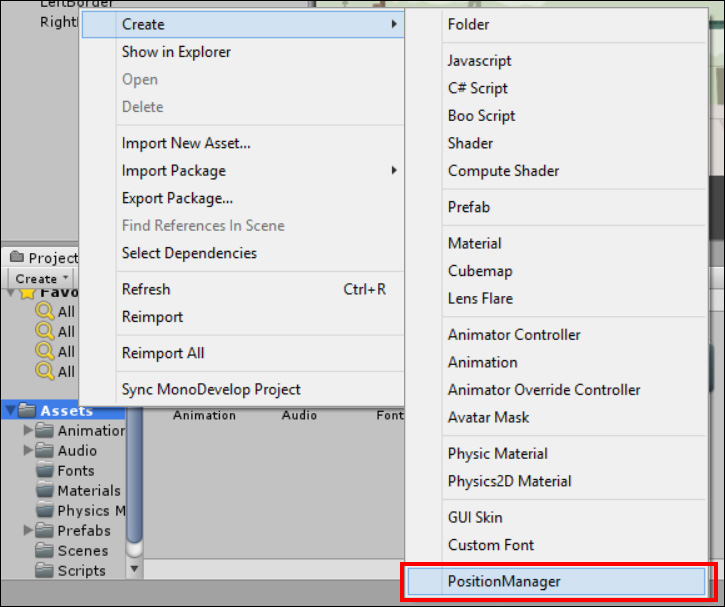
If you return to Unity now and right-click on the Asset folder (or click on the Create menu option in the Project view), you will see the new menu option you just created, as shown in the following screenshot:
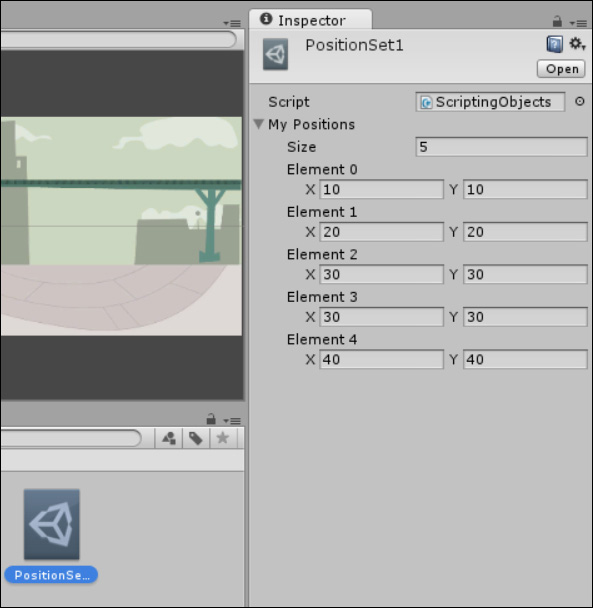
After clicking on it, you will see your new asset in the Project view (in the location you saved it to, in this case, the root of the Asset folder) and the Inspector view for your item, as shown in the following screenshot:

If we rename our new serialized object, give it some values, and save the scene or project, we will see the following screenshot:
We go from the preceding screenshot to the following code stored in the .asset file (when opened from the .asset file generated in Unity from File Explorer):
%YAML 1.1
%TAG !u! tag:unity3d.com,2011:
--- !u!114 &11400000
MonoBehaviour:
  m_ObjectHideFlags: 0
  m_PrefabParentObject: {fileID: 0}
  m_PrefabInternal: {fileID: 0}
  m_GameObject: {fileID: 0}
  m_Enabled: 1
  m_EditorHideFlags: 0
  m_Script: {fileID: 11500000, guid: fa9c23f7a21df484a96802b68617f3b6, type: 3}
  m_Name: MyPositions1
  m_EditorClassIdentifier:
  MyPositions:
  - {x: 10, y: 10}
  - {x: 20, y: 20}
  - {x: 30, y: 30}
  - {x: 30, y: 30}
  - {x: 40, y: 40}
There is a fair amount of Unity information in the preceding code, but what is important is our serialized data at the bottom. So if we wish, we can edit this file outside of the editor and it will be reimported next time you open Unity.
Using the files in the editor is a very simple task. Simply create a property in any script using the type of your serialized asset and then assign a project asset in the editor.
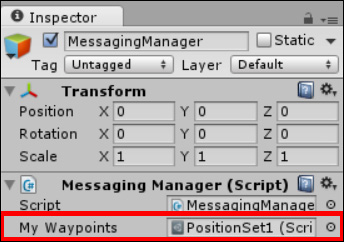
For example, edit the MessagingManager script and add the following property:
public ScriptingObjects MyWaypoints;
Then, the script will be exposed in the Inspector pane and you can assign it normally, as shown in the following screenshot:
You will also be able to access the contents of the serialized object from that script as well.
Note
You cannot edit the contents of the serialized file in the assigned property by default. This is only achievable by using a custom property inspector, which will be covered in Chapter 10, The Battle Begins. However, it is still editable in the editor by opening the Asset folder itself.
Now, if you don't want to assign the asset through the editor, there is a way to just load the .asset file directly from the project.
Firstly, to do this, you will need to store your .asset files in a special folder named Resources in your Asset folder. You can read them there directly using Unity's own resource functions once.
As an example, open the PositionManager script and add the following function:
public static PositionManager ReadPositionsFromAsset(string Name)
{
  string path = "/";

  object o = Resources.Load(path + Name);
  PositionManager retrievedPositions = (PositionManager)o;
  return retrievedPositions;
}
This function, which is available from anywhere as it is static, will perform the following tasks:
- Using the
Nameparameter, it will read the.assetfile from the root of theResourcesfolder - It will convert the retrieved file to the correct object type
- It will return the deserialized object to the calling function
So now you can call up the data contained within your .asset file anywhere in your game project.
Tip
The same kind of pattern can also be used to download the .asset files from the Web for your project to add DLC or expand the levels of your game. A word to the wise though; if you do go down this route, be sure to compress and encrypt your assets that are meant for downloading to protect your IP.
Also, if you have any dependent files, such as images, be sure to download them separately.
However, to use the downloaded files as assets in your scene, you will require them to be packaged as asset bundles. This also requires Unity Pro.