
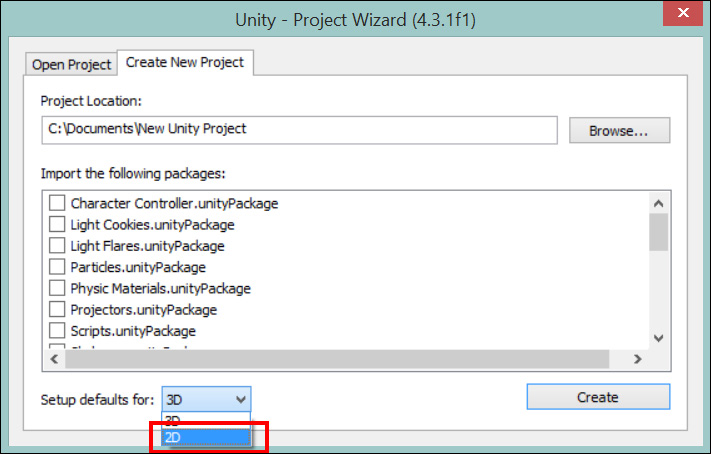
First things first! To ensure that you have all the bases covered, you need to start a new project. For 2D, however, you need to ensure that you start the project using the 2D game template in the Unity New Project wizard, as shown in the following screenshot:
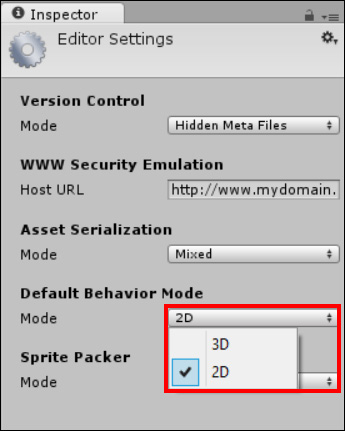
If you accidentally leave the 3D option set (which is the default) as is, don't worry! You can change this at any time for your project through Editor Settings. To open Editor Settings, simply navigate to Edit | Project Settings | Editor, as shown in the following screenshot:
Lastly, let's create the folder structure for the project, as shown in the following screenshot, using the guidance provided earlier:
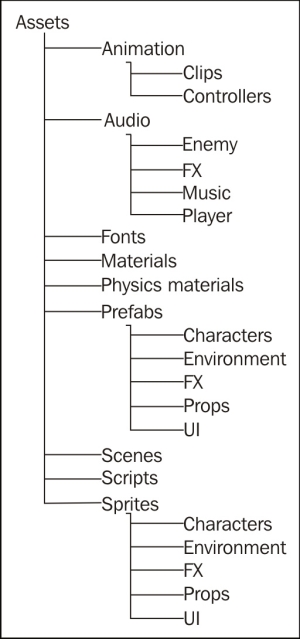
At this point, it's important to note that we will most likely not use all of these folders during the course of the book. Nevertheless, it is a good working practice to get these set up for every project just so that you have a standard template.
Note
This book will cover the process of creating your own project template later in Chapter 12, Deployment and Beyond, which will create a standard asset for our folder structure to import the setup of the project's framework automatically; let's get on and start populating it.