
Chapter 19
Image Filters in LightWave
The Effects panel in Layout contains a few options for applying effects to your renders. To open this panel, click on the Image Process button under the Scene tab, or press Ctrl+F8.
Most of the functions and settings on the Effects panel fall within the realm of rendering, so we do not need to deal with all of them here. In terms of texturing, however, we find some use for certain image filters that can be added to the Image Filters list. To add an image filter, simply click on the Add Image Filter button and select the filter that you wish to use.
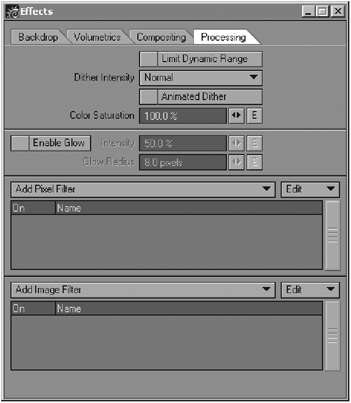
Figure 19-1
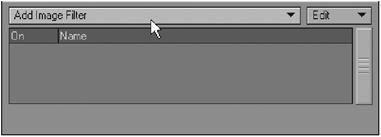
Figure 19-2

Figure 19-3
You can copy, paste, or remove filters from this panel by right-clicking on them in the list, or by clicking on the button labeled Edit.
How Image Filters Work
Image filters are applied during post-processing. This means that they are added to the rendered image once the actual rendering process is complete. Because of this, they have certain limitations. For example, hair created using a filtering process (such as Saslite or Sasquatch, which uses a pixel filter that is also created during post-processing) does not normally show up in reflections because the hair fibers are created after rendering and are therefore not included in the reflection ray tracing during rendering.
Using Image Filters to Enhance Surfaces
Although most of these filters are not texturing related, a few of them can be used to create some very cool effects on your surfaces. You can use these globally, by simply assigning them to this list and setting them up as desired, or you can use them in conjunction with Special Buffers, which are discussed in depth in Chapter 5, to have them affect certain surfaces only.
Bloom
This particular filter helps to create those extremely bright spots or halos that we observe in highly reflective surfaces when they are brightly lit, especially in sunlight. It is particularly useful for enhancing realism in surfaces like highly polished car paint, very reflective metals, glass, and water, which have a tendency to almost sparkle in sunlight.
Figure 19-4 shows an example of this in real life. Look at the extremely bright spot on the edge of the glass where the sun is hitting it.

Figure 19-4
The shader is very simple to set up, since it only has three controls.
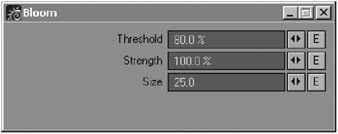
Figure 19-5
The Threshold value determines how bright a pixel must be before the Bloom effect will actually affect it. The lower this value, the more of your surface will bloom. Since the bloom effect in real life is usually quite small and focused, higher values tend to be more appropriate here.
The following image shows a fairly reflective and highly specular surface with increasing values of Threshold. The logo on the left does not have Bloom applied to it at all, while the one in the middle has a Threshold value of 25% and the one on the right has a Threshold value of 80%.
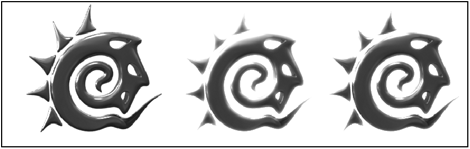
Figure 19-6
As you can see, the higher the value becomes, the tighter and more focused the Bloom effect becomes since it only affects the pixels that are far brighter.
The Strength value determines the strength of the Bloom effect compared to the pixel that it affects. Basically, this value controls the overall brightness of the blooming effect on the bright areas of the surface.
The following image shows the increasing effect of this value. The logo on the left has a Strength value of 25%, while the one in the middle has a value of 50% and the one on the right has a value of 100%.

Figure 19-7
Size, the last option, controls the actual pixel radius of the blooming effect at a resolution of 640 × 480. If the resolution changes, the size is automatically adjusted so that the effect always appears the same, despite any changes in resolution.
In the following image, the logo on the left has a Size value of 25 while the logo on the right has a value of 80.

Figure 19-8
Increasing the Size value can increase rendering times quite dramatically.
Corona
The Corona filter produces the same type of effect as the Bloom filter, except that it gives you more control over the look of the effect by offering more options.
The Input Channel drop-down list allows you to specify a particular internal render buffer that the effect will be applied to, while the Input Threshold value determines the threshold level of that input after which to apply the effect.

Figure 19-9
This is the biggest difference between the Corona filter and the Bloom filter, since Bloom is applied to pixels in all the buffers. This basically allows you to apply the effect to only one particular aspect of the surface, such as its specularity or its reflectivity.
Clicking on Input Channel gives you a rather long list of internal buffers from which to choose.
Color uses the actual raw hue of the pixels to determine which areas are affected by the effect, so that the brighter colors will bloom. Alpha uses the brightness values of the render’s alpha.
Specular Shading uses the specular shading values as an input, so that the areas with higher values of specularity bloom, while Diffuse Shading uses the Diffuse channel’s shading.

Figure 19-10
These two shading options are different from the Specularity and Diffuse input types in that the shading values vary across the surface, from 0% to 100%, while the Specularity and Diffuse options take their input values directly from the values assigned in the Surface Editor and are therefore uniform across the surface.
Essentially, this means that when using Specular Shading or Diffuse Shading (which are influenced by the lighting in the scene), the bloom effect will appear where there are brighter spots of specular or diffuse shading on any particular area of a surface, while using Specularity or Diffuse will apply the effect to any surface that has a specularity or diffuse value in the Surface Editor that exceeds the input threshold as a whole.
Geometry uses the normal angles of the object’s surface to trigger the effect. This is an incidence-based (Fresnel) effect, where an Input Threshold value of 100% places the blooming on areas that face the camera directly. Inverse Geometry is the opposite, whereby the normals that are perpendicular to the camera (in other words the edges) trigger the blooming effect when using an Input Threshold value of 100%.
The following image shows the Geometry option on the left and the Inverse Geometry option on the right.
Figure 19-11
Special Buffer uses the Special Buffers feature in the Surface Editor as the input for the effect. This is useful for applying the effect to specific surfaces only. For more information on using the Special Buffers feature, refer to Chapter 5.
Mirror and Reflectivity use reflection information from the surface as the input. Although similar to the Specular Shading versus the Specularity input options we looked at a moment ago, the Mirror and Reflectivity options differ in that Mirror uses the flat reflection value assigned to the surface in the Surface Editor, while Reflectivity uses the reflection shading information.
The Shadow option uses shadows on the surface to trigger the effect, while Shading uses the actual light on the surface as the input. This means the Input Threshold value determines how brightly lit an area of the surface must be before it blooms.
Depth applies the effect according to the z-depth buffer, using the values ranging from 0% to 100% to represent the transition from black to white in the buffer. Velocity uses movement of the object as a trigger.
Luminance and Transparency use the appropriate values set in the Surface Editor as the input for the effect.
You can mask the blooming effect using one of these buffers as well, by selecting it from the Threshold Mask drop-down list.
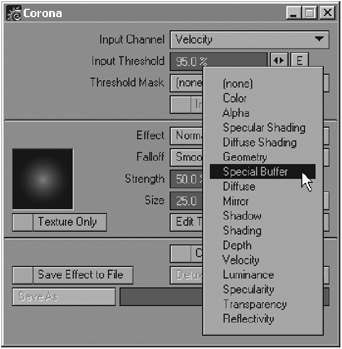
Figure 19-12
This buffer now acts like an alpha channel for the effect. The mask can also be inverted.
The Effect drop-down list gives you three different blending modes for the effect.

Figure 19-13
The Additive mode creates an effect that looks extremely hot (white) where blooming pixels are closely grouped. This is useful for effects like heated metal. This mode creates an effect that is very strong in the middle and much less so on the edges.
Normal (the default) is similar to, although not quite as strong as, the Additive mode, since the effect at the center and the edges tends to grow more evenly, as opposed to being concentrated in the middle only.
Maximum takes the maximum of contributive pixels, creating a strong bloom effect where the blobs of light on the surface actually tend to merge where they meet one another (most noticeable when the Size value is set fairly high).
Figure 19-14 shows each of the different modes, with all other settings the same for each. From left to right, we have Normal, Additive, and Maximum.

Figure 19-14: Effect options
The Falloff drop-down list allows you to select an option for how the Bloom effect falls off (at its edges). Refer to the little preview window to see how the different Falloff options work. You can achieve some really bizarre effects by playing around with this setting.
The Linear falloff type simply has a straight falloff in the Bloom effect, from solid white in the middle to fading away completely at the edges.
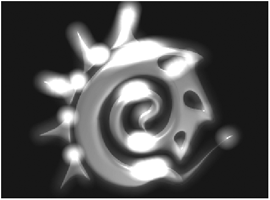
Figure 19-15: Linear falloff
Smooth produces a slightly tighter effect, with the falloff occurring sooner from the middle, while Center Bias creates an even tighter falloff from the middle. Figure 19-16 shows the Smooth falloff on the left and the Center Bias falloff on the right. As you can see, they are very similar.
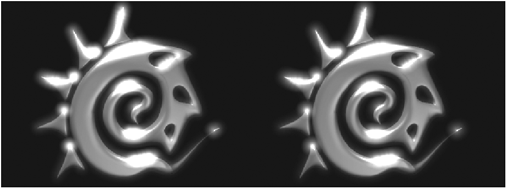
Figure 19-16: Smooth and Center Bias falloff
Solid Box causes the blooms to appear square, and Ring forms halos of light instead of blooming spots. In Figure 19-17, the Solid Box falloff is shown on the left and the Ring falloff on the right.

Figure 19-17: Solid Box and Ring falloff
Just as we have in the Bloom filter, the Strength value is the strength of the Corona pixel compared to the source pixel, and the Size value is the radius in pixels of the brush at a 640 × 480 resolution. If the resolution is different, the brush is adjusted so that the effect always looks the same.
Use the Edit Texture option to add color and modulation to the effect using a texture, which can be a procedural texture, an image, or a gradient. Clicking on this button opens a Texture Editor just like we find in the Surface Editor, where you can create layers of textures.

Figure 19-18
When using gradients with the Corona filter, you’ll find some unusual input parameters that are only found when using them with this particular filter.
The Previous Layer, Depth, Distance to Center, and LW_Corona Input Channel options allow you to alter the way in which the Corona effect is applied to the surface.
When the Texture Only option is active (checked) and there is also a texture color, the effect uses the value of the texture only.
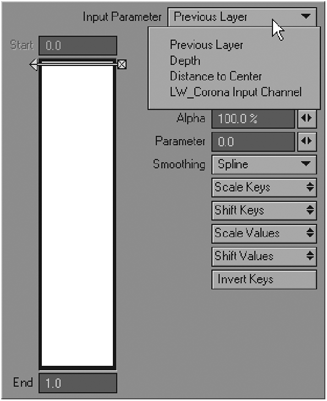
Figure 19-19
The Corona filter will be added to your alpha channel when the Contribute to Alpha option is selected. Use the Save Effect to File option to save just the Corona effect to a separate image file (or image sequence) when rendering, and select an appropriate file format in which LightWave should save the images.
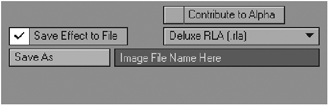
Figure 19-20
And that’s it for the Corona filter. Since it offers so many more controls than the Bloom filter, you will probably find that it can take a little longer to set up, but the results often have a greater effect than using Bloom. Use Bloom when you need a quick and easy overall effect, and Corona when you need to limit the effect to certain aspects of the surface.
Soften Reflections
This filter creates soft-looking reflections by simply blurring them somewhat. It is a faster rendering option than using the Reflection Blurring option in the Surface Editor, which greatly impacts rendering times.
Take a look at Figure 19-21. The logo in the background has Soften Reflections applied to it (using the filter in conjunction with Special Buffers, discussed in a moment), while the logo in the foreground does not have the filter applied to it. Notice how the reflections in the front logo are sharp, while the reflections in the back logo are softened by the filter.
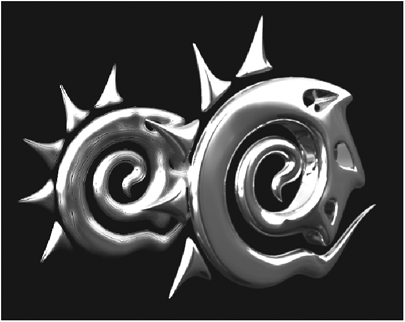
Figure 19-21
The filter is simple to control, since it only has a few adjustable options.

Figure 19-22
The Softness value controls the strength of the effect, while the Blending mode determines how the effect is applied to the surface.
The Replace mode (the default) replaces the original rendered reflections with the blurred pass, while Average calculates an average percentage between the original render and the blurred pass to create a more subtle effect. Maximum takes the maximum of the replace result and the original value to create a slightly lighter effect to avoid any dark halo around the reflection.
Alpha uses the alpha channel of the surface to blend the effect, while LumaBlend blends according to the intensity of the actual reflection.
You can select the Scale By Surface Buffer option to use the effect of the filter together with surfaces using the Special Buffers feature in the Surface Editor. This limits the effect so that it only affects surfaces using Special Buffers. For more information on using this feature, refer to Chapter 5.