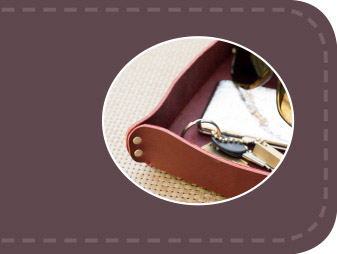
Leather Valet
Because both the interior and exterior surfaces are visible, a valet is the perfect project for getting to know bridle leather. Bridle leather comes pre-finished from the tannery and both sides are presentable. Valets organize your keys and coins on the dresser, or notes and paper clips on your desk.

Finished size
7×6½ inches (17.8×16.5cm)
Materials
1 piece 6–7 ounce (2.4–2.8mm) bridle leather, 9½×8½ inches (24.2×21.6cm)
8 nickel-plated double cap rivets, 7mm
Cardstock
Template
Leather Valet (idiotsguides.com/leather)
Tools
Mechanical pencil
Clamps
Hole punch, #2
Mallet
Precision knife
Straightedge
Cutting mat
Mini sledge hammer
Adjustable U-gouge
Techniques Used
Working with Templates
Cutting: Using a Straightedge
Cutting: Using a Precision Knife Freehand
Punching: Using Rotary Punches
Hardware: Riveting
Shaping Leather: Folding with a Channel

1 Prepare and trace the template. Transfer the paper template pattern to cardstock and clamp it onto the leather. Trace it using a mechanical pencil and mark the holes to be punched.

2 Punch the holes. Punch the holes where marked using the #2 hole punch and mallet. Start by punching holes at the intersections of lines for a clean cut.

3 Cut the Straight edges. Cut the straight exterior sides first, using a straightedge and precision knife.

4 Cut the inside corners. Using the precision knife freehand, cut the curved interior corners in a line between the interior holes and to meet the straight cuts.

5 Trace and gouge the fold lines. Using a mechanical pencil and a straightedge, trace the gouge lines on the leather between the interior holes of the bottom of the coin tray. Adjust the U-gouge to half the thickness of the leather, about 1/16 inch (0.1cm), and gouge along the fold lines.

6 Rivet the corners. Fold the sides so the corners are flush and the rivet holes aligned. Insert a rivet in each aligned rivet hole and set the rivets using the mini sledge hammer.