The simplest user interface might consist of a window with a few buttons or check boxes on the screen. However, there's a limit to the number of options you can cram inside a window. Eventually, you may want to organize commands in categories and display those categories of commands in pull-down menus at the top of the screen.
Pull-down menus enable you to store and organize multiple commands, yet keep them tucked out of sight until the user actually needs them. In addition to menus, you can create submenus. You can also assign shortcut keystrokes to specific menu commands. By designing a pull-down menu for your program, you can simplify your user interface and provide a consistent Mac look and feel for your program without any additional programming whatsoever.
When you create a new program, Interface Builder automatically creates a standard pull-down menu for you. To make this pull-down menu work, you need to customize these menus and commands. In this chapter, you'll learn the steps involved in editing pull-down menus, linking menu commands and assigning keystrokes to them, and defining text inside dialog boxes.
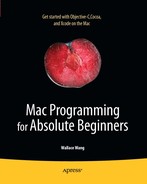
Every time you create a new project based on the Cocoa Application template, Xcode automatically creates a basic pull-down menu that contains common menus (File, Edit, View, etc.) along with common menu items (Cut, Copy, Paste, etc.), as shown in Figure 21-1.
The following are the six pull-down menus that typically appear:
File: Commands for manipulating files used by the program, such as opening, creating, printing, and saving
Edit: Commands for editing data, such as Cut, Copy, and Paste
Format: Commands for changing the appearance of data
View: Commands for changing the appearance of data displayed in a window on the screen
Window: Commands for manipulating multiple windows that display data
Help: Commands for getting help using the program
SinceXcode creates generic pull-down menus for your Cocoa application automatically, you'll need to customize these menus and menu items. To edit a pull-down menu, follow these steps:
Double-click the
MainMenu.xibfile that contains the pull-down menu you want to edit. Interface Builder appears.Double-click the Main Menu icon inside the MainMenu.xib window to display the pull-down menu bar.
Double-click the menu object that you want to edit. For example, if you want to change the name of the Format menu, you would double-click Format. Your chosen menu appears highlighted.
Type new text or use the arrow keys to edit the existing menu title.
To edit a menu item that appears in a pull-down menu, follow these steps:
Double-click the
MainMenu.xibfile that contains the pull-down menu you want to edit.Double-click the Main Menu icon inside the MainMenu.xib window to display the pull-down menu bar.
Click the menu that contains the menu item you want to edit. A pull-down menu appears.
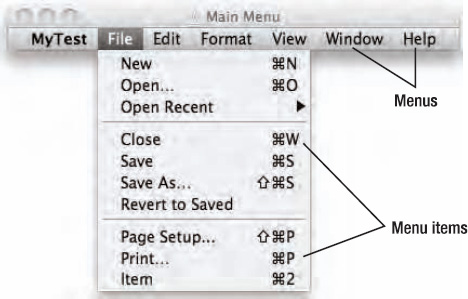
Double-click the menu item that you want to edit. Your chosen item appears highlighted, as shown in Figure 21-2.
Type new text or use the arrow keys to edit the existing menu item title.

You can also edit a menu or menu item by clicking it and then choosing Tools
Sometimes a pull-down menu or menu item may not appear in the order you want, in which case you can move it to another position. To move a menu, follow these steps:
Double-click the
MainMenu.xibfile that contains the pull-down menu you want to move.Double-click the Main Menu icon inside the MainMenu.xib window to display the pull-down menu bar.
Click on the menu that you want to move (such as Edit or View) and drag the mouse left or right. As you move the mouse, a vertical line indicates where the menu will appear when you release the mouse button.
Release the mouse button when you're happy with the new position of the menu.
To move a menu item, follow these steps:
Double-click the
MainMenu.xibfile that contains the pull-down menu in which the menu item you want to move appears.Double-click the Main Menu icon inside the MainMenu.xib window to display the pull-down menu bar.
Click the menu (such as File or Edit) that contains the menu item you want to move. The pull-down menu appears.
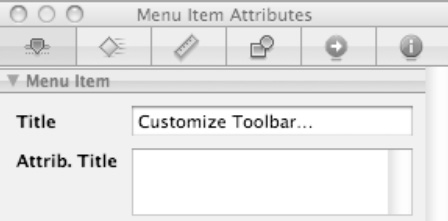
Click the menu item that you want to move and drag the mouse up or down. As you move the mouse, a horizontal line indicates where the menu item will appear when you release the mouse button, as shown in Figure 21-4.
Release the mouse button when you're happy with the new position of the menu item.
Chances are good that the default pull-down menu that Xcode creates will contain menus and menu items that your program won't need. To delete a pull-down menu (and all menu items stored in that pull-down menu), follow these steps:
Double-click the
MainMenu.xibfile that contains the pull-down menu you want to delete.Double-click the Main Menu icon inside the MainMenu.xib window to display the pull-down menu bar.
Click the menu that you want to delete. The menu's pull-down menu appears.
Click the menu again. The menu's pull-down menu now disappears.
Press Delete or Backspace to delete your selected menu.
To delete a menu item, follow these steps:
Double-click the MainMenu.xib file that contains the pull-down menu in which the menu item you want to delete appears.
Double-click the Main Menu icon inside the MainMenu.xib window to display the pull-down menu bar.
Click the menu that contains the menu item you want to delete. Its pull-down menu appears.
Click the menu item you want to delete.
Press Delete or Backspace to delete your selected menu item.
Note
If you delete a menu or menu item by mistake, you can undo the deletion and retrieve it by pressing
After deleting, editing, and rearranging menus and menu items, you may eventually need to add your own menus and menu items to the pull-down menus. To add a new menu, follow these steps:
Double-click the
MainMenu.xibfile stored in the Resources folder. Interface Builder appears.Double-click the Main Menu icon inside the MainMenu.xib window to display the pull-down menu bar.
Choose Tools

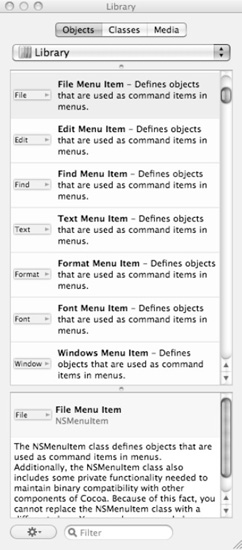
Scroll through the Object Library until you find a Menu Item object such as File Menu Item or Text Menu Item, as shown in Figure 21-5.
Drag the Menu Item object over your pull-down menu bar. A vertical line indicates where your newly added menu will appear when you release the mouse button.
Release the mouse button to drop the menu in place.
Double-click the menu to highlight it.
Type or edit the menu title.
Choose File
To add a new menu item to an existing pull-down menu, follow these steps:
Double-click the
MainMenu.xibfile stored in the Resources folder. Interface Builder appears.Double-click the Main Menu icon inside the MainMenu.xib window to display the pull-down menu bar.
Click the menu to which you want to add a new item. So, for example, if you want to add a new menu item to the File menu, you would click the File menu to display its menu.
Choose Tools
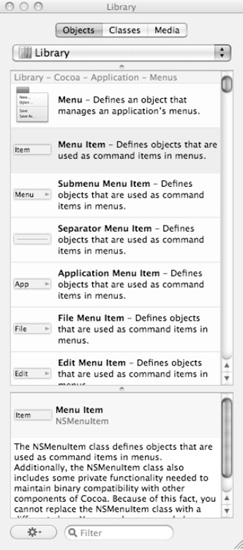
Scroll through the Object Library until you find the Menu Item object, as shown in Figure 21-6.
Drag the Menu Item object over the pull-down menu. A horizontal line indicates where your menu item will appear when you release the mouse button.
Release the mouse button to drop the menu item in place.
Double-click your newly added menu item.
Type or edit the menu item.
Choose File
After creating a new menu item, you need to connect it to a method to make it actually work. Just as you can connect a push button or any user interface object to a method, you can connect a menu item to a method in the same fashion.
To see how to connect a menu item to a method, follow these steps:
Open the MyTest program that you modified in the previous chapter.
Click the
MyTestAppDelegate.hfile stored in the Classes folder and modify the code as follows:#import<Cocoa/Cocoa.h> @interfaceMyTestAppDelegate : NSObject<NSApplicationDelegate> { NSWindow *window; } @property (retain) IBOutletNSWindow *window;-(IBAction) displayDialog:(id)sender;@endChoose File
Click the
MyTestAppDelegate.mfile stored in the Classes folder and modify the code as follows:#import "MyTestAppDelegate.h" @implementationMyTestAppDelegate @synthesize window; - (void)applicationDidFinishLaunching:(NSNotification *)aNotification { // Insert code here to initialize your application } - (void)dealloc { [window release]; [superdealloc]; }-(IBAction) displayDialog:(id)sender{NSAlert *alert = [[NSAlertalloc] init];alert.alertStyle = NSWarningAlertStyle;alert.messageText = @"It worked!";alert.informativeText = @"The displayDialog method ran.";[alertrunModal];[alert release];}@endChoose File
Double-click the
MainMenu.xibfile stored in the Resources folder to open your user interface.Double-click the Main Menu icon inside the
MainMenu.xibwindow to display the pull-down menu bar.Click the File menu to display its pull-down menu.
Choose Tools
Scroll through the Object Library until you see the Menu Item object.
Drag the Menu Item object and drop it near the bottom of the File menu.
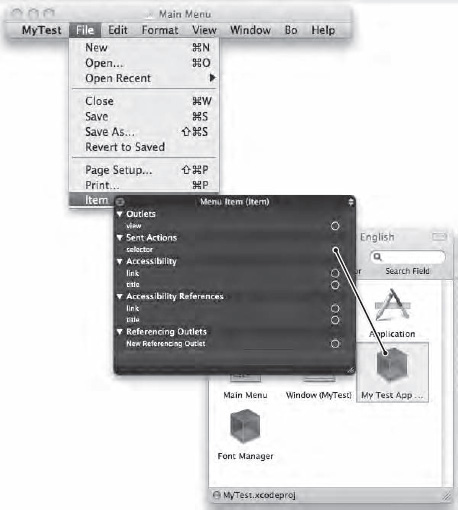
Right-click the menu item you just added. A heads-up window appears, as shown in Figure 21-7.
Note
You can also choose Tools

Move the mouse pointer over the circle that appears to the right of
selectorunder the Sent Actions heading.Click and drag the mouse pointer over the My Test App Delegate icon. A menu of methods appears.
Choose
displayDialog.Choose File
Switch to Xcode and click the Build and Run button or choose Build
Choose File
Click the OK button to make the alert dialog box go away.
Quit your program.
To make choosing a particular menu command easy, many programs assign shortcut keystrokes. Instead of clicking a menu title to display a pull-down menu, and then clicking a command, the user can just press the assigned keystroke combination and your program chooses the command without requiring the user to fumble with the pull-down menus at all.
To assign a keystroke combination to a menu command, follow these steps:
Double-click the
MainMenu.xibfile that contains the pull-down menu in which the menu command appears.Double-click the Main Menu icon inside the
MainMenu.xibwindow to display the pull-down menu bar.Click the menu to display the pull-down menu of menu items.
Click a menu item to which you want to assign a keystroke.
Choose Tools
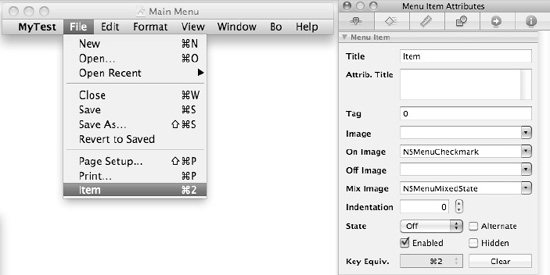
Click in the Key Equiv. field.
Press the keystroke combination you want to assign to the currently selected command. Make sure you choose a keystroke combination that isn't used by another command. Your chosen keystroke combination appears on the pull-down menu, as shown in Figure 21-8. Now when your program runs, users can choose the command by pressing its keystroke combination.
When you need to provide the user with multiple commands, you probably won't want to clutter your user interface with multiple push buttons or check boxes. Instead, you can store related commands in their own menu that users can pull down when they want to choose a particular command.
To make choosing a menu command even easier, you can assign a unique keystroke combination to that command. Then a user can just press that keystroke combination to choose the command without displaying the pull-down menu at all.
To edit, rearrange, or delete menu titles and menu commands, you can click the pull-down menu directly. If you want to add new menus or menu items, just drag a menu or menu item from the Library window and drop it directly on the pull-down menu bar or on a menu.
In general, use the standard commands in every menu whenever possible, such as the Cut, Copy, and Paste commands under the Edit menu or the Save, Print, and Open commands under the File menu. Users expect to find common commands under certain menu titles, so delete, edit, or move them only when absolutely necessary to ensure that your program looks and behaves like a typical Mac application.