The most time-consuming part of creating your program will be writing the Objective-C code that makes your program do something. Since you'll be spending much of your time writing, testing, and rewriting code, you'll be using Xcode as your primary tool for hours at a time. Whereas much of this book showed you one way of using Xcode, this chapter will show you several tips and shortcuts for using Xcode that weren't covered previously.
By learning some of Xcode's hidden features, you can save time and work more efficiently. The less time you waste wrestling with Xcode, the more time you'll have to design, write, test, and market your finished program.
A single Xcode project typically consists of several files. To help organize those files, Xcode automatically creates several folders such as Classes and Resources. As your program grows in size and complexity, chances are good that even these default folders will get too cluttered. To solve that problem, you may need to create additional folders.
You can create as many folders as you need and name them anything you want. To create a new folder, follow these steps:
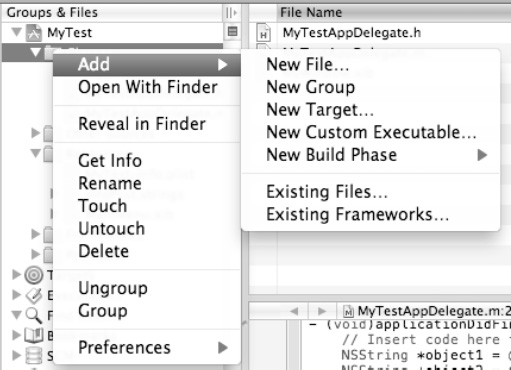
Right-click the folder in which you want to store your newly created folder. A pop-up menu appears, as shown in Figure 23-1. (If you wanted to create a new folder inside the Classes folder, right-click the Classes folder. If you right-click your project name, you'll be able to create a new folder at the same hierarchical level as the Classes and Resources folders.)
Choose Add

Double-click the New Group name. Xcode highlights New Group.
Type a new name for your folder. At this point, you can drag and drop files from other folders and store them in your newly created folder.
Note
You can delete a folder at any time by right-clicking that folder to display a pop-up menu and then choosing Delete. Make sure you really want to delete a folder, because you'll also delete any files stored in that folder.
One of the biggest problems with creating a project is that your data winds up scattered all over the place. To navigate from one part of your program to another, you might have to switch to a different folder, then switch to a different file, then scroll through that file to find the method you want to edit.
To make navigating through your program faster and easier, Xcode offers pop-up buttons and icons that let you switch to a different part of your program quickly, as shown in Figure 23-2.
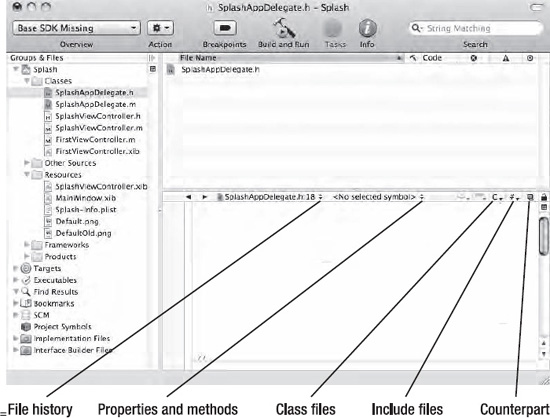
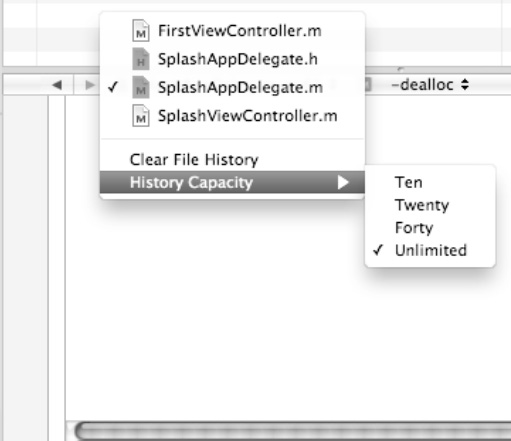
The File History pop-up button stores a list of all the files you've opened. The idea is that if you opened a file once, you'll probably want to open and view that file again. Clicking the File History pop-up button displays a list of your recently opened files along with options to clear the entire history list or define how many files to store, as shown in Figure 23-3.
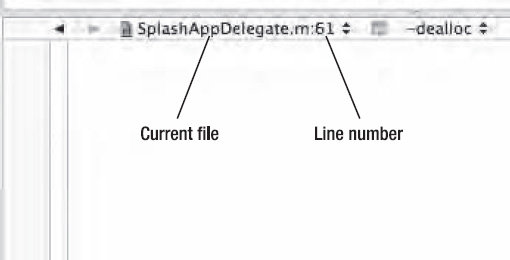
The File History button displays the currently displayed file plus the line number that the cursor is on, as shown in Figure 23-4.
When you're viewing a file, you may want to jump to a particular variable (property) or method. Rather than scroll endlessly through the file, you can just click the Properties and Methods pop-up button and view a list of different items, as shown in Figure 23-5.

Just click a property or method name and Xcode displays your chosen method or property.
If you want to see the class that your currently displayed file is based on, click the Classes menu, as shown in Figure 23-6.
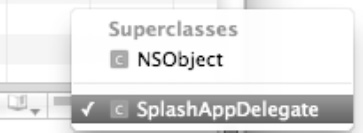
Clicking the superclass file displays the Objective-C code for that superclass. In most cases, you probably won't modify this Objective-C code (although you could). Instead, you can study this code to better understand how it works.
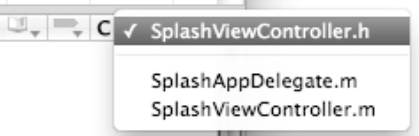
Most Objective-C files are interdependent on other files, so if you want to see which files depend on the currently displayed file, click the Include menu, as shown in Figure 23-7.
Every time you create a class, you're actually creating two files: the header (.h) file and the implementation (.m) file. Almost every time you change one file, you'll need to change the other file. To make switching between the header file and implementation file easier, you can use the Counterparts icon by following these steps:
Open either the
.hor.mfile of a class.Click the Counterparts icon. If you opened the
.hfile, the Counterparts icon displays the accompanying.mfile. If you opened the.mfile, the Counterparts icon displays the accompanying.hfile.
The more Objective-C code you write, the harder it can be to read, let alone understand. The problem is that more code means more instructions, which means more possible ways your program can do something wrong.
Ideally, you want to divide large chunks of code into multiple files and then store as little code as possible in each file to make it easier to read. Since this isn't always possible, Xcode offers code folding.
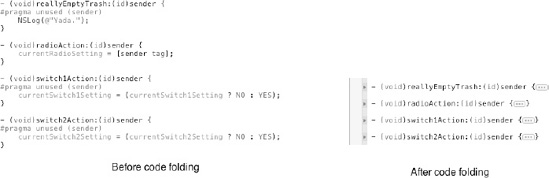
Code folding temporarily collapses code, such as a block of code inside a loop, switch statement, or a method, as shown in Figure 23-8.
To fold code, you have three choices:
Fold (unfold) all methods and functions
Fold (unfold) a selected block of code, but leave all other blocks of code unchanged
Fold (unfold) comments defined by the
/*and*/symbols
To fold (or unfold) all methods and functions in a file, follow these steps:
Click a file that contains Objective-C code.
Choose View
Xcodecan fold any bracketed chunk of code inside a method, loop, if statement, or switch statement. To fold a single block of code in a file, follow these steps:
Click a file that contains Objective-C code.
Move the cursor anywhere inside the block of code (defined by
{ }brackets) that you want to fold.Choose View
Note
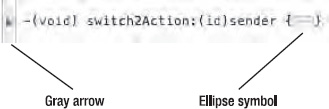
A quick way to fold a block of code is to move the mouse pointer to the left of the method or function name until a gray arrow appears. Then click that gray arrow to fold your code.
To unfold a block of code, you have two options:
Click the gray arrow that appears to the left of the folded code
Click the ellipse symbol of the folded code
If you used the /* and */ symbols to define multiple lines of comments, you can selectively fold (unfold) your comment block by following these steps:
Click a file that contains Objective-C code.
Move the cursor anywhere inside a comment defined by the
/*and*/symbols.Choose View
Usually the Xcode window displays either your Objective-C code or your user interface, but not both at the same time. However, you can split the Xcode window in half so you can see both your user interface and theeditor split horizontally to show two different files containing Objective-C code, as shown in Figure 23-10.
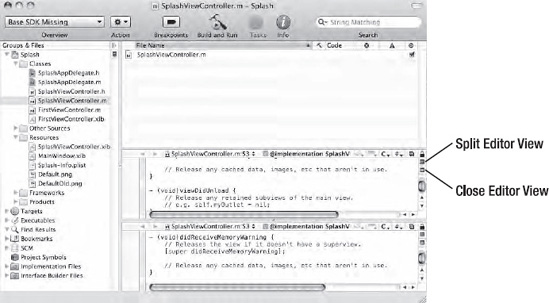
To split the Xcode window, follow these steps:
Xcode provides plenty of features to make programming easier, but you have to find out what those features are and learn how to use them. Initially as you're learning to program the Mac, just focus on learning the basic features of Xcode so you understand how to write Objective-C code, how to design a user interface, how to connect your user interface to your Objective-C code, and how to use the built-in classes provided for you by Apple's Cocoa framework.
Once you get familiar with these basic steps to Mac programming, then you'll be more comfortable exploring Xcode's other features. By using folders, you can organize your projects exactly the way you want. Then you can use the various pop-up buttons and icons to navigate your way around folders, files, and methods so you can quickly find what you need.
Ideally, you don't want a single file to get too crowded with code or else it will be harder to read, understand, and modify later. Since you can't always avoid this problem, you can do the next best thing and temporarily hide or fold code so only the method or function names appear but the actual code that makes those methods or functions work remains hidden. By selectively folding code, you can hide code that you don't need to examine and just focus on the code that you need to look at right now.
If you have a large monitor, you can even split the Xcode window to show two files. This lets you study two separate files full of Objective-C code.
Of course, you can selectively choose which Xcode features you want to use and ignore the rest. The more you get comfortable using Xcode, the more you'll find how Xcode can make programming even easier and faster than ever before, just as long as you take time to learn the basics of Mac programming first.