Computers running Windows Server 2003 Service Pack 1 (SP1) or later, or Windows XP Professional Service Pack 2 (SP2) or later, use Attachment Manager to monitor and control access to file attachments. Before you try to configure this Windows component in policy, you should have a strong understanding of how it works.
The goal of Attachment Manager is to enhance security by identifying types of files that might represent a security risk and then managing access to these files when they are obtained from network locations. Risk is assessed according to the Internet Security zone from which a file attachment was received. Four Internet Security zones are defined:
Restricted Sites. Web sites that have been specifically designated as restricted due to content or potential to damage computers. Restricted Sites have a higher-than-normal security level by default.
Trusted Sites. Web sites that have been specifically designated as trusted. Trusted Sites are considered to be safe and have a lower-than-normal security level by default.
Local Intranet. All locations on the local network, including intranet sites, sites bypassed by the proxy server, and all network paths. Local intranet sites are considered to be very safe and have a much lower-than-normal security level by default.
Internet. Web sites on the Internet that aren’t specifically assigned to another security zone. Internet sites have a moderate security level by default.
Attachment Manager assigns one of three levels of risk to file attachments based on the zone from which they were received:
High Risk. Poses a potential high risk to system security if opened. By default, any file types designated as High Risk are blocked on restricted sites and require that the user be prompted before they can be downloaded from Internet sites. The built-in list of High Risk file types follows: .ade, .adp, .app, .asp, .bas, .bat, .cer, .chm, .cmd, .com, .cpl, .crt, .csh, .exe, .fxp, .hlp, .hta, .inf, .ins, .isp, .its, .js, .jse, .ksh, .lnk, .mad, .maf, .mag, .mam, .maq, .mar, .mas, .mat, .mau, .mav, .maw, .mda, .mdb, .mde, .mdt, .mdw, .mdz, .msc, .msi, .msp, .mst, .ops, .pcd, .pif, .prf, .prg, .pst, .reg, .scf, .scr, .sct, .shb, .shs, .tmp, .url, .vb, .vbe, .vbs, .vsmacros, .vss, .vst, .vsw, .ws, .wsc, .wsf, and .wsh.
Moderate Risk. Poses a potential moderate risk to system security if opened. By default, any file types designated as Moderate Risk require that the user be prompted before they can be downloaded from restricted or Internet sites. Any file types that Attachment Manager does not label as High Risk or Low Risk are automatically labeled as Moderate Risk.
Low Risk. Unlikely to pose a risk to system security if opened. By default, any file types designated as Low Risk are opened without prompting from any location. Windows includes a built-in list of file types that are designated as Low Risk. This list applies to two applications—Notepad and Windows Picture And Fax Viewer. When you open a .log, .text, or .txt file on restricted or Internet sites using Notepad, the file is considered to be low risk. When you open a .dib, .emf, .gif, .ico, .jfif, .jpg, .jpe, .jpeg, .png, .tif, .tiff, or .wmf file on restricted or Internet sites using Windows Picture And Fax Viewer, the file is considered to be Low Risk. Note that associating additional file types with Notepad or Windows Picture And Fax Viewer doesn’t add that file type to the list of low-risk file types.
Tip
Configuring policies related to Attachment Manager is most useful when a computer doesn’t have antivirus software or has antivirus software that isn’t configured to scan file attachments before opening a file. In either situation, you can use Attachment Manager to monitor access to file attachments and either block access or prompt users before opening files, as appropriate.
In Group Policy, you can configure the way Attachment Manager works through User Configuration. Although there are many ways to configure Attachment Manager settings, you’ll usually want to configure them in one of two ways. The first way is to use default risk levels and trust logic to determine how file attachments are handled. The second way is to specifically define the types of files that are High Risk, Moderate Risk, and Low Risk, and by doing so override the built-in list of file types that are designated as having those risk levels—and then set the trust logic. In either case, you might also want to configure antivirus notification.
Trust logic is one aspect of Attachment Manager we haven’t yet discussed. Attachment Manager can assess risk for file attachments by file type and also by the application that is attempting to open a file attachment. The default preference is given to the application attempting to open a file attachment, which means a trusted application, such as Word.exe, might be able to open a file attachment that an untrusted application, such as Malware.exe, cannot. You can configure trust logic in two other ways as well. If you want Attachment Manager to look only at the file type, you can determine risk by preferring the file type. If you want Attachment Manager to look at both the application and the file type, you can determine risk by looking at the file handler and the file type. In this configuration, Windows uses the more restrictive of the two conditions, making this the most restrictive (and most secure) option.
To configure Attachment Manager policies, follow these steps:
Access the Group Policy object (GPO) you want to work with. Access User ConfigurationAdministrative TemplatesWindows ComponentsAttachment Manager.
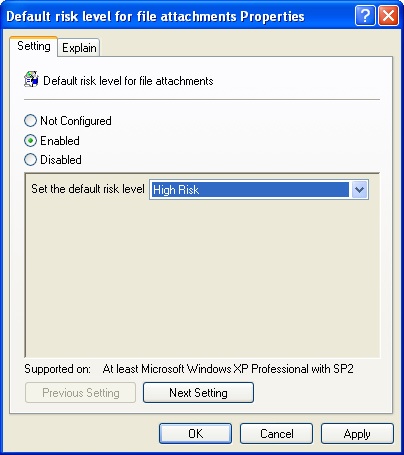
The default risk level is Moderate for file attachments received from restricted or Internet locations. With this risk level, users are prompted before they can download files from restricted or Internet locations. To set a different default risk level, double-click Default Risk Level For File Attachments. Select Enabled and then choose a risk level, such as High Risk, as shown in Figure 6-1. Click OK.
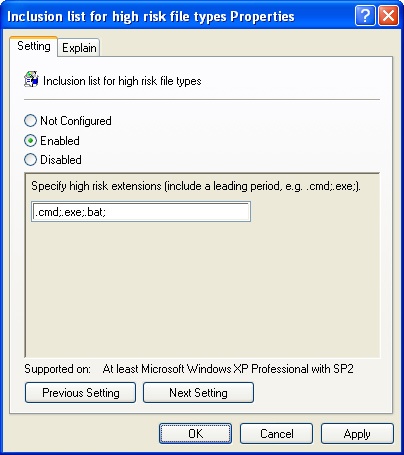
If you want to specifically define the types of files that are High Risk and override the default list, double-click Inclusion List For High Risk File Types. Select Enabled and then enter a semicolon-separated list of file extensions that should be treated as High Risk when file attachments are obtained from restricted or Internet locations (Figure 6-2). Click OK.
If you want to specifically define the types of files that are Moderate Risk and override the default list, double-click Inclusion List For Moderate Risk File Types. Select Enabled and then enter a semicolon-separated list of file extensions that should be treated as Moderate Risk when file attachments are obtained from restricted or Internet locations. Click OK.
If you want to specifically define the types of files that are Low Risk and override the default list, double-click Inclusion List For Low Risk File Types. Select Enabled and then enter a semicolon-separated list of file extensions that should be treated as Low Risk when file attachments are obtained from restricted or Internet locations. Click OK.
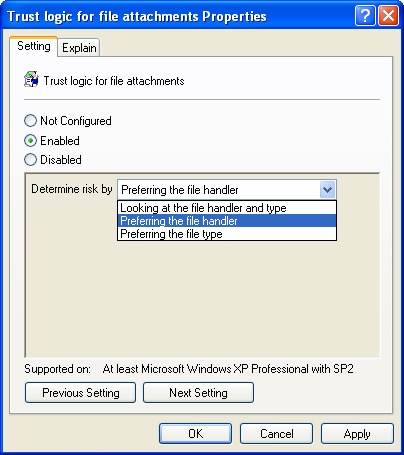
By default, Windows determines risk by preferring the file handler (the application attempting to open a file attachment). If you want to set a different trust logic, double-click Trust Logic For File Attachments. Select Enabled and then use the Determine Risk By list to set the trust logic, as shown in Figure 6-3. Click OK.
By default, Windows does not call registered antivirus programs before opening file attachments. Most antivirus programs can be configured to scan files automatically before they are opened. However, if the user disables or otherwise overrides this feature, the antivirus program won’t scan files before they are opened. To ensure that all registered antivirus programs are notified before a file attachment is opened, double-click Notify Antivirus Programs When Opening Attachments. Select Enabled and then click OK.