
Security templates are text files that are used to organize, configure, and manage security on computers throughout a Windows–based enterprise. These templates are organized into logical sections based on the various categories of security policies on all Windows–based computers. Once a security template is configured, you can use it to configure a single computer or multiple computers on the network. Security templates offer a method for centralizing the configuration and deployment of security configurations to computers.
Security templates are basic text files that are accessed through the Security Templates snap-in using the Microsoft Management Console (MMC), as shown in Figure 5-1.

Windows Server 2003 comes with a number of default security templates that are designed to help meet the needs of different computer security levels and functions. These templates can be used as is, or they can be modified to meet the needs of the computers on your network. All of the default security templates can be found in the C:WindowsSecurityTemplates folder. This following sections describe the default security templates and their functions.
The Compatws.inf template relaxes the default permissions for the Users group so that you don’t have to make end users members of the Power Users group. Limiting the number of Power Users makes computers more secure when they run legacy applications.
In practice, the default permissions for workstations and servers are primarily granted to three local groups: Administrators, Power Users, and Users. Administrators have the most privileges and Users have the least. As a result, it is a best practice to put most user accounts in the Users group—not the Administrators group—assuming that applications can be successfully run by members of the Users group. For each application that requires more than Users group membership, there are two options: The users can be placed in the Power Users group or the permissions for the Users group can be relaxed to allow the Users group to run the application.
The Compatws.inf security template changes the default file and registry permission for the Users group so that its members can run the application, and it removes the Power Users group from running the application. Because Power Users have inherent capabilities, such as creating users, groups, printers, and shares, some administrators would rather relax the default User permissions than allow end users to be members of the Power Users group.
This template is created when a server is promoted to a domain controller. It reflects file, registry, and system service default security settings. Reapplying it resets these areas to the default values, but it might overwrite permissions on new files, registry keys, and system services created by other applications.
The Iesacls.inf template is designed to establish auditing for Registry keys that are associated with Microsoft Internet Explorer. The permissions for these keys are set using the security template to allow the built-in Everyone group Full Control access to the keys. Then, the auditing is configured to track when anyone attempts to modify the values located in the keys.
The Secure templates (Secure*.inf) define enhanced security in ways that are least likely to affect application compatibility. The security settings include stronger passwords, lockout, and audit settings. Both Secure templates also limit the use of LAN Manager and NTLM authentication protocols by configuring clients to send only NTLMv2 responses and configuring servers to refuse LAN Manager responses. The Secure templates also further restrict anonymous users by preventing those users (such as users from untrusted domains) from enumerating account names and shares, as well as performing SID-to-name or name-to-SID translations.
This template provides the same configurations as the Securedc.inf template, but it is designed to be applied to clients and member servers. The template enables server-side Server Message Block (SMB) packet signing, which is disabled by default for servers. Because client-side SMB packet signing is enabled by default, SMB packet signing is always negotiated when workstations and servers are operating at the Secure level.
If the Securews.inf security template is applied to a domain member, the following limitations apply:
All of the domain controllers that contain the accounts of all users who log on to the client must run Microsoft Windows NT® 4.0 Service Pack 4 or later.
If the domain member is joined to a domain that contains domain controllers running Windows NT 4.0, the clocks of the domain controllers running Windows NT 4.0 and the member computers must be within 30 minutes of each other.
Clients cannot connect to servers that use only the LAN Manager authentication protocol or that run Windows NT 4.0 before Service Pack 4 using a local account defined on the target server.
Clients cannot connect to servers running Windows 2000 or Windows NT 4.0 using a local account defined on the target server unless the clock on the target server is within 30 minutes of the clock on the client.
Clients cannot connect to a computer running Windows XP or later using a local account defined on the target server unless the clock on the target server is within 20 hours of the clock on the client.
Clients cannot connect to servers configured to use LAN Manager authentication that are running in share-level security mode.
A user with a local account on a configured server cannot connect to it from a client computer running only LAN Manager that is using that local account.
A user with a local account on a configured Windows Server 2003 server that is also configured to use NTLMv2 authentication cannot connect unless the clocks on the two machines are within 20 hours of each other.
The Highly Secure templates (Hisec*.inf) are supersets of the Secure templates that impose further restrictions on the levels of encryption and signing that are required for authentication and for the data that flows over secure channels and between Server Message Block (SMB) clients and servers. For example, the Secure templates cause servers to refuse LAN Manager responses, while the Highly Secure templates cause servers to refuse both LAN Manager and NTLM responses. The Secure templates enable server-side SMB packet signing, while the Highly Secure templates require it. Also, the Highly Secure templates require strong encryption and signing for the secure channel data that constitutes domain-to-member and domain-to-domain trust relationships.
If the Hisecdc.inf security template is applied to a domain controller, the following limitations apply to the domain controllers:
All of the domain controllers in all trusted or trusting domains must run Windows 2000 or Windows Server 2003.
A user with an account in that domain cannot connect to member servers using that domain user account if the connection is being attempted from a client that uses only the LAN Manager authentication protocol.
A user with an account in that domain cannot connect to member servers using that domain account unless the client and target server are both running Windows 2000 or later. Users can also use Kerberos-based authentication rather than LAN Manager–based authentication, unless the client is configured to send NTLMv2 responses.
Lightweight Directory Access Protocol (LDAP) clients cannot bind with the Active Directory LDAP server unless data signing is negotiated. By default, all Microsoft LDAP clients that ship with Windows XP request data signing if Transport Layer Security/Secure Sockets Layer (TLS/SSL) is not already being used. If TLS/SSL is being used, data signing is considered to be negotiated.
The Hisecws.inf template works on the same premise as the Hisecdc.inf template, with some minor modifications. It removes all members of the Power Users group and ensures that only Domain Admins and the local Administrator account are members of the local Administrators group.
If the Hisecws.inf security template is applied to a domain member, the following limitations apply:
All of the domain controllers that contain the accounts of all users that will log on to the client must be running Windows NT 4.0 Service Pack 4 or later.
All of the domain controllers for the domain that the client is joined to must be running Windows 2000 or later.
Clients cannot connect to computers that run only LAN Manager or computers that are running Windows NT 4.0 Service Pack 3 or earlier using a local account defined on the target server.
Clients cannot connect to servers running Windows 2000 or Windows NT 4.0 Service Pack 4 using a local account defined on the target server unless the clock on the target server is within 30 minutes of the clock on the client.
Clients cannot connect to computers running Windows XP or later using a local account defined on the target computer unless the clock on the target computer is within 20 hours of the clock on the client.
Clients cannot connect to LAN Manager servers operating in share-level security mode.
A user with a local account on a configured server cannot connect to the server from a client that does not support NTLMv2.
A client with a local account on a configured server cannot connect to the server unless the client’s computer is configured to send NTLMv2 responses.
All clients that want to use SMB to connect to a configured server must enable client-side SMB packet signing. All computers running Windows 2000 and Windows XP operating systems enable client-side SMB packet signing by default.
The Notssid.inf template weakens security to allow older applications to run on Windows Terminal Services. The default file system and registry access control lists (ACLs) that are on servers grant permissions to a Terminal Server security identifier (SID). The Terminal Server SID is used only when Terminal Server is running in application compatibility mode. If Terminal Services is not being used, this template can be applied to remove the unnecessary Terminal Server SIDs from the file system and registry locations. However, removing the access control entry for the Terminal Server SID from these default file system and registry locations does not increase the security of the system. Instead of removing the Terminal Server SIDs, a better approach is to run Terminal Server in Full Security mode. In this mode, the Terminal Server SID is not used.
The Rootsec.inf template establishes the security for the root of the system drive. The best use of this template is to reapply the root directory permissions if they have been changed accidentally or where the system is broken. The template will not overwrite explicit permissions for any child object; it will only establish permissions for the parent objects, with the default inheritance configuring the child objects.
The Setup Security.inf template is created during installation for each computer. It can vary from computer to computer, depending on whether the installation was a clean installation or an upgrade. This template represents the default security settings that are applied during installation of the operating system, including the file permissions for the root of the system drive. It can be used on servers and client computers; it cannot be applied to domain controllers. You can apply portions of this template for disaster-recovery purposes.
Tip
Setup Security.inf should never be applied using Group Policy. It contains a large amount of data and can seriously degrade performance if it is applied through Group Policy because policy is periodically refreshed and a large amount of data would move through the domain.
It is a best practice to apply the Setup Security.inf template in parts, and the Secedit command-line tool is a good choice for doing this.
Caution
The default security templates are meant to be applied to computers that already use the default security settings. You should use these templates to incrementally modify the default security settings you configure on the computers. These security templates do not install the default security settings before performing the modifications. This means you should also test these security templates in a non-production environment to ensure that the right level of application functionality is maintained for your network and system architecture.
A security template has many sections, each with a specific role in protecting, securing, and hardening the computer it will be deployed to. Knowing the role of each section will help you move forward as you decide which security settings to configure for each type of computer in your organization.
Descriptions of the sections within the security template follow, along with some best practices for using them.
The Account Policies section controls areas of authentication for user accounts and is configured at the domain policy level. Account Policies has three subsections:
Password policy. Controls the password for user accounts—the time period that a password is valid, the length of the password, and the complexity of the password
Account Lockout policy. Controls how the authenticating computer will behave when incorrect passwords are typed multiple times
Kerberos policy. Controls the ticketing that the Kerberos authentication protocol uses for domain communication and authorization
Table 5-1 lists some best practices for configuring these settings for domain policy in enterprise client environments—that is, where client computers are running Windows 2000 Professional or Windows XP Professional and where all domain controllers are running Windows 2000 or later.
Table 5-1. Best-Practice Account Policies Settings
Account Policies Setting | Subsection | Best Practice Setting |
|---|---|---|
Enforce Password History | Password Policy | 24 |
Maximum Password Age | Password Policy | 42 days |
Minimum Password Age | Password Policy | 2 days |
Minimum Password Length | Password Policy | 8 |
Password Must Meet Complexity Requirements | Password Policy | Enabled |
Store passwords using reversible encryption | Password Policy | Disabled |
Account Lockout Duration | Account Lockout Policy | 30 minutes |
Account Lockout Threshold | Account Lockout Policy | 50 invalid logon attempts |
Reset account lockout counter after | Account Lockout Policy | 30 minutes |
Any policy settings | Kerberos Policy | Leave at defaults |
More Info
For more information on these recommended domain policy settings in enterprise client environments, and for additional recommendations for configuring these settings in legacy client and high security client environments, refer to the Windows Server 2003 Security Guide found at http://www.microsoft.com/downloads/details.aspx?FamilyID=8a2643c1-0685-4d89-b655-521ea6c7b4db&displaylang=en. Additional recommendations for securing client computers can be found in the Windows XP Security Guide v2 found at http://www.microsoft.com/downloads/details.aspx?FamilyId=2D3E25BC-F434-4CC6-A5A7-09A8A229F118&displaylang=en.
The Local Policies section of the security template controls the local security settings that reside on each computer. It has three subsections:
Audit Policy. Triggers events to be logged in the Security log that resides in the Event Viewer. Each Audit Policy setting can be set to Log Successful, Failed, or to both types of attempts. There are different categories within the Audit Policy that you can configure. On member servers and workstations that are joined to a domain, auditing settings for the event categories are undefined by default. On domain controllers, auditing is enabled for most of the audit policy settings. By defining auditing settings for specific event categories, you can create an auditing policy that suits the security needs of your organization.
User Rights Assignment. Determines what a user or group can do on a server or client. These settings are computer-specific but can be defined through a GPO. In many cases, the default user rights are too open and need to be limited.
Security Options. Enables or disables security settings for the computer, such as digital signing of data, Administrator and Guest account names, floppy drive and CD-ROM access, driver installation, and logon prompts.
Table 5-2 lists some best practices for configuring these settings in policy that applies to domain controllers and member servers in enterprise client environments—that is, where client computers are running Windows 2000 Professional or Windows XP Professional and where all domain controllers are running Windows 2000 or later.
Table 5-2. Best-Practice Local Policies Settings
Local Policies Setting | Subsection | Best Practice Setting |
|---|---|---|
Account logon events | Audit Policy | Success: Yes Failure: Yes |
Account management events | Audit Policy | Success: Yes Failure: Yes |
Directory service access | Audit Policy | Success: Yes Failure: Yes |
Logon events | Audit Policy | Success: Yes Failure: Yes |
Object access | Audit Policy | Success: Yes[*] Failure: Yes |
Policy change | Audit Policy | Success: Yes Failure: No |
Privilege use | Audit Policy | Success: No Failure: Yes |
Process tracking | Audit Policy | Success: No Failure: No |
System events | Audit Policy | Success: Yes Failure: No |
User Right Assignment | Limit to privileged accounts | |
Add workstations to domain | User Right Assignment | Limit to privileged accounts |
Back up files and directories | User Right Assignment | Limit to privileged accounts |
Change the system time | User Right Assignment | Limit to privileged accounts |
Force shutdown from a remote system | User Right Assignment | Limit to privileged accounts |
Log on as a service | User Right Assignment | Limit to privileged accounts |
Log on locally | User Right Assignment | Limit to privileged accounts |
Replace a process level token | User Right Assignment | Limit to privileged accounts |
Restore files and directories | User Right Assignment | Limit to privileged accounts |
Shut down the system | User Right Assignment | Limit to privileged accounts |
Take ownership of files or other objects | User Right Assignment | Limit to privileged accounts |
Accounts: Guest account status | Security Options | Disabled |
Audit: Audit the access of global system objects | Security Options | Disabled |
Devices: Prevent users from installing printer drivers | Security Options | Enabled |
Domain member: Digitally encrypt or sign secure channel data (always) | Security Options | Enabled |
Domain member: Digitally sign secure channel data (when possible) | Security Options | Enabled |
Interactive logon: Do not display last user name | Security Options | Enabled |
Interactive logon: Message text for users attempting to log on | Security Options | Specify as needed |
Interactive logon: Message title for users attempting to log on | Security Options | Specify as needed |
Interactive logon: Number of previous logons to cache (in case domain controller is not available) | Security Options | 0 |
Interactive logon: Require Domain Controller authentication to unlock workstation | Security Options | Enabled |
Network access: Allow anonymous SID/Name translation | Security Options | Disabled[**] |
Network access: Do not allow anonymous enumeration of SAM accounts and shares | Security Options | Enabled |
Network access: Let Everyone permissions apply to anonymous users | Security Options | Disabled |
Network security: Do not store LAN Manager hash value on next password change | Security Options | Enabled |
Network security: LAN Manager authentication level | Security Options | Send NTLMv2 response only/refuse LM & NTLM |
Network security: LDAP client signing requirements | Security Options | Negotiate signing |
[*] When establishing your object access audit, be careful of the amount of information that can be generated from this setting. As a best practice, you can enable both Success and Failure events for object access in the baseline audit policy and then be very careful and selective in enabling the SACL on the objects whose access you want to audit. [**] Must be specified in domain policy. | ||
More Info
For more information on these recommended settings in enterprise client environments, and for additional recommendations for configuring these settings in legacy client and high security client environments, refer to the Windows Server 2003 Security Guide found at http://www.microsoft.com/downloads/details.aspx?FamilyID=8a2643c1-0685-4d89-b655-521ea6c7b4db&displaylang=en. Additional recommendations for securing client computers can be found in the Windows XP Security Guide v2 found at http://www.microsoft.com/downloads/details.aspx?FamilyId=2D3E25BC-F434-4CC6-A5A7-09A8A229F118&displaylang=en.
Note
The Local Policies section has nearly 75 security option settings. Table 5-2 lists best practice settings for only the settings that are very important for most computers on the network. For more information on all recommended settings as well as recommended values, refer to the Security Template snap-in and Security Configuration Wizard and the appropriate files that these tools generate. For help on this procedure, refer to Chapter 15 in this book. Also see the sections later in this chapter on hardening servers and hardening clients, which cover best practice configurations for various server and client scenarios.
The Event Log security area defines attributes related to the application, security, and system logs: maximum log size, access rights for each log, and retention settings and methods. The application log records events generated by programs; the security log records security events, including logon attempts, object access, and changes to security, depending on what is audited; and the system log records operating system events.
Table 5-3 lists some best practice configurations for configuring these settings in policy that applies to domain controllers and member servers in enterprise client environments—that is, where client computers are running Windows 2000 Professional or Windows XP Professional and where all domain controllers are running Windows 2000 or later.
Table 5-3. Best-Practice Event Log Settings
Event Log Setting | Best Practice Setting |
|---|---|
Prevent local guests group from accessing application log | Enabled |
Prevent local guests group from accessing security log | Enabled |
Prevent local guests group from accessing system log | Enabled |
Retention method for security log | Overwrite events as needed |
More Info
For more information on these recommended settings in enterprise client environments, and for additional recommendations for configuring these settings in legacy client and high security client environments, refer to the Windows Server 2003 Security Guide found at http://www.microsoft.com/downloads/details.aspx?FamilyID=8a2643c1-0685-4d89-b655-521ea6c7b4db&displaylang=en. Additional recommendations for securing client computers can be found in the Windows XP Security Guide v2 found at http://www.microsoft.com/downloads/details.aspx?FamilyId=2D3E25BC-F434-4CC6-A5A7-09A8A229F118&displaylang=en.
The Restricted Groups security setting allows an administrator to define two properties for security-sensitive groups ("restricted" groups): Members and Member Of. The Members list defines who does and does not belong to the restricted group. The Member Of list specifies which other groups the restricted group belongs to.
When Restricted Groups are configured, the existing members of that group are removed. After the policy is completed, the members of the group will be only those users and groups that are listed on the Members list.
Caution
If a Restricted Groups policy is defined and Group Policy is refreshed, any current member not on the Restricted Groups policy members list is removed. This can include default members, such as administrators.
Note
Restricted Groups are an excellent solution to configure clients and member servers, but should not be used for Active Directory groups. If the Members list is empty, the group will have no members—not even those that are currently configured in the group. On the other hand, if the Members Of list is empty, it just means that the policy setting is not specifying any additional groups in which the group should be a member.
As a best practice, you should control the membership of local groups that reside on member servers and clients within the Active Directory domain. Some of the groups you will want to control include those with advanced or administrative privileges, as shown in Table 5-4.
Table 5-4. Best-Practice Restricted Groups Configurations
Group | Best Practice Group Members |
|---|---|
Administrators | Administrator Domain Admins |
Power Users | Domain user accounts that need this privilege on the server or client |
Backup Operators | Domain administrators or local administrators, not standard domain user accounts |
More Info
For additional information on using Restricted Groups to secure domain controllers and member servers running Windows 2000 or later in enterprise environments, see the Windows Server 2003 Security Guide found at http://www.microsoft.com/downloads/details.aspx?FamilyID=8a2643c1-0685-4d89-b655-521ea6c7b4db&displaylang=en.
The System Services section of the security template allows you to define the behavior of system services on all computers in the enterprise. You can first specify how the system service will start when the computer starts:
Manual
Automatic
Disabled
Specifying how the system service will start does not affect whether the user of the computer can start or stop the service. As a result, this section of the template also allows the administrator to control the access permissions for each service. This includes the permissions to start, stop, or pause the service.
Some services are commonly controlled to harden the server or client. These services either have well-known exploits or are routinely targeted by attackers due to the access the attacker would gain if he could exploit the service. The following services are commonly secured for servers and clients:
In addition to controlling these services, you should also consider the following best practices with regard to system services:
Test all services that you disable using this section of the security template. Some services are required for the operating system or applications to function properly.
If you choose to set the system service startup to Automatic, perform adequate testing to verify that the service can start without user intervention.
For performance optimization, set unnecessary or unused services to start as Manual.
More Info
For more information on securing system services on domain controllers and member servers running Windows 2000 or later in enterprise environments, see the Windows Server 2003 Security Guide found at http://www.microsoft.com/downloads/details.aspx?FamilyID=8a2643c1-0685-4d89-b655-521ea6c7b4db&displaylang=en.
The Registry section allows you to define access permissions and audit settings for registry keys, including the discretionary access control list (DACL) and the system access control list (SACL) on any registry key. You also use this section to control all domain members—servers and clients alike. To take full advantage of the power of this section, you must also consider the best way to implement these new access permissions for registry keys. Here are some general and specific best practices to consider as you implement your registry changes:
Always make a backup of the registry before making changes. For Windows XP and Windows Server 2003 computers, you do this by updating your Automated System Recovery (ASR) feature.
Do not intermix registry keys or permissions on different operating systems. Windows NT, Windows 9x, Windows 2000, Windows XP, and Windows Server 2003 operating systems are not identical with regard to the registry. You must configure the registries correctly for the specific operating system you are targeting.
Limit the number of users and groups that have access to the registry. This is the key benefit of this section of the security template. You can add or remove any user or group account to the DACL or SACL of any registry key.
Don’t be too restrictive. Although you have ultimate power to control permission to the registry, you must be careful not to break applications and services. It is always best to test configurations in a non-production environment and then deploy the settings to production computers after you know that your settings will not cause problems.
The File System section allows you to define access permissions and audit settings for files and folders. This includes both the DACL and SACL on any file and folder. You also use this section to control all domain members—servers and clients alike. To take full advantage of the power of this section, you must also consider the best way to implement these new access permissions for these resources. Consider the following general and specific best practices as you implement your changes:
Assign permissions to groups rather than to users. It is more efficient to configure DACLs and SACLs for groups than it is for individual accounts.
Use Deny permissions for special cases only. Troubleshooting and tracking access issues related to Deny configurations is difficult, so you should use Deny permissions for two reasons only. First, use the Deny permission to exclude a subset of a group that has Allowed permissions. Second, if you want to exclude one special permission when you have already granted full control to a user or a group, you can use the Deny permission.
Don’t be too restrictive. Avoid changing the default permissions on file system objects, especially system folders and root folders. Changing these permissions can be too restrictive, causing unexpected access problems for applications or the operating system.
Never deny the Everyone group access to an object. The Everyone group includes all users, including the Administrator.
Configure permissions as high up in the folder structure as possible. This reduces the overall complexity of your permissions and reduces the need to troubleshoot access issues. This approach relies on the inheritance built in to the folder permissions to propagate your permissions down through the folder and file structure.
Security templates are just text files, but you should not modify them using Microsoft Word or Notepad on a regular basis. The files can become quite large, and it can be hard to figure out the syntax used within each section of the template file. Some built-in tools are available that can help you access, create, and modify these templates.
The Security Templates snap-in is one of the many tools available within the MMC, which we introduced earlier in the chapter. The tool opens at the default storage location for security templates, C:WindowsSecurityTemplates.
Follow these steps to open the Security Template snap-in:
Click Start, Run, type mmc in the Run dialog box, and then click OK.
On the File menu, click Add/Remove Snap-In, and then click Add.
Scroll down to the Security Templates snap-in and select it.
In the Add Standalone Snap-in dialog box, click Add.
In the Add Standalone Snap-in dialog box, click Close.
In the Add/Remove Snap-in dialog box, click OK.
The Security Templates snap-in is the primary tool used to create and manipulate security templates. It allows you to perform the following tasks:
View security template settings
Modify security template settings
Copy and paste security settings from one template to another
Copy a security template
Create a new, unconfigured security template
Configure new search paths for stored security templates
More Info
For more information about how to use the Security Templates snap-in to manage security templates, see Chapter 15.
The Security Configuration and Analysis snap-in is a tool that uses the security templates created by the Security Templates snap-in. As the name suggests, the Security Configuration and Analysis snap-in is responsible for configuring and analyzing security on a computer. Both of these tasks are accomplished by using a security template. You access and launch this snap-in in the same way that you access and launch the Security Templates snap-in, except that you select the Security Configuration and Analysis snap-in in step 3 in the procedure under "Security Templates Snap-in" in this chapter.
More Info
For more information about how to use the Security Configuration and Analysis snap-in to configure and analyze security on a computer using security templates, see Chapter 15.
The Security Configuration Wizard is a new tool provided with Windows Server 2003 Service Pack 1. It does not create and manipulate security templates—rather, it uses security templates to help generate security policies. The next section explains how to access and use this wizard.
The Security Configuration Wizard is a new tool in Windows Server 2003 Service Pack 1 that uses security templates to help generate security policies. It is similar to the intentions of both the Security Templates snap-in and Security Configuration and Analysis snap-in, but with distinctly different results. The tool is also similar to the Configure Your Server Wizard, which is also available on all Windows Server 2003 computers, in that it relies on roles.
The Security Configuration Wizard is not installed by default when you install SP1 on your Windows Server 2003 computers. To install the wizard, follow these steps:
Click Start, Control Panel, and Add Or Remove Programs.
Click the Add/Remove Windows Components icon in the left pane.
Scroll down and select the Security Configuration Wizard check box in the Components area. The wizard now appears on the Administrative Tools menu.
The wizard also comes bundled with the SCW Viewer, which allows you to view security policies in much the same way that the Security Templates snap-in allows you to view security templates. The SCW Viewer can be accessed from within the wizard, or you can just run the SCW Viewer from the command line.
The Security Configuration Wizard has the following sections:
Role-based service configuration
Network security
Registry settings
Audit policy
Note
The Security Configuration Wizard might have additional sections if other server components have been installed. For example, if the Application Server role has been installed, the wizard has an additional section called Internet Information Services, which you can use to harden your Web server.
The most important concept that the Security Configuration Wizard uses is server roles. Server roles are logical functions that a Windows Server 2003 computer can host and provide services for. The concept of server roles is not new—it was first introduced in the Configure Your Server Wizard, which was first introduced with Windows 2000 Server.
You can choose from approximately 60 server roles within the Security Configuration Wizard. Here are a few of them, to give you an idea of how the functions are broken down:
Application server
Certificate server
DFS server
DHCP server
DNS server
Domain controller
File server
Message queuing server
Microsoft Operations Manager 2005 server
Print Server for UNIX (LDP)
Remote Storage server
SMTP server
Microsoft Windows SharePoint® Services
These server roles are designed to help you choose which functions your server or servers will support. You choose these functions so the Security Configuration Wizard can help you configure services, open ports, and include other server roles that need to function on the server that is updated by the policy. Figure 5-2 illustrates how the wizard organizes these roles and provides information to help you understand each role and what the wizard will do with regard to services, ports, and other roles.

The Security Configuration Wizard is not responsible for installing the server roles that you configure and store in the security policies. This task is left to the Configure Your Server Wizard. Instead, the Security Configuration Wizard security policy, when applied to a computer, enables the services and open the ports that are associated with the roles you specified. It also disables services and closes ports that are not associated with the roles you specified.
Caution
If you omit a server role when you create the security policy using the Security Configuration Wizard, the server might not function properly after the security policy is applied. You can fix this by enabling the appropriate services and opening the correct ports or by rolling back the security policy using the Security Configuration Wizard. You can then modify the security policy and reapply it to the server so that it will function properly. It is always a good idea to test your security policies for incorrect settings or incompatible configurations before you deploy them.
The server roles are the largest portion of the Security Configuration Wizard. However, the wizard and the security policy also have other server role–dependent and server role–independent sections. These areas help you create a secure foundation for the computers on the network. Here is a list of those additional areas and some information to help you understand best practices for hardening computers.
Client Features. A subset of the Server Roles section of the wizard. It might seem a bit odd to have a section named "Client Features" on a server, but servers perform many client activities on the network. This section of the wizard enables services that are related to the client features you select. Figure 5-3 shows the Select Client Features page. Table 5-5 specifies which services are associated with each of the available client features.
Table 5-5. Client Features and Their Required Services
Client Feature
Required Services
Automatic update client
Background Intelligent Transfer Service
Automatic Updates
DHCP client
DHCP client
DNS client
DNS Client
DNS registration client
DNS Client
Domain member
Net Logon
Network Location Awareness
Windows Time
Microsoft networking client
Workstation, TCP/IP NetBIOS helper
Remote access client
Remote Access Connection Manager
Telephony
WINS client
Server
TCP/IP NetBIOS helper
Administration And Other Options. A subset of the server roles that you specify for the server. These options are used to enable services and open ports. When you think "administration," you typically think of tools or applications. This section offers more than that—it targets the Windows services and features that help support the tools and applications you want to use. Table 5-6 lists some of the options in this section and specific services that are associated with each option.
Table 5-6. Administration And Other Options Settings
Option
Required Services
Alerter
Alerter
Messenger
Workstation
TCP/IP NetBIOS helper
Browse master
Computer Browser
Server
Workstation
TCP/IP NetBIOS helper
Remote Desktop administration
Terminal Services
Server
RSoP planning mode
Resultant Set of Policy Provider
Shadow copying
MS Software Snapshot Provider
Volume Snapshot
Time synchronization
Windows Time
Windows firewall
Windows Firewall/Internet Connection Sharing (ICS)
Wireless networking
Wireless Zero Configuration
Network Location Awareness
Network Provisioning Service
Additional Services. Other server role–independent services might be installed on the server that is being used as the baseline for the wizard. You can control these additional services within the wizard to enable or disable the service when the security policy is deployed.
Unspecified Services. The wizard creates the security policy based solely on a baseline server. Therefore, the only services the wizard is aware of are those that are configured on the server or stored in the security policy from a different baseline server. The servers that receive the security policy might have additional services that are not associated with server roles or listed under Additional Services. The wizard gives you an opportunity to control these services in one of two ways:
Do not change the startup mode for the service
Disable the service

This section allows you to configure inbound ports using Windows Firewall. The ports you configure are based on the roles and administrative options selected earlier in the wizard. The configurations also allow you to restrict access to ports and indicate whether port traffic is signed or encrypted using Internet Protocol Security (IPSec).
This section allows you to configure protocols used to communicate with other computers on the network. You can disable use of earlier versions of communication protocols needed to communicate with older Windows operating systems. These earlier communication protocols are vulnerable to exploits such as password cracking and man-in-the-middle attacks. The wizard allows you to configure and control the following aspects of authentication and communication on the network:
Named Pipe Firewall
Server Message Block (SMB) security signatures
LDAP signing
LAN Manager authentication protocol and levels
After you work through all of the sections of the Security Configuration Wizard, you can save the security policy to the local computer or a centralized network location. Figure 5-4 shows the wizard page where you save the file, as well as the default location where security policies are stored.

Important
Remember that the security policy file is saved with an .xml extension. This is important to remember because you might need to find these files at a later time. Also, the .xml file extension is not supported in a GPO, so a native security policy is not compatible with GPOs. The next section discusses how to convert security policies to a format that is compatible with deployment using GPOs.
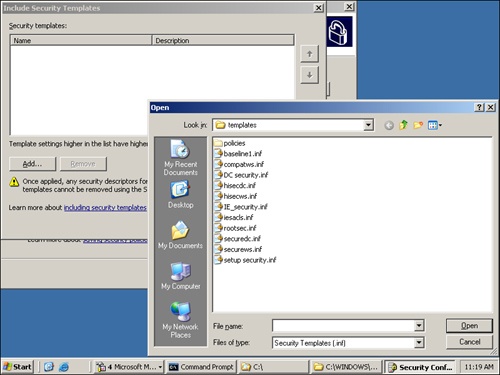
You can also click the Include Security Templates button on that wizard page to include one or more existing security templates (generated by the Security Templates snap-in) in your security policy. If you add more than one security template, you can prioritize them in case any configuration conflicts occur between them. However, the security settings configured in the wizard will have precedence over all security templates included in the final security policy file. Figure 5-5 shows the wizard page for adding security templates to security policies and prioritizing them.
Note
The Security Configuration Wizard uses two security templates by default: DefaultSACLs.inf and SCWAudit.inf. These files establish permissions on registry keys and the file system. You might see these security templates listed with the other security templates that you import to the security policy during this final stage of creating the policy.
To harden servers by using the Security Configuration Wizard and the associated security policies, you must consider the areas that the wizard covers and how they fit into your overall scheme for securing and protecting your servers. The wizard can help reduce the attack surface of servers by allowing you to design security policies based on the server’s specific role. Here are some best practices for using the wizard to optimize the hardening of your servers:
Identify, organize, and target similar servers. The wizard is designed to work with other methods that are typically used to harden servers, which are based on server roles. Take advantage of this relationship as you develop and author security polices and distribute them to servers in the organization. Here are some ways you can do this:
Author only one security policy for a group of servers. Administrators can use the wizard once to author a security policy, save the policy, and then apply it to all servers that perform the job function. Others servers that perform the same, or similar, functions can be configured with the same security policy.
Group servers with similar functions into one organizational unit (OU). Administrators can use the same security policy for servers that perform similar job functions by grouping those servers into a single OU. They can then use the wizard’s transform operation to quickly and easily distribute the new security policy to the OU containing the servers. The transform operation can apply the security policy to a domain or an OU.
Select a prototype server with similar services as the target servers. The administrator must select a server from which the security policy will be derived. Make sure this server matches the target servers at the service level as much as possible. The security policy disables any service on the server that is contained in the Security Configuration Database but was not present on the prototype server when the policy was created.
Tip
You can use the Security Configuration Wizard to configure any unnecessary service that is not in the Security Configuration Database and is therefore not defined in the security policy that you created with the Security Configuration Wizard. You can disable the service or leave the startup mode of the service unchanged.
Test new security policies offline before deployment. Given the wide variety of security settings included in a standard security policy, it is essential that you test the policies on a server that is configured as closely to the target servers as possible. The settings configured in the new security policies might cause compatibility issues with applications or services. Do this testing on a nonproduction computer that can’t hinder or adversely affect the production network before you apply the policies to production servers.
Create one complete security policy. Use the Security Configuration Wizard to author a single security policy that contains all desired security settings for a server. This simplifies configuration, rollback, and analysis. For simple configuration and rollback, a single security policy for a machine, or set of machines, is much easier to understand and update than a series of policies. If a security policy defines all the desired settings for a server, you can generate a compliance report by executing one scan, which facilitates analysis when you use the scwcmd/analyze command.