
As discussed previously, the GPMC allows you to create and link GPOs as separate operations or as a single operation on a selected domain, site, or OU. You can, for example, create a GPO without linking it to any domain, site, or OU. You can also create a GPO for a selected domain or OU and have the GPO linked automatically to that domain or OU. With sites, the only way to create and link a GPO is to do so with separate operations.
How you create GPOs is a matter of preference. There is no right or wrong way. Some administrators prefer to create a GPO first and then link it to a domain, site, or OU. Other administrators prefer to create a GPO and have it linked automatically to a specific domain, site, or OU. However, you should remember that a GPO can be linked to multiple containers (domains, sites, and OUs) and at multiple levels.
Note
When you create and link a GPO to a site, domain, or OU, the GPO is applied to the user and computer objects in that site, domain, or OU according to the Active Directory options governing inheritance, the precedence order of GPOs, and other settings. In other words, these options can affect the way policy settings are applied. For details, see the section in Chapter 3 titled "Managing Group Policy Inheritance."
In an Active Directory forest, only Enterprise Admins and forest root Domain Admins can create and modify sites and site links. Similarly, only Enterprise Admins and forest root Domain Admins can create and manage GPOs for sites. Site-level GPOs aren’t used that often, and when they are implemented, they are used primarily for managing network-specific policy settings—which is in keeping with the purpose of sites to help you better manage the physical structure of the network (your subnets). For example, you might want to use site-level GPOs to manage IP security, Internet Explorer configurations for proxies, wireless networking, or public key security on a per-subnet basis.
In the GPMC, you can create and link a new site GPO by completing the following steps:
Start the GPMC by clicking Start, Programs or All Programs, Administrative Tools, and then Group Policy Management Console. Or type gpmc.msc at a command prompt.
Expand the entry for the forest you want to work with, and then expand the related Domains node by double-clicking it.
Right-click Group Policy Objects, and then select New.
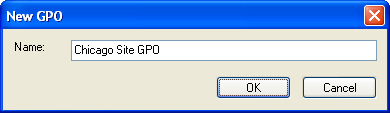
In the New GPO dialog box (shown in Figure 2-9), type a descriptive name for the new GPO, and then click OK. You’ll see the new GPO listed in the Group Policy Objects container.
Right-click the new GPO, and then choose Edit. This opens the Group Policy Object Editor.
Configure the necessary policy settings, and then close the Group Policy Object Editor.
In the GPMC, expand the Sites node and select the site you want to work with. In the right pane, the Linked Group Policy Objects tab shows the GPOs that are currently linked to the selected site (if any).
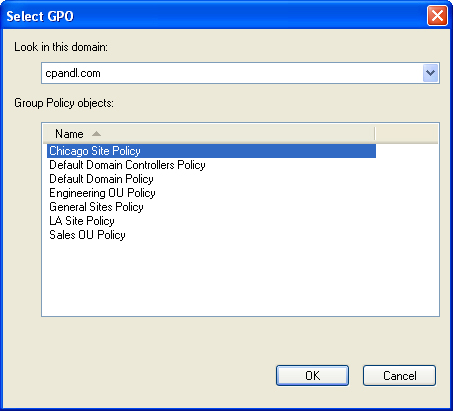
Right-click the site to which you want to link the GPO, and then select Link An Existing GPO. Use the Select GPO dialog box (shown in Figure 2-10) to select the GPO to which you want to link, and then click OK.
Note
Sites aren’t listed automatically. If you don’t see the site you want to work with, right-click Sites and then select Show Sites. You can then select the available sites that you want to display.
The GPO is now linked to the site. In the right pane, the Linked Group Policy Objects tab should show the linked GPO. Once Group Policy is refreshed for computers and users in the site, the policy settings in the GPO will be applied. To learn how to manually refresh Group Policy, see "Refreshing Group Policy Manually" in Chapter 3.
Computer policy is refreshed during startup when the computer connects to the network. User policy is refreshed during logon when the user logs on to the network. Thus you can verify that computer policy settings have been applied as expected by restarting a workstation or server in the site and then checking the computer. To verify user policy settings, have a user who is logged on to a computer in the site log off and then log back on. You can then verify that user policy settings have been applied as expected.
In an Active Directory forest, only Enterprise Admins, Domain Admins, and those who have been delegated permissions can manage objects in domains. You must be a member of Enterprise Admins or Domain Admins or be specifically delegated permissions to be able to work with GPOs in a domain. With regard to Group Policy, delegated permissions are primarily limited to management of Group Policy links and RSoP for the purposes of logging and planning.
Unlike site GPOs, which aren’t frequently used, GPOs are used widely in domains. In the GPMC, you can create and link a new GPO for a domain as two separate operations or as a single operation.
To create a GPO and then link it separately for a domain, complete the following steps:
Start the GPMC by clicking Start, Programs or All Programs, Administrative Tools, and then Group Policy Management Console. Or type gpmc.msc at a command prompt.
Expand the entry for the forest you want to work with, and then expand the related Domains node by double-clicking it.
Right-click Group Policy Objects and then select New. In the New GPO dialog box, type a descriptive name for the new GPO and then click OK.
The new GPO is now listed in the Group Policy Objects container. Right-click the GPO, and then choose Edit.
In the Group Policy Object Editor, configure the necessary policy settings and then close the Group Policy Object Editor.
In the GPMC, expand the Domains node and then select the domain you want to work with. In the right pane, the Linked Group Policy Objects tab shows the GPOs that are currently linked to the selected domain (if any).
Right-click the domain to which you want to link the GPO, and then select Link An Existing GPO. Use the Select GPO dialog box to select the GPO to which you want to link, and then click OK.
The GPO is now linked to the domain. In the right pane, the Linked Group Policy Objects tab should show the linked GPO as well.
When Group Policy is refreshed for computers and users in the domain, the policy settings in the GPO are applied. To verify that computer policy settings have been applied as expected, restart a workstation or server in the domain and then check the computer. To verify user policy settings, have a user who is logged on to a computer in the domain log off and then log back on. You can then verify that user policy settings have been applied as expected.
In the GPMC, you can create and link a domain GPO as a single operation by completing the following steps:
Start the GPMC by clicking Start, Programs or All Programs, Administrative Tools, and then Group Policy Management Console. Or type gpmc.msc at a command prompt.
Expand the entry for the forest you want to work with, and then expand the related Domains node by double-clicking it.
Right-click the domain you want to work with, and then select Create And Link A GPO Here.
In the New GPO dialog box, type a descriptive name for the new GPO and then click OK.
The GPO is created and linked to the domain. Right-click the GPO, and then choose Edit.
In the Group Policy Object Editor, configure the necessary policy settings and then close the Group Policy Object Editor.
When Group Policy is refreshed for computers and users in the domain, the policy settings in the GPO are applied. To verify that computer policy settings have been applied as expected, restart a workstation or server in the domain and then check the computer. To verify user policy settings, have a user who is logged on to a computer in the domain log off and then log back on. You can then verify that user policy settings have been applied as expected.
In an Active Directory forest, only Enterprise Admins, Domain Admins, and those that have been delegated permissions can manage objects in OUs. You must be a member of Enterprise Admins or Domain Admins or be specifically delegated permissions to be able to work with GPOs in OUs. With regard to Group Policy, delegated permissions are primarily limited to management of Group Policy links and RSoP for the purposes of logging and planning.
Unlike site GPOs, which aren’t frequently used, GPOs are used widely in OUs. The GPMC is fairly versatile when it comes to OUs. Not only can you use it to create and link a new GPO for an OU, but you can also create any necessary OUs without having to work with Active Directory Users And Computers.
To create an OU in the GPMC, follow these steps:
Start the GPMC by clicking Start, Programs or All Programs, Administrative Tools, and then Group Policy Management Console. Or type gpmc.msc at a command prompt.
Expand the entry for the forest you want to work with, and then expand the related Domains node by double-clicking it.
Right-click the domain in which you want to create the OU, and then select New Organizational Unit.
In the New Organizational Unit dialog box, type a descriptive name for the OU and then click OK.
To create a GPO for an OU and then link it separately, complete the following steps:
Start the GPMC by clicking Start, Programs or All Programs, Administrative Tools, and then Group Policy Management Console. Or type gpmc.msc at a command prompt.
Expand the entry for the forest you want to work with, and then expand the related Domains node by double-clicking it.
Right-click Group Policy Objects, and then select New. In the New GPO dialog box, type a descriptive name for the new GPO and then click OK.
The new GPO is now listed in the Group Policy Objects container. Right-click the GPO, and then choose Edit.
In the Group Policy Object Editor, configure the necessary policy settings and then close the Group Policy Object Editor.
In the GPMC, expand the Domains node and select the OU you want to work with. In the right pane, the Linked Group Policy Objects tab shows the GPOs that are currently linked to the selected OU (if any).
Right-click the OU to which you want to link the GPO, and then select Link An Existing GPO. Use the Select GPO dialog box to select the GPO to which you want to link, and then click OK.
The GPO is now linked to the OU. In the right pane, the Linked Group Policy Objects tab should show the linked GPO as well.
When Group Policy is refreshed for computers and users in the OU, the policy settings in the GPO are applied. To verify that computer policy settings have been applied as expected, restart a workstation or server in the OU and then check the computer. To verify user policy settings, have a user who is logged on to a computer in the OU log off and then log back on. You can then verify that user policy settings have been applied as expected.
In the GPMC, you can create and link an OU GPO as a single operation by completing the following steps:
Start the GPMC by clicking Start, Programs or All Programs, Administrative Tools, and then Group Policy Management Console. Or type gpmc.msc at a command prompt.
Expand the entry for the forest you want to work with, and then expand the related Domains node by double-clicking it.
Right-click the OU you want to work with, and then select Create And Link A GPO Here.
In the New GPO dialog box, type a descriptive name for the new GPO and then click OK.
The GPO is created and linked to the OU. Right-click the GPO, and then choose Edit.
In the Group Policy Object Editor, configure the necessary policy settings and then close the Group Policy Object Editor.
When Group Policy is refreshed for computers and users in the OU, the policy settings in the GPO are applied. To verify that computer policy settings have been applied as expected, restart a workstation or server in the OU and then check the computer. To verify user policy settings, have a user who is logged on to a computer in the OU log off and then log back on. You can then verify that user policy settings have been applied as expected.