
The marketing events should be accountable in terms of their ROI. Any marketing campaign doesn't end with the successful execution, it needs to be measured in terms of the response received and key patterns identified.
In the previous chapter, you learned how to automate your campaign management process using Microsoft Dynamics CRM 2013. In this chapter, you will take a step further to understand how Microsoft Dynamics CRM 2013 can also let you reconcile campaign responses and help measure performance. You will learn how to capture and manage campaign responses using Microsoft Dynamics CRM 2013.
We will cover the following topics in this chapter:
- Capturing a campaign response
- Managing a campaign response
- Converting a campaign response to a lead or an opportunity
- Measuring a campaign response and ROI
A campaign response in Microsoft Dynamics CRM 2013 allows you to capture the result of a campaign. Campaign responses could be manual, where you record the response based on inputs you received from a feedback channel. Microsoft Dynamics CRM 2013 also allows you to automate the process of creating a corresponding response. This is possible for e-mail campaigns. Microsoft Dynamics CRM 2013 provides the option to configure an e-mail tracking system that can trigger an e-mail reply received from a user to automatically create a campaign response.
The marketing Systems Settings dialog box shown in the following screenshot provides a set of options to automate the campaign response capturing process:

Marketing System Settings
The second option in the Marketing tab of System Settings dialog box enables you to specify whether you want campaign responses to be automatically created from an incoming e-mail activity. If e-mail tracking is enabled, you will also have the option to let users get a "Do Not Send Marketing Material" link in the e-mail, clicking on which will auto-unsubscribe them.
In addition to manually or autocreating a campaign response, you can also promote distributed campaign activities into a response or import a response using the Import Data Wizard in Microsoft Dynamics CRM 2013. Let's first explore the steps to create a campaign response.
In your Microsoft Dynamics CRM 2013 instance, perform the following steps to create a campaign response:
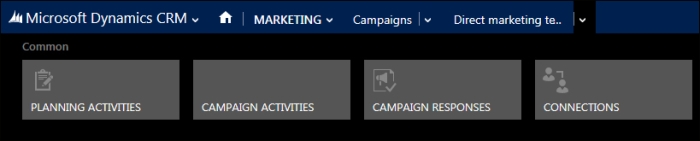
- Go to the list of campaigns from the top navigation menu by selecting the MARKETING tab.
- You will see the familiar My Campaigns page you used to create campaigns in the previous chapter.
- Click on your campaign to navigate to the details page.
- In the campaign details page, the top navigation provides an option to navigate to the CAMPAIGN RESPONSES page as shown in the following screenshot:
Navigating to CAMPAIGN RESPONSES
- In the Campaign Response Associated View, click on Add New Campaign Response to launch the CAMPAIGN RESPONSE window. You can specify a subject, customer details, and a channel through which the response will be received, as shown in the following screenshot. After completing the details, save the campaign response.
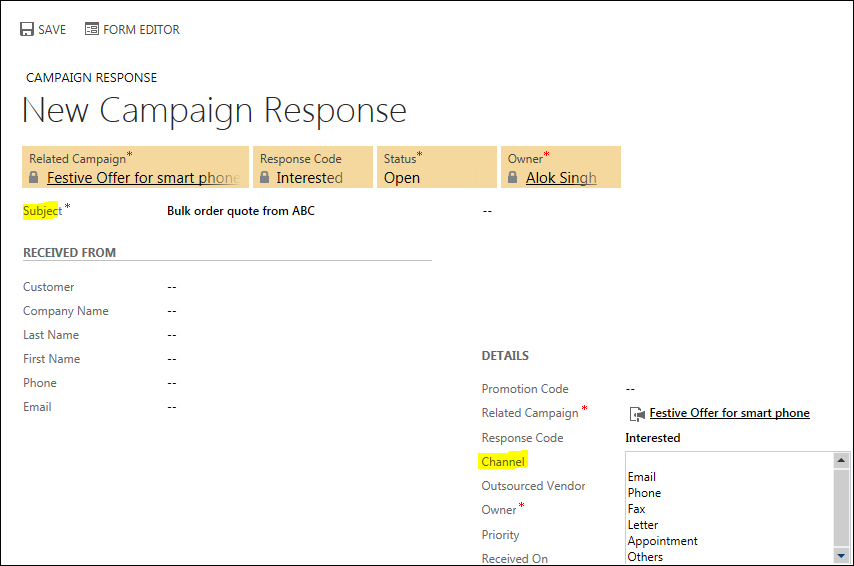
Creating a new campaign response
The default response represented by Response Code is set to Interested. You can however change it to Not Interested, Do Not Send Marketing Material, or Error depending on the response you captured from the customer.
Note that if the response is automated, then Channel will automatically indicate the activity from where the response was generated, and the fields such as Subject and Response Code will be auto populated.
A campaign response can also be created by promoting a campaign activity into a response. Perform the following steps to promote an e-mail activity into a campaign response:
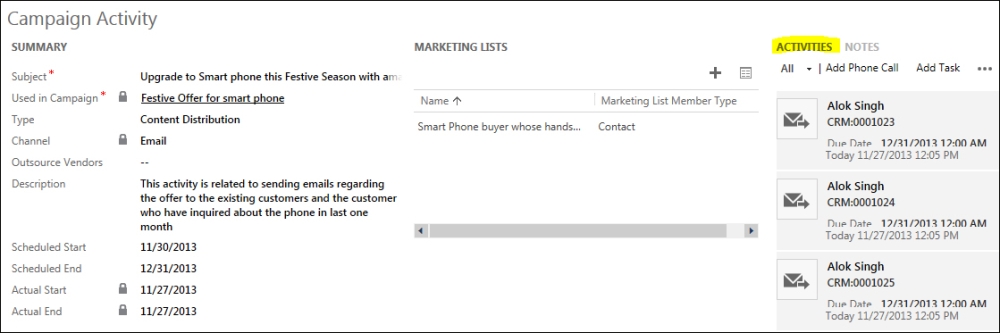
- Open CAMPAIGN ACTIVITIES from the list under your campaign. Note that the activity must be distributed.
- From the list of activities on the Campaign Activity details page, click on any one of the e-mail activity buttons and open the e-mail. The promotable distributed campaign activities are shown in the following screenshot:
Distributed campaign activity that can be promoted
- In the command bar at the top of the e-mail activity, you will see the option Promote to Response under the dropdown of the CONVERT TO command, as shown in the following screenshot:

Converting a Campaign Activity
- A New Campaign Response page will be created with information from the Email Campaign Activity. You will notice that the Subject and other details are retained. You can now save the campaign response.
Now that you have successfully created a campaign response in Microsoft Dynamics CRM 2013, let's explore the tasks you can perform to manage the lifecycle of a response.