
Let's write our first vertex and fragment shaders:
- In our application, we only need to change the used material. Change it to
MyMaterial13. Also remove the second quad:manual->begin("MyMaterial13", RenderOperation::OT_TRIANGLE_LIST); - Now we need to create this material in our material file. First, we are going to define the fragment shader. Ogre 3D needs five pieces of information about the shader:
- The name of the shader
- In which language it is written
- In which source file it is stored
- How the main function of this shader is called
- In what profile we want the shader to be compiled
- All this information should be in the material file:
fragment_program MyFragmentShader1 cg { source Ogre3DBeginnersGuideShaders.cg entry_point MyFragmentShader1 profiles ps_1_1 arbfp1 } - The vertex shader needs the same parameter, but we also have to define a parameter that is passed from Ogre 3D to our shader. This contains the matrix that we will use for transforming our quad into camera space:
vertex_program MyVertexShader1 cg { source Ogre3DBeginnerGuideShaders.cg entry_point MyVertexShader1 profiles vs_1_1 arbvp1 default_params { param_named_auto worldViewMatrix worldviewproj_matrix } } - The material itself just uses the vertex and fragment shader names to reference them:
material MyMaterial13 { technique { pass { vertex_program_ref MyVertexShader1 { } fragment_program_ref MyFragmentShader1 { } } } } - Now we need to write the shader itself. Create a file named
Ogre3DBeginnersGuideShaders.cgin themediamaterialsprogramsfolder of your Ogre 3D SDK. - Each shader looks like a function. One difference is that we can use the
outkeyword to mark a parameter as an outgoing parameter instead of the default incoming parameter. Theoutparameters are used by the rendering pipeline for the next rendering step. Theoutparameters of a vertex shader are processed and then passed into the pixel shader as aninparameter. Theoutparameter from a pixel shader is used to create the final render result. Remember to use the correct name for the function; otherwise, Ogre 3D won't find it. Let's begin with the fragment shader because it's easier:void MyFragmentShader1(out float4 color: COLOR)
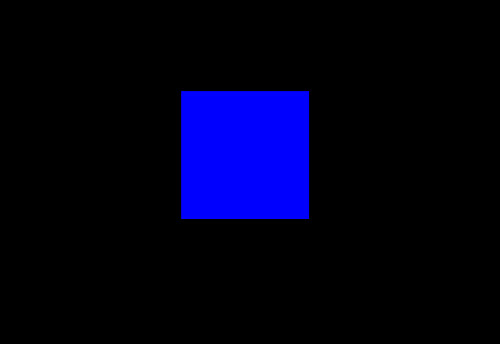
- The fragment shader will return the color blue for every pixel we render:
{ color = float4(0,0,1,0); } - That's all for the fragment shader; now we come to the vertex shader. The vertex shader has three parameters the position for the vertex, the translated position of the vertex as an
outvariable, and as a uniform variable for the matrix we are using for the translation:void MyVertexShader1( float4 position : POSITION, out float4 oPosition : POSITION, uniform float4x4 worldViewMatrix)
- Inside the shader, we use the matrix and the incoming position to calculate the outgoing position:
{ oPosition = mul(worldViewMatrix, position); } - Compile and run the application. You should see our quad, this time rendered in blue.
Quite a lot happened here; we will start with step 2. Here we defined the fragment shader we are going to use. As discussed before, Ogre 3D needs five pieces of information for a shader. We define a fragment shader with the keyword fragment_program, followed by the name we want the fragment program to have, then a space, and at the end, the language in which the shader will be written. As for programs, shader code was written in assembly and in the early days, programmers had to write shader code in assembly because there wasn't another language to be used. But also, as with general programming language, soon there came high-level programming to ease the pain of writing shader code. At the moment, there are three different languages that shaders can be written in: HLSL, GLSL, and CG. The shader language HLSL is used by DirectX and GLSL is the language used by OpenGL. CG was developed by NVidia in cooperation with Microsoft and is the language we are going to use. This language is compiled during the start up of our application to their respective assembly code. So shaders written in HLSL can only be used with DirectX and GLSL shaders with OpenGL. But CG can compile to DirectX and OpenGL shader assembly code; that's the reason why we are using it to be truly cross platform. That's two of the five pieces of information that Ogre 3D needs. The other three are given in the curly brackets. The syntax is like a property file first the key and then the value. One key we use is source followed by the file where the shader is stored. We don't need to give the full path, just the filename will do, because Ogre 3D scans our directories and only needs the filename to find the file.
Another key we are using is entry_point followed by the name of the function we are going to use for the shader. In the code file, we created a function called MyFragmentShader1 and we are giving Ogre 3D this name as the entry point for our fragment shader. This means, each time we need the fragment shader, this function is called. The function has only one parameter out float4 color : COLOR. The prefix out signals that this parameter is an out parameter, meaning we will write a value into it, which will be used by the render pipeline later on. The type of this parameter is called float4, which simply is an array of four float values. For colors, we can think of it as a tuple (r,g,b,a) where r stands for red, g for green, b for blue, and a for alpha: the typical tuple to description colors. After the name of the parameter, we got a : COLOR. In CG, this is called a semantic describing for what the parameter is used in the context of the render pipeline. The parameter :COLOR tells the render pipeline that this is a color. In combination with the out keyword and the fact that this is a fragment shader, the render pipeline can deduce that this is the color we want our fragment to have.
The last piece of information we supply uses the keyword profiles with the values ps_1_1 and arbfp1. To understand this, we need to talk a bit about the history of shaders. With each generation of graphics cards, a new generation of shaders have been introduced. What started as a fairly simple C-like programming language without even IF conditions are now really complex and powerful programming languages. Right now, there are several different versions for shaders and each with a unique function set. Ogre 3D needs to know which of these versions we want to use. ps_1_1 means pixel shader version 1.1 and arbfp1 means fragment program version 1. We need both profiles because ps_1_1 is a DirectX specific function set and arbfp1 is a function subset for OpenGL. We say we are cross platform, but sometimes we need to define values for both platforms. All subsets can be found at http://www.ogre3d.org/docs/manual/manual_18.html. That's all needed to define the fragment shader in our material file. In step 3, we defined our vertex shader. This part is very similar to the fragment shader definition code; the main difference is the default_params block. This block defines parameters that are given to the shader during runtime. param_named_auto defines a parameter that is automatically passed to the shader by Ogre 3D. After this key, we need to give the parameter a name and after this, the value keyword we want it to have. We name the parameter worldViewMatrix; any other name would also work, and the value we want it to have has the key worldviewproj_matrix. This key tells Ogre 3D we want our parameter to have the value of the WorldViewProjection matrix. This matrix is used for transforming vertices from local into camera space. A list of all keyword values can be found at http://www.ogre3d.org/docs/manual/manual_23.html#SEC128. How we use these values will be seen shortly.
Step 4 used the work we did before. As always, we defined our material with one technique and one pass; we didn't define a texture unit but used the keyword vertex_program_ref. After this keyword, we need to put the name of a vertex program we defined, in our case, this is MyVertexShader1. If we wanted, we could have put some more parameters into the definition, but we didn't need to, so we just opened and closed the block with curly brackets. The same is true for fragment_program_ref.
Now that we have defined all necessary things in our material file, let's write the shader code itself. Step 6 defines the function head with the parameter we discussed before, so we won't go deeper here. Step 7 defines the function body; for this fragment shader, the body is extremely simple. We created a new float4 tuple (0,0,1,0), describes the color blue and assigns this color to our out parameter color. The effect is that everything that is rendered with this material will be blue. There isn't more to the fragment shader, so let's move on to the vertex shader. Step 8 defines the function header. The vertex shader has 3 parameters two are marked as positions using CG semantics and the other parameter is a 4x4 matrix using float4 as values named worldViewMatrix. Before the parameter type definition, there is the keyword uniform.
Each time our vertex shader is called, it gets a new vertex as the position parameter input, calculates the position of this new vertex, and saves it in the oPosition parameter. This means with each call, the parameter changes. This isn't true for the worldViewMatrix. The keyword uniform denotes parameters that are constant over one draw call. When we render our quad, the worldViewMatrix doesn't change while the rest of the parameters are different for each vertex processed by our vertex shader. Of course, in the next frame, the worldViewMatrix will probably have changed. Step 9 creates the body of the vertex shader. In the body, we multiply the vertex that we got with the world matrix to get the vertex translated into camera space. This translated vertex is saved in the out parameter to be processed by the rendering pipeline. We will look more closely into the render pipeline after we have experimented with shaders a bit more.