This time we won't modify the createScene() function; so just leave it as it is with the Sinbad instance and shadows:
- Create a new empty function named
createCamera()in theExampleApplicationclass:void createCamera() { } - Create a new camera named
MyCamera1and assign it to the membermCamera:mCamera = mSceneMgr->createCamera("MyCamera1"); - Set the position of the camera and let it look at the null point:
mCamera->setPosition(0,100,200);
mCamera->lookAt(0,0,0);
mCamera->setNearClipDistance(5);
- Now change the render mode to wireframe modus:
mCamera->setPolygonMode(Ogre::PM_WIREFRAME);
- Compile and run the application.
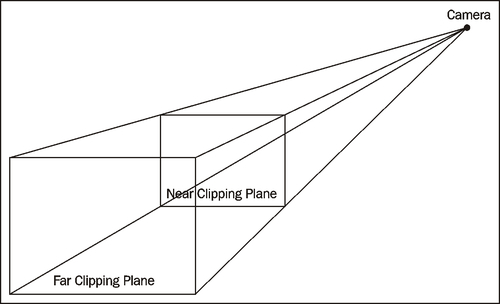
We overrode the createCamera() function, which initially created a camera and set it to a position. After creation, we set a position and used the lookat() function to set the camera up to look at the origin. The next step we did was setting the near clipping distance. A camera can only see parts of a 3D scene, so rendering it completely would be a waste of precious CPU and GPU time. To prevent this, before rendering, large parts of the scene are "cut out" from the scene by the SceneManager. Only objects visible to the camera are rendered. This step is called culling. Only those objects that are before the near clipping plane and behind the far clipping plane are rendered and then only when they are inside a pyramid; this is called the view frustum of the camera. The view frustum is a pyramid with the top cut off; only those objects that are inside the cut-off pyramid can be seen by the camera. More information can be found at http://www.lighthouse3d.com/opengl/viewfrustum/. We set the near clipping plane to 5. When you use a higher-value part of the scene which is near the camera, it will be culled and not visible.
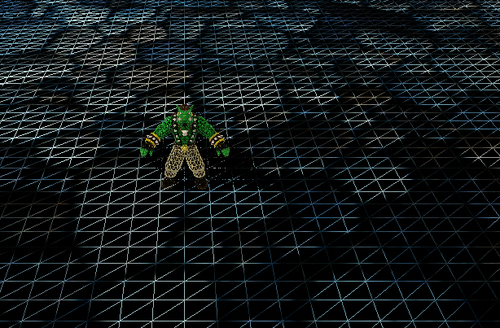
Then we changed the render mode to wireframe. This effect that we get when we press the R key, as suggested before, is the same as the one we got when we wanted to see the plane triangles. With R, this effect can also be undone. When the application starts, we now see a difference as compared to earlier; the camera is now above the instance of Sinbad and looks down on him. Before overriding the createCamera() function, the camera started hovering slightly over the plane looking at the origin. With setPosition(0,100,200), we set the camera higher than before; the following screenshot shows the change. One interesting aspect we can observe is that even after we have created our own instance of a camera, we can still navigate the scene as before. This is possible because we used the mCamera member variable from ExampleApplication. This keeps ExampleApplication in control of our camera and thus it can be modified. One important feature of a camera is that it can also be attached to a scene node and will react the same way an entity does when attached to a scene node.
Try using different positions and look at points to see how this affects the starting position of the camera.
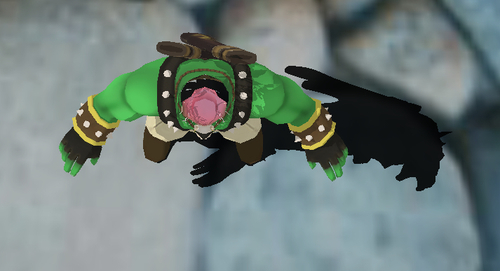
Also try increasing the near clipping distance and try out what effect this has. This should produce funny images like the following, where we can look into Sinbad's head. The near clipping distance was set to 50 to produce this image.