
Now that we've created an application that does something useful, it's time to deploy our new creation to our iOS device and explore our scene using the accelerometer. As we've run through this process before we can cover these details at a high-level, it's important to walk through this again just so that the process feels right.
- The first thing we need to do is to make sure that we're deploying the right type of application. When Unity originally created our new project it created it for desktop deployment. We need to change this in the Build Settings (File | Build Settings):
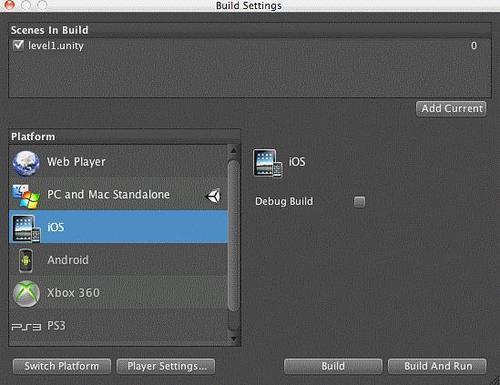
- An important step here is to make sure that any scenes that we want included in the build on our device are included.
- Click on the Add Current button and our level1 scene and all of the assets necessary for that scene will be included in the application when it is packaged for the device.
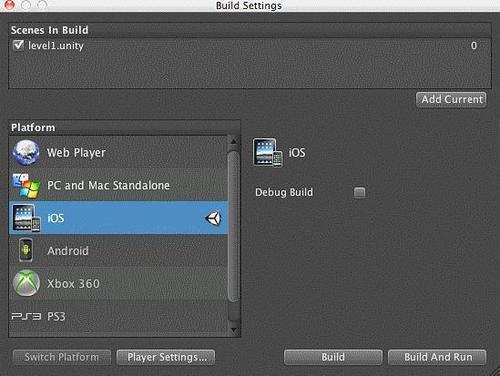
- Select the iOS platform as the target platform and click on the Switch Platform button. Unity will pause for a moment and make the necessary changes to the project so that it can be deployed to the new target platform:
With this done the only thing remaining is to change the build settings for the project so that Unity can communicate with XCode and have it construct the application for deployment.
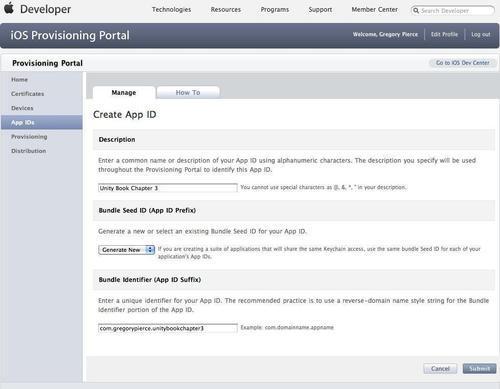
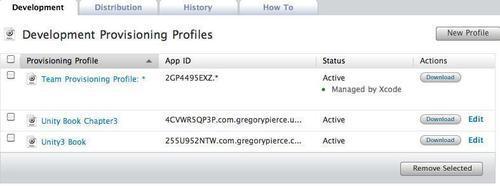
- As before, we need to create an App ID and deploy a provisioning profile to our development machine so that Unity can accomplish this. Enter the iOS Provisioning Portal and create a new App ID for our new application. While we could use the same App ID we used before, recall that doing so would replace our old application with the one we just built:
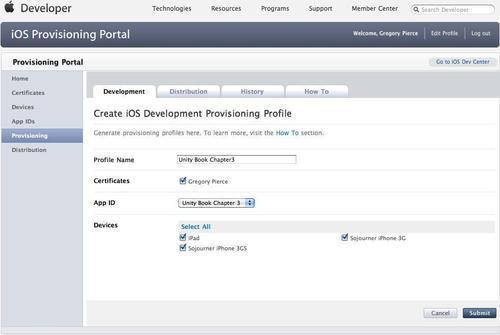
- Next we need to create another provisioning profile so that we can deploy the application to the device:
- Once the provisioning profile is created you need to download the provisioning profile so that XCode can deploy the application to your iOS device:
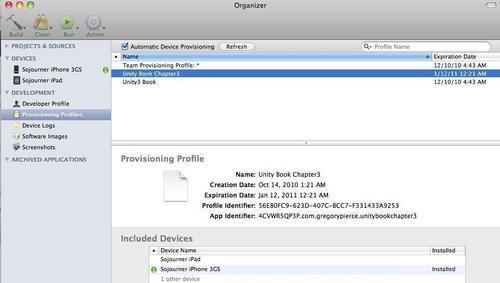
- Double-clicking on the provisioning profile will open XCode's Organizer and deploy the provisioning profile to your device:
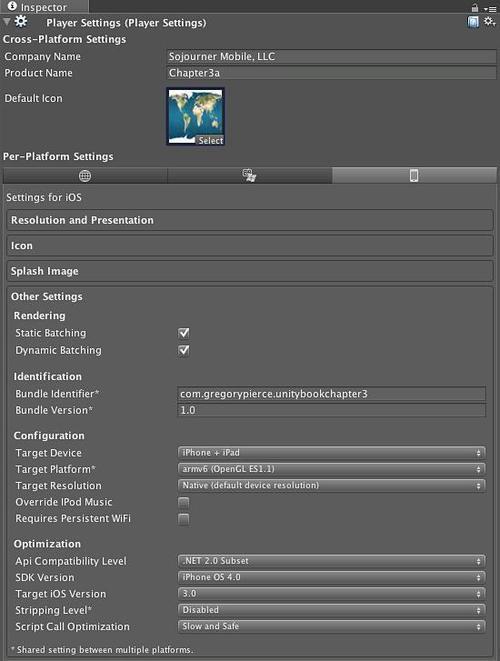
- With this completed all we need to do is inform Unity of which App ID it should be using by entering that App ID in the Bundle Identifier:
- With all of these steps completed, the last action we need to perform is invoking Unity's Build process so it can have XCode compile our game and install it on the phone. We can accomplish this through File | Build & Run.
- Shortly after you've performed these steps, Unity will start on your iOS device.
Remember that we have the accelerometer active so as soon as our game starts we will start moving around the scene.
We just built our first game application from scratch. It doesn't do much right now, but we have just opened the doorway to building great games for the iOS platform. This should also give you a feel for how you would normally interact with the Unity environment. Unity is a sandbox where you can add all sorts of assets and then create scripts that will allow behaviors for those assets.