
- From the project folder for
Chapter 4select thedog_1.mp3file and drag it into the Project view. - The audio clip will be imported into Unity and will appear in the Project view designated by a speaker icon:

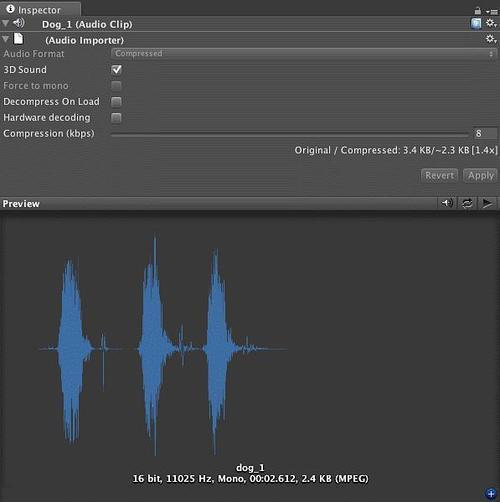
- Select the Audio Clip in the Project view. The Inspector will fill with all of the settings for the Audio Clip:
- Create a Cube Game Object.
- Add an Audio Source to the Cube Game Object.
- In the Audio Source Game Object select the Loop checkbox to designate that we'd like this sound to play indefinitely.
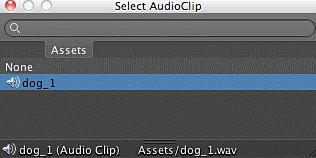
- To the right of the Audio Source property is a small round button. Press it to bring up the Asset Browser.
- Select the dog_1 asset from the browser:
You have just added sound to an object. Now when you play your scene, if you are close enough to that Game Object you will hear the sound. If you are having trouble, make sure that Play on Awake is checked in the Audio Source.
When you create a script in Unity you are creating a new behavior that will be attached to a Game Object and that behavior will be invoked as Unity communicates with the Game Object during the rendering pipeline stages. Unity ships with a number of pre-defined scripts to do basic things such as FPS Control, iOS Joypad controls, and so on. However, you will find that for most things that you want to do you will be creating a script yourself.
Unity supports scripting using Javascript, C#, and Boo as the primary scripting languages, but given that Mono will work with any .Net language it is entirely possible to write your scripts using F# or even Java. However, you may find that since these paths are not officially supported, the cost to self-support your custom path may not be worth the effort.
Internally, Unity utilizes the Mono/.Net compilation path for all of the scripts that you have in your project. The underlying language implementation for C# and Javascript scripting within the Unity frameworks are all extending functionality from Boo. You will find that it is very easy to create new scripts, import functionality from .Net assemblies, or even extend the language by interfacing directly with the abstract syntax tree (AST) generated during the build phase. During the build phase, Unity will cause all scripts to be compiled statically, embedded with your application, and deployed to the device.
There are two editors available for scripting with Unity: Unitron and MonoDevelop.
Unitron is the original script editor that ships with Unity and will be active by default. It is lightweight and fast, but lacks all of the modern conveniences of a traditional IDE. As your projects get more complex, you will find that having a robust IDE is essential and may want to move to a more professional editor:

MonoDevelop was introduced in Unity3 as a higher productivity option for developers that needed something that had support for functions such as code completion, better key binding support, add-Ins, refactoring, metrics, and so on. MonoDevelop is a solution that has been around nearly as long as Mono, and since it is open source and supported on all the platforms that Unity utilizes it makes an ideal choice for development:

To change which editor you use, enter the Unity Preferences ( Unity | Preferences ) and in the General tab change the External Script Editor to your editor of choice. If you want to use MonoDevelop, you will find it in the /Applications/Unity folder. After selecting it, when you double-click on a script from any of Unity's languages the editor will launch and allow you to update the script. Changes you make to a script and save will be available immediately to Unity, and any errors in the script will immediately show up in the
Unity Console view:

We will cover scripting in more detail in the next chapter.
A Prefab is a reusable collection of meshes, scripts, animations, and so on that you want to use in a scene. Prefabs are a core component of any Unity project, but when starting out it may not be immediately clear why you want to adopt them.
Let's pretend that this is our enemy in our hot seller "Red Cubes must Die" and we need to add more red cubes. We don't want to go through all the steps to try to create this cube again. Your first thought might be to copy/paste the cube, and that will work. But now you've decided that instead of a red color you want a red flame texture. Do you go back to all of the cubes in the scene and change the texture? This may work for a small number of objects, but imagine doing this in a complex scene.
Worse still suppose you've just imported a lot of mesh data and set up the textures for a zombie in your hack and slash game. You scaled him to fit your scene and made sure all the animations work properly. However, this is just one of the many zombies you plan on putting into this level. Certainly you don't want to have to do this for every zombie that is going to be in the game.