
In this chapter we will examine the Unity Interface in detail, explore all of its views and tools while personalizing them to suit our particular development style, and configure our environment for remote debugging using Unity Remote. In this chapter we will finish laying down the foundation for building applications and explore all of the Unity options that we need.
In this chapter we shall:
- Explore the Unity user interface
- Customize our interface with new custom layouts
- Configure and deploy Unity Remote for debugging
- Test our application using Unity Remote and our new custom layout
So let's get on with it...
If you've ever used a 3D modeling tool or written an application using any modern software development IDE you will find Unity 3 very familiar and fairly straightforward. The interface for Unity is composed of a Toolbar area that consists of 5 basic control groups and a number of user customizable areas that can contain Views.
The transform tools are used with the Scene View and allow you to manipulate the objects in the scene. We will take a moment to walk through these tools since we will spend much of our time using them.
Working our way from left to right the first of the tools is a multi-use tool that is used to manipulate the camera in the scene. The camera you're moving is of your view of the scene and has no relationship to what is actually shown in the game.
In the default mode, the Hand tool will simply translate the camera around. Pressing the left mouse button and dragging will translate along the X-axis of the camera. If you have a mouse wheel, scrolling that wheel will move the camera along the Z-axis.
Holding the Alt key or the right mouse button will cause the Hand to change into an Eye. In this mode you can orbit the camera around its current pivot point in the scene. The Scene Gizmo in the upper left of the scene view reflects this. As you pivot the camera, the gizmo will update to reflect the current camera pivot.
Holding the Control key allows you to zoom the camera as you move the mouse around in the scene. This is particularly useful if you need to get in close to where some critical action should be taking place.
There are two gizmos that determine how the updates to an object, using the Transform Gizmo, will impact on the object. The Transform Gizmo is just as it sounds, it appears in the Scene View and allows us to change the position or rotation of an object. These toggles determine where the Gizmo will appear.
The first toggle is the Position toggle. If set to Center, the Transformation Gizmo will appear in the center of the object's bounds that you want to transform. In most cases this is what you want if you are laying out an object in a scene. However, if you want to change an object's position based upon its pivot point, select Pivot for the setting of the toggle.
The second toggle is the Rotation toggle. Here you will determine whether or not rotations will be relative to the object's Local coordinate system or based upon the Global or world space coordinate system.
The next set of controls is used to drive the gameplay in the Game View. The visual representation of these controls is so commonplace that they almost require no explanation.
The Play control will cause the game to start playing. If you want to stop and look at things you press the Pause button. When the Pause button is pressed, Unity will switch to Scene view (unless already displayed) so you can examine the details of the scene. Pressing Pause again will cause the game to continue where it left off. If, while paused, you want to determine what will happen in the next cycle, you can press the Step button. Pressing the Step button while a game is playing will cause it to enter a paused state.
As you develop your applications you will create layers in the Scene View which represent groups of game objects that you want to display in the view. This helps to unclutter the display in a very complex scene.
In the Layers drop-down you can select what layers you want to see and which ones you want to hide. The hidden objects are still there and will display in Game View the next time the game is run.
During the development of creating a game you will find that some tools are useful for some scenarios and not useful in others. Custom layouts allow you to define a collection of views, and their position and configuration, while providing a unique name for the layout so that you can switch to it later.
The Layout drop-down will display all of the layouts that are available for you to switch to, allowing you to rapidly move between multiple IDE arrangements so that you have the tools that are important to you when you need them.

The Project view is where you will manage all of the assets that are in your project. However, if the files in those folders get updated (that is, you change the mesh of an object in some other tool), those updates will be changed in Unity as well.
You can add new assets to your project by simply dragging them from the desktop, or file system browser, right into the project view and Unity will import the content for use. Under the covers, Unity will also move the assets into the project's Assets folder.
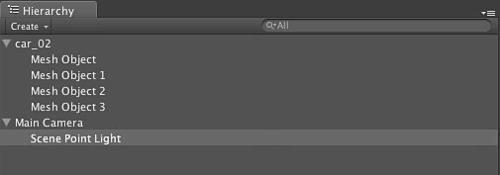
The Hierarchy view is a close peer to the Project view. Where the Project view is responsible for managing the assets that are available to your sandbox – the Scene view, the Hierarchy view is used to manage the objects that are in the scene and the parent child relationships of those objects. For example, you may have a vehicle object in the scene that has a light attached to it. In the Hierarchy view these objects would have a parent child relationship, such that the light would be the child of the vehicle object. The result would mean that as the parent object changed through transform, rotation, or other the child object would be impacted.
In large projects there will be a large number of objects in the Hierarchy view. To make it easier to find particular objects, or types of objects, Unity provides the search box in the Hierarchy view. When you enter the name of an object, Unity will filter the Scene view such that the objects you have entered are clearly visible in the view while the other objects are grayed-out. For example, suppose you are trying to find the steering wheel component of a scene that consists of a large number of game objects. If you enter steering wheel in the search box it will only provide texture, color, and so on to that object so that it is easy to find. Similarly, if you enter a type of object, such as light, in the search box the scene will only highlight the lights in the scene – even if the word 'light' isn't in the name of the Game Object.
The Scene view is where you will you will spend most of your time. It is in the Scene view that you will build your game, position the camera, change environment settings, observe occlusion levels, and so on:

The Game view is where the action takes place. Whenever you press Play in the VCR controls, this view will use the active camera in the scene and render what that camera sees to the Game view:

The Control Bar, in the Game view, contains useful controls for adjusting the Game view to deliver information useful in rendering the Game view closer to the actual target display:
The first tool in the Control Bar is the Free Aspect drop-down that allows you to change the aspect ratio of the Game view to different values. This is particularly important for iOS development as you can select the aspect ratio of your target device and get a better idea of how your content will look with the appropriate perspective applied.
The next tool is the Maximize on Play toggle which, when enabled, will display the Game view in full screen. In the case where this Game view is not the same resolution as the screen, you will note that the Game view maximizes to cover the entire display, but only renders the scene at whatever resolution / aspect ratio you have set in the Free Aspect drop-down.
The next control is the Gizmos control. This will force Unity to render all of the Gizmos that are present in the Scene view in the Game view.
The final control is the Stats control. When enabled this will show the Rendering Statistics window overlaid on the Game view. This is an extremely useful control to have active, as you will gain insight into how your application is performing at a high-level, without having to delve into the Profiler view while playing the game.
The Inspector view contains all of the properties for the selected Game Object in a view. The properties that the Inspector shows are entirely context sensitive based upon the Game Object selected:

As Game Objects in Unity are composed of components such as meshes, scripts, transforms, and so on. each of the components that make up the Game Object will have its editor appear in the Inspector. So, for example, in our example Inspector we've selected a camera in the scene. As you can see the Transform, Camera, and so on each have editors that show up for this Game Object.
The Console view shows all of the messages that come from your game. These messages may come from the Unity engine, or may represent messages which you have sent to the Console view using the script commands, such as Debug.Log()
. If you double-click on the messages that appear in the
Console view, you will be taken directly to the script that caused the message:

The Unity Profiler is your best friend when building games with Unity, particularly when developing for an iOS device. While the tool is only available with the Pro version of Unity, it deserves special attention as it provides substantially more information than the Rendering Statistics window in Game view:

In the top are profile tools that provide information about CPU Usage, Rendering, Memory, and Audio statistics. Next to each Profiler is a histogram representing the values retrieved from the instrumentation process on each frame. You can click and drag the mouse across the histogram and see the results across multiple profile tools, which will help to correlate specific performance issues with other events that occur in the application:

The bottom provides information about function calls that are being made by the application. This is done by instrumenting the code and determining how often the functions are being called. This can help determine where the hot spots are within an application so that you can focus your attention and get your game performing well on your target platform:
