
It is now time for us to create the project for our game that will be used for the rest of the text. While we have walked through this at a high-level before, there are particular details that we want to include with this new project that require review.
- Create a new Unity Project.
Our project will use some of the unitypackages that come with Unity to provide some of the core functions without us having to write a large amount of code.
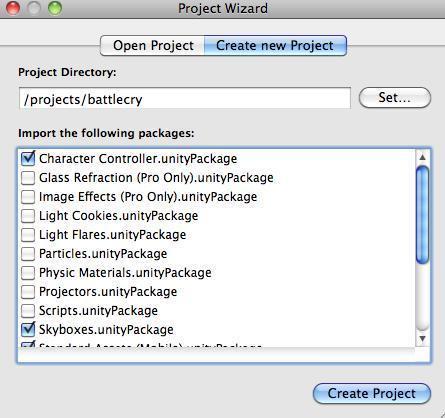
- Enter a directory name for the project.
- Select the Character Controller, Skyboxes, Standard Assets (Mobile), and Terrain Assets packages in the Project Wizard:
- Character Controller will allow us to move our character around the level without having to deal with a lot of scripting.
- Skyboxes are useful for being able to draw the sky for our world. We will be able to put up a simple texture to represent the sky or ceiling for our dungeons.
- Standard Assets (Mobile) will contain a lot of interface and optimized prefabs specifically for the iPhone.
- Terrain Assets will give us the basics for being able to paint on our terrain without having to go off and search for other assets.
- As we've done previously, we need to create a new App ID and provisioning profile on the Apple Developer Center's provisioning portal.
- Download and import the provisioning profile into XCode.
- In the Player Settings change the Product Name to Battlecry. This is the name that the application will display when it is installed on the device.
- Set our Bundle Identifier to that which we have from the provisioning portal. Here I have inserted
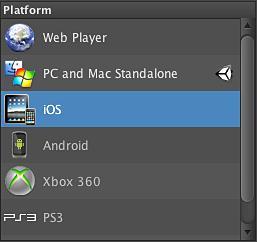
com.sojournermobile.battlecryto mimic what is stored in the provisioning profile. - As we're targeting both the iPhone and the iPad we must set the Target Device to iPhone + iPad so that we will end up with a universal binary:
- Provide an image for the game so that it will display with a real icon when it starts. In the assets there is an "icon_57_57.png" file. Import that and drag it in to the Default Icon field:

- To ensure that we're linking to the latest SDK, and have access to all of the functions of iOS available to us, select iOS Latest as the SDK version:

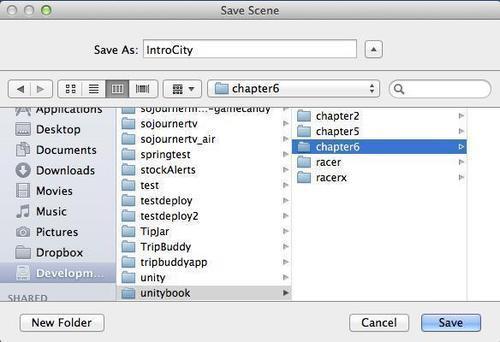
- Save the scene in the project. You will need to do this before you can include the scene in the build:
- Open the Build Settings and check our scene:

- Select the Build & Run function from the File menu. If everything is okay you should see your iOS device start and display the Unity logo.
..................Content has been hidden....................
You can't read the all page of ebook, please click here login for view all page.