
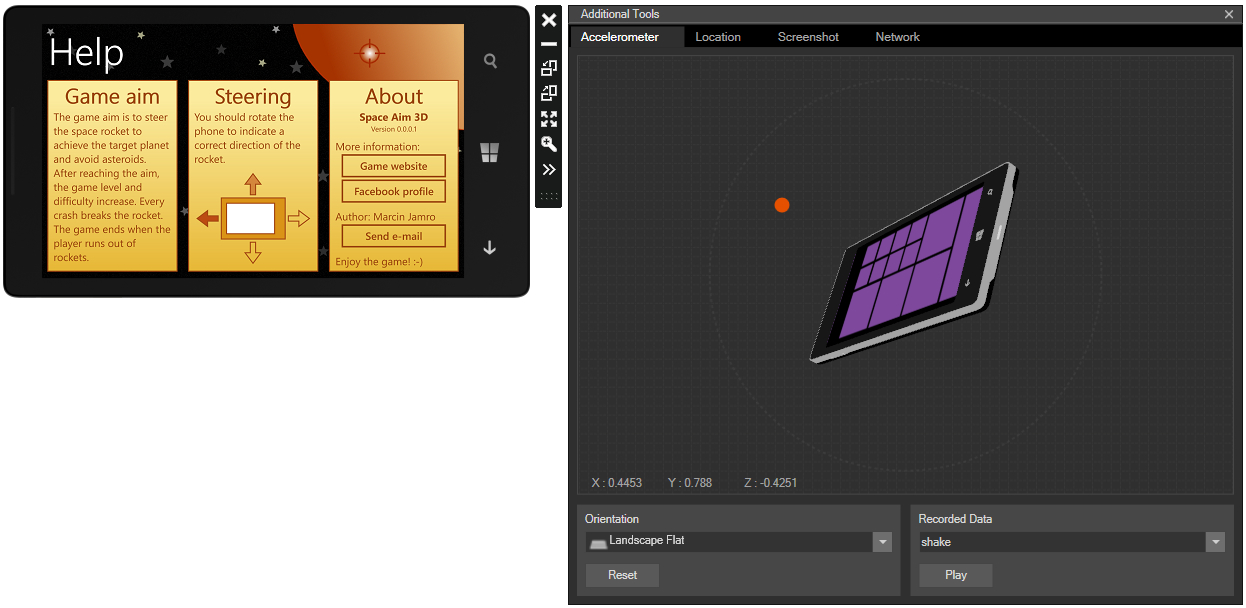
The sensors can be used not only in the native part of the game, but also in the managed one. As an example, you will modify the Help screen to present a movement of the device, by drawing an interactive picture representing the device and arrows indicating a direction in which the rocket should be moved, as shown in the following screenshot:
The interactive picture will be placed inside the StackPanel layout control in the Steering group, in HelpPage.xaml file. It is represented by the following XAML code:
<Grid Margin="0 10 0 0">
  <Grid.RowDefinitions> (...) </Grid.RowDefinitions>
  <Grid.ColumnDefinitions> (...) </Grid.ColumnDefinitions>
  <Polygon Grid.Row="0" Grid.Column="1"
    Points="10,40 10,20 0,20 15,0 30,20 20,20 20,40"
    Fill="{Binding BrushUp}" />
  <Polygon Grid.Row="2" Grid.Column="1"
    Points="10,0 20,0 20,20 30,20 15,40 0,20 10,20"
    Fill="{Binding BrushDown}" /> (...)
  <Rectangle Grid.Row="1" Grid.Column="1" Height="80"
    Stroke="{StaticResource SA3DDarkBrush}"
    Fill="{StaticResource SA3DLightBrush}"
    StrokeThickness="2" />
  <Rectangle Grid.Row="1" Grid.Column="1" Height="60"
    Fill="White" Stroke="{StaticResource SA3DDarkBrush}"
    StrokeThickness="2" Margin="10 10 20 10" />
</Grid>
The Grid control contains three rows and three columns. The first and last row have height equal to 50 pixels, and the middle row fills the remaining space. Similar scenario is used in case of columns. The first and last column have width equal to 50 pixels, and the middle column fills the remaining space between other columns.
The most interesting part of this code is related to the Polygon elements. The Polygon is a control that draws an object by specifying a set of point coordinates. Each coordinate is separated by a comma, and each pair by a space. The first Polygon control makes it possible to draw an arrow representing the upward direction. It uses seven points, including (10,40) and (20,40). Their graphical representation is shown in the following figure. It is worth mentioning that the Polygon forms a closed line, that is, the last point is automatically connected with the first one. Each Polygon control has the Fill attribute that is bound to some property (for example, BrushDown). You will define it later in the view model class.

Apart from the Polygon controls (representing up, down, left, and right directions), two Rectangle elements are added into the Grid. The first one presents a mobile phone, while the other provides a screen of the device. They are placed in the middle row and in the middle column. Their arrangement is specified by suitable margins.
To present arrows in a proper way, you should create a style that is automatically applied to all Polygon controls. It sets a vertical and horizontal alignment (to center), as well as a stroke color (to the SA3DDarkBrush resource) and thickness (to 2).
Additional modifications are necessary in the code-behind file. Here, you need to override the OnNavigatedTo and OnNavigatedFrom methods.
At the end of the OnNavigatedTo method, you should call the method with the same name, but from the HelpViewModel class. It will be used to perform some additional operations when the user navigates to the page. The code is as follows:
protected override void OnNavigatedTo(NavigationEventArgs e)
{
  base.OnNavigatedTo(e);
  this.m_viewModel.NavigationService = this.NavigationService;
  this.m_viewModel.OnNavigatedTo(e);
}
In a similar way, you handle a situation when the user navigates from the page. Thus, in the OnNavigatedFrom method you call the suitable method from the view model class, as shown as follows:
protected override void OnNavigatedFrom(NavigationEventArgs e)
{
  base.OnNavigatedFrom(e);
  this.m_viewModel.OnNavigatedFrom(e);
}
The remaining modifications are required in the HelpViewModel class.
First of all, you define four properties representing brushes used by the data binding mechanism. They are named BrushUp, BrushDown, BrushLeft, and BrushRight. All of them are instances of SolidColorBrush (from System.Windows.Media namespace). In the following code, only the first property is shown, however, others can be added in a very similar way:
public SolidColorBrush m_brushUp =
  new SolidColorBrush(Colors.Transparent);
public SolidColorBrush BrushUp
{
  get { return this.m_brushUp; }
  set
  {
    this.m_brushUp = value;
    this.OnPropertyChanged("BrushUp");
  }
}
Now, you create the private field representing the accelerometer, which is an instance of the Accelerometer class from the Microsoft.Devices.Sensors namespace:
private Accelerometer m_accelerometer;
Inside the OnNavigatedTo method, you perform operations required before obtaining data from the sensor, as shown in the following block:
public void OnNavigatedTo(NavigationEventArgs e)
{
  if (Accelerometer.IsSupported)
  {
    try
    {
      this.m_accelerometer = new Accelerometer();
      this.m_accelerometer.CurrentValueChanged +=
        this.Accelerometer_CurrentValueChanged;
      this.m_accelerometer.Start();
    }
    catch (Exception) { this.m_accelerometer = null; }
  }
}
At the beginning, you check whether the accelerometer is supported in your device, by reading a value of the IsSupported property. Then, a new instance of the Accelerometer class is created. The next step is related to the CurrentValueChanged event, which you subscribe to obtain up-to-date information from the sensor. You use the additional method (Accelerometer_CurrentValueChanged) that is called every time when data read from accelerometer have been changed. At the end, you start using the accelerometer, by calling the Start method. In case of any exception during accelerometer initialization, you disable its further use by assigning a null value to the m_accelerometer field.
As soon as the accelerometer is no longer required, you should stop it. It can be done in the OnNavigatedFrom method, which is called when the user changes the page, for example, returns to the main menu. The suitable part of code is as follows:
public void OnNavigatedFrom(NavigationEventArgs e)
{
  if (this.m_accelerometer != null)
  {
    this.m_accelerometer.Stop();
    this.m_accelerometer = null;
  }
}
The Accelerometer_CurrentValueChanged is a method that should update values of properties (for example, BrushUp) that are taking part in the data binding:
private void Accelerometer_CurrentValueChanged(object sender,
  SensorReadingEventArgs<AccelerometerReading> e)
{
  float x = e.SensorReading.Acceleration.X;
  float y = e.SensorReading.Acceleration.Y;
  float z = e.SensorReading.Acceleration.Z;
  Color mainColor = new Color() { R = 175, G = 40, B = 0 };
  Color upColor = mainColor;
  Color downColor = mainColor;
  Color leftColor = mainColor;
  Color rightColor = mainColor;
  upColor.A = (byte)(255 * Math.Max(x, 0));
  downColor.A = (byte)(255 * Math.Abs(Math.Min(x, 0)));
  leftColor.A = (byte)(255 * Math.Max(y, 0));
  rightColor.A = (byte)(255 * Math.Abs(Math.Min(y, 0)));
  Deployment.Current.Dispatcher.BeginInvoke(() =>
  {
    this.BrushUp = new SolidColorBrush(upColor);
    this.BrushDown = new SolidColorBrush(downColor);
    this.BrushLeft = new SolidColorBrush(leftColor);
    this.BrushRight = new SolidColorBrush(rightColor);
  });
}
At the beginning, you use the second parameter of this method (named e) to get suitable values and store them as x, y, and z local variables. Next, you choose a color (mainColor) that is used as a fill color for an arrow when the accelerometer data have the maximum available value in particular direction. Then, you copy data of this color into four separate variables representing colors of all arrows (upColor, downColor, leftColor, and rightColor).
In the following part, some simple calculations are made to set a suitable alpha values for colors. They should be in range <0;255>. The lowest value indicates that the color is not shown. To calculate alpha values for all arrows, the following formulas are applied:
up = 255 * max(x,0)
down = 255 * |min(x,0)|
left = 255 * max(y,0)
right = 255 * |min(y,0)|
All calculated values are in range <0;255>, because the second part of each formula returns a value not smaller than 0 and not higher than 1.
The remaining part of the Accelerometer_CurrentValueChanged method just updates values of properties. What is more, due to performing operation from a different thread, it is required to use the BeginInvoke method on the Dispatcher property (using the Deployment class from the System.Windows namespace). It specifies operations, which should be performed, by taking a lambda expression as a parameter.