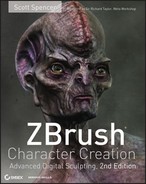
When working with textures and UVs in ZBrush, be aware that there are four separate texture-related menus. First is the main Texture menu accessed from the top toolbar (Figure 5-9). This menu allows you to create new textures, rotate and flip existing maps, and import and save maps. The main Texture menu also allows you to access as well as add maps to the SpotLight and provides several other tools for working with file textures. See Table 5-1 for an explanation of each menu option. This menu functions similarly to the Brush, Tool, and Alpha menus in that there is a palette for the currently loaded textures as well as several modifiers. The Texture palette itself is accessible on the left of the UI.
Figure 5-9: The main Texture menu
Each subtool can have its own color, normal, and displacement map. If you want a color map to display on a subtool, you must select it in the texture swatch for that subtool found under the Tool Texture Map menu. Maps are loaded and exported from the main Texture menu at the top of the screen and the Texture palette.
Table 5-1: The Texture menu
| Menu option | Function |
| Load / Save SpotLight | Load and save spotlight files to disk. SpotLight files can contain any number of photo references for use on your work. |
| Import/Export | Imports and exports texture files. |
| Transparent Texture | Sets black to transparent. |
| AntiAlias texture | Antialiases the color texture. |
| Turn On SpotLight | Enables SpotLight. |
| Add to SpotLight | Adds the current texture file to SpotLight. |
| Flip H | Flips the currently selected texture horizontally. |
| Flip V | Flips the currently selected texture vertically. |
| Rotate | Rotates the currently selected texture 90 degrees clockwise. |
| Invers | Inverts the currently selected texture. |
| Grad | Colorizes the mesh with a gradient blend between the Sec and main watches. |
| Sec | Sets the secondary color for Grad. |
| Main | Sets the main color for Grad. |
| Clear | Clears the texture and fills it with the current Main color. |
| Width | The width value in pixels for the next texture created with the New button. |
| Height | The height value in pixels for the next texture created with the New button. |
| Clone | Creates a copy of the currently selected texture and places it in the Texture palette. |
| New | Creates a new texture with the height and width values set in the sliders as well as the currently selected color in the color picker. |
| MakeAlpha | Creates an Alpha from the currently selected texture. Alphas are 16 bit while textures are 8 bit. This will convert the texture to 16 bit and strip all color information. |
| Remove | Deletes the current texture from the Texture palette. |
| Cd | When clicked, clears depth information from the canvas when using crop and fill. |
| CropandFill | Crops and fills the document window with the currently selected texture. |
| GrabDoc | Grabs the document color information and loads it in the Texture palette. |
| Image Plane | This free ZScript allows you to load reference images into ZBrush or texture with photo reference. |
The second menu is the PolyPaint menu located under the Tool menu. This is where you will enable Colorize for the mesh and turn on polypainting. The third menu is UV Map, also found under the Tool menu (Table 5-2). This menu contains options for working with UV coordinates, setting map resolution, and editing the UV settings. The fourth menu is located just under UV Map under the main Tool menu. This is the Texture Map submenu. Don’t confuse this with the main Texture menu at the top of the screen. This menu contains options for generating various types of texture maps as well as importing and applying maps to subtools. Here you can also transfer color information from PolyPaint to a UV map. See Table 5-3 for an explanation of each menu option. Each subtool can have its own color map.
Table 5-2: The Tool UV Map menu
| Menu option | Function |
| Delete UV | Deletes UV coordinates from the current subtool. |
| Morph UV | Interactively flattens to UV coordinate view. |
| UV Map Size | Creates a UV Map at the specified size based on slider or button input. |
| 512, 1024, 2048, 4096 | Clicking one of these buttons will automatically set the texture resolution for the UV coordinates. |
| UV Map Border | Sets the pixel size of the overpaint on the UV border. |
| Uvc | Cylindrical mapping. |
| Uvp | Planar mapping. |
| Uvs | Spherical mapping. |
| UV Tile | Basic UV tiling. |
| PUV Tiles | Packed UV tiles, a combination of GUV and AUV and the most efficient of the automatic methods. |
| GUV Tiles | Grouped UV tiles, automatic mapping that is somewhat human readable. |
| AUV Tiles | Automatic UV tiles, efficient but unreadable to the human eye. |
| AUV Ratio | Adjusts the way polygons are mapped using the AUV tile button based on a ratio of texture resolution to polygon size. |
| H Repeat | Horizontal repetition of the texture map. |
| VRepeat | Vertical repetition of the texture map. |
| AdjU | Adjusts the map offset in U; this change is applied by clicking the applyAdj button. |
| AdjV | Adjusts the map offset in V; this change is applied by clicking the applyAdj button. |
| ApplyAdj | Applies changes set in the AdjU and AdjV sliders. |
| Switch U V | Swaps U and V space. |
| Cycle UV | Cycles between U and V coordinates. |
| Flip U | Flips coordinates horizontally. |
| Flip V | Flips coordinates vertically. |
Table 5-3: The Tool Texture Map menu
| Menu Option | Function |
| Texture On | Enables the currently selected map to display on the current subtool. |
| Clone Texture | Creates a copy of the currently selected map that can be accessed via the main Texture menu. |
| New texture | Creates a new texture map based on the UV settings in the UV Map menu. |
| Fix Seam | Redraws edges of disconnected polygons to remove artifacts. |
| Transparent | Displays black as transparent. |
| Antialiased | Applies antialiasing to the texture to smooth transitions between colors. |
| New From Polypaint | Creates a new UV texture map based on the polypaint data. |
| New From masking | Creates a new texture based on the current mask. |
| New From UV Map | Creates a texture map based on the UV coordinates. This is helpful for sighting your UV layout quickly. |
| New From UV Check | Helps identify areas of overlapping UV by marking them in red. |
| New From Vertex Order | Creates a gradient texture map based on vertex order. Helpful for comparing two models to verify the vertex IDs are consistent. |
| New From Poly Order | Creates a gradient texture map based on poly order. Helpful for comparing two models to verify the mesh remains consistent. |
UV Projection Texture Method
When you texture with projection, it requires that the model be temporarily dropped on the canvas in 2.5D mode. You may paint or project from only one view at a time. This is because the computer looks at the color information you have applied to the model and projects it into the UV texture coordinates’ corresponding regions or into PolyPaint.
Projection Master allows you to convert the current canvas view of your model into pixols. This process is called “dropping” the model to the canvas. This will allow you to use the 2.5D illustration and sculpting tools on a 3D model that is temporarily frozen in a single view and converted to pixols. When you have finished working on the view, Projection Master will pick up the model from the current view and project the pixol painting strokes to the model. If you were sculpting, the detail would be projected into the current mesh; if you were painting, the color strokes would be projected into the UV texture map or onto the PolyPaint surface. Projection Master does this by sampling the RGB, Material, and Depth values for each pixol on the canvas and transferring that information to the corresponding pixels on the color map or polygons on the 3D surface.
Normally in Projection Master you rotate so that the area you want to work on is directly facing you, dropping the model with the Projection Master button, painting or sculpting, then picking up again. This process is repeated as many times as needed by rotating small increments around the surface.
You will not use Projection Master often. It has been replaced by ZAppLink in version 4, but ZAppLink actually uses Projection Master to function. For this reason I want to show you how Projection Master works so you will have a better understanding of the mechanics behind ZBrush texture tools that use projection.
Start Projection Master by clicking its button in the upper left of the screen ![]() or by pressing the G key. The Projection Master window (Figure 5-10) has several options:
or by pressing the G key. The Projection Master window (Figure 5-10) has several options:
Figure 5-10: Projection Master window

Color Specifies that the color information you paint in Projection Master will be applied to the model when it is picked up. The Shaded option will “bake” the current surface shading into the model as well as the color information. Material will bake in the material settings. These options apply to PolyPaint or UV projection.
Double Sided Projects your painting or sculpting through to the other side of the model. This is best used on a symmetrical object when you have snapped to an orthographic side view. Remember that Shift-dragging in the document window while a tool is in Edit mode will snap it to the closest orthographic view.
Fade When Fade is turned on, any texture or color painted on the model will fade as the surface turns away from the surface normal. The effect is similar to spraying an airbrush directly at a surface; any areas that curve away get a lighter coat than those facing you. With Fade off, all surfaces get a solid coverage of the texture or color.
Deformation Applies any sculpting strokes to the mesh. These are projected into the mesh at pickup and deform the actual geometry. For deformation to function, there must be enough resolution in the number of polygons to support the level of detail you are attempting to achieve.
Normalized Takes into account the normal of the surface when projecting sculpted details. When Normalized is off, all sculpting is projected directly back in ZBrush with no attention given to the curvature of the underlying surface.
With the model now dropped to the canvas, you may use any of the 2.5D brushes available under the Tool menu. The difference is that since you used Projection Master to “drop” the model, you can pick it up again and apply the changes you made. To pick up from Projection Master, use the G hotkey and click the Pickup Now button.
While Projection Master is still accessible on its own as a plug-in, remember it is mostly overlooked in favor of ZAppLink by most artists. ZAppLink uses Projection Master in the background, but it allows you to use Photoshop to paint on your model and then return to ZBrush, where you can pick up the changes and apply them to the ZTool.