We will begin by creating a general base form for our gun. To do this, we will revisit ZSketch. We will begin by making a ZSphere skeleton to build our strokes on. As you read this exercise, be sure to check the accompanying DVD for a video of the exercise in progress. The ZTools for all steps are included, so you can start with the ZSphere chain or the original ZSketch files and follow along.
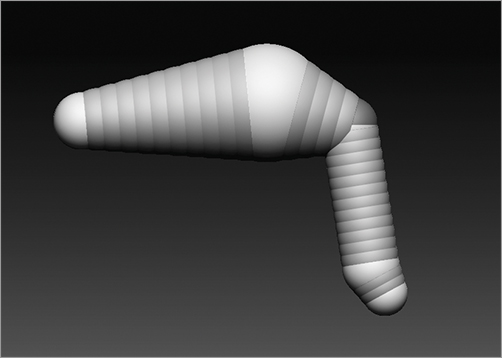
1. Initialize ZBrush or start a new session. Select a ZSphere from the Tool menu and draw it on the canvas. Create spheres on either side to create a chain, as shown in Figure 10-72. The root sphere is at the center. Continue to develop the ZSphere chain until you have the configuration shown in Figure 10-73.
Figure 10-72: We will be building this ray gun in this section.
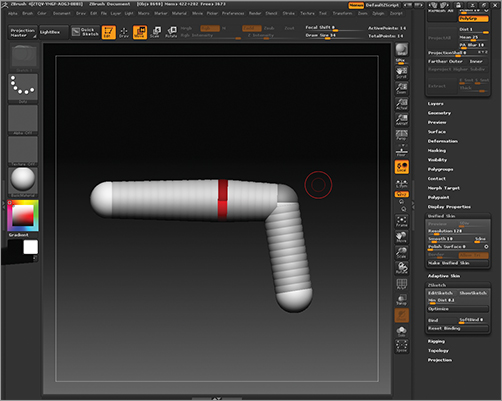
Figure 10-73: The final ZSphere chain
2. When the skeleton is ready, enable Edit Sketch under Tool ZSketch. Using the ZSketch brushes, start building the form of the gun. Remember you can trim these shapes down into more mechanical forms later (Figure 10-74). The intention at this stage is to lay out a stroke for each major form. I try to work a little more carefully here instead of quickly piling strokes on the skeleton.
Figure 10-74: Start building the forms of the gun with the ZSketch strokes.

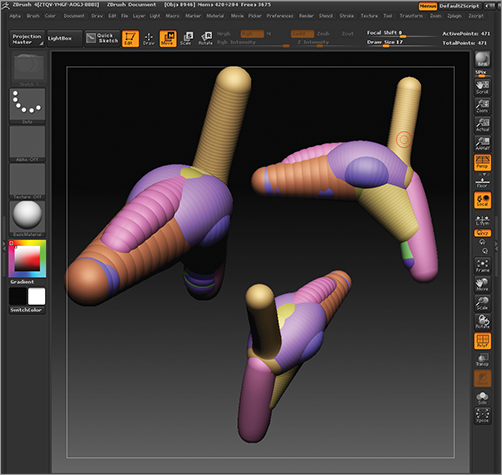
3. You can isolate strokes with Ctrl+Shift-click and mask them separately from the rest of the form. This allows you to move just a single stroke or apply a Bulge brush stroke to it while preserving the other forms (Figure 10-75). As you work, also be aware that the strokes are polygrouped separately. This grouping will transfer into the unified skin mesh (Figure 10-76).
Figure 10-75: Isolate strokes with masks to make specific form changes.
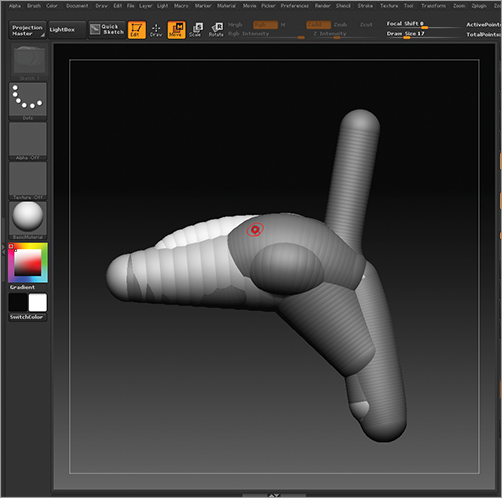
Figure 10-76: Strokes are polygrouped automatically.
4. The lines of the strokes can be straightened by moving the sphere you want to be the endpoint with the Move tool (press the W hotkey). Return to Draw mode, then press Shift to smooth and immediately press Alt to snap the other spheres into a line with the moved sphere (Figure 10-77). See the video on the DVD for this technique in action. When the strokes are all complete, create a unified skin mesh (Figure 10-78).
Figure 10-77: The straight lines of the strokes are created by pressing Alt while smoothing.
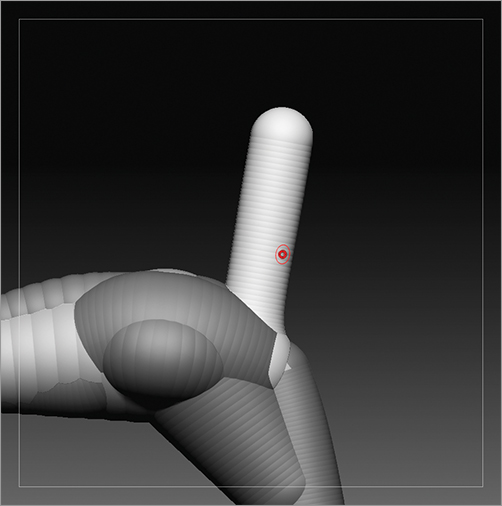
Figure 10-78: The unified skin mesh generated from the ZSketch gun

5. At this stage you will start to carve the form into a mechanical shape using the various hard-surface brushes. To help isolate the strokes you laid in and create some hard edges, you will use the group loop function to cut edge loops around all the polygroups. Click the GroupsLoops button under Tool Geometry to cut these new edge loops (Figure 10-79). You can now isolate and move the groups, creating sharp edges at the divisions. Figure 10-80 shows this approach used to make the trigger area of the grip narrower than the rest of the gun. Right now you are blocking in shape and using the group loops to help keep edges sharp.
Figure 10-79: GroupsLoops will cut edge loops around each polygroup.
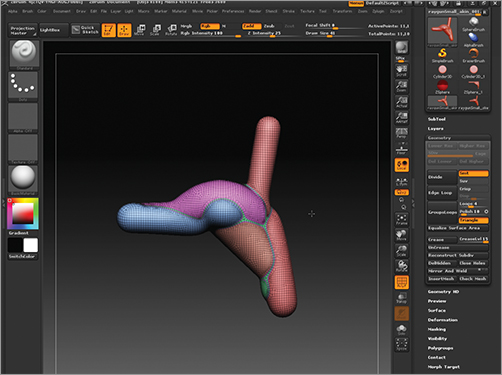
Figure 10-80: Use GroupsLoops to help create a hard edge between the gun and the trigger area.

6. Rotate to a front view. Select the Clip Curve brush and trim the sides of the trigger area to create a hard plane (Figure 10-81). Rotate to a side view and use the ClipCurve brush to further shape the trigger area (Figure 10-82).
Figure 10-81: Use the Clip brush to create hard planes in the trigger area.

Figure 10-82: The clip curve brush is used to further refine the trigger area from the side view.
Ctrl+Shift-click on the antenna portion of the gun sticking out of the top to isolate it. Mask the rest of the model so you can work on this portion alone (Figure 10-83). Using the Clip brushes, shape the antenna into a more interesting form similar to what’s shown in Figure 10-84.
Figure 10-83: Isolate the antenna portion with a mask.

Figure 10-84: Use the Clip brush to shape the antenna portion.

At this stage, you will create more interesting planar forms in the muzzle of the gun. Isolate the polygroup, as shown in Figure 10-85, using masks. Rotate to the top view and use a Clip Curve brush to shave down the planes, as shown in Figure 10-86. Rotate to the side and clip a plane similar to Figure 10-87.
Figure 10-85: Isolate the lower portion of the muzzle with a mask.

Figure 10-86: Use the Clip Curve brush to create these planes.

Figure 10-87: The gear shapes
Using the same method of selecting polygroups that you used earlier, isolate the top of the gun with a mask, as shown in Figure 10-88. Rotate to the top view and trim a shape similar to the one in Figure 10-89.
Figure 10-88: Isolate the top of the gun with a mask.

Figure 10-89: Use the Clip brush to trim a shape similar to the one shown here.

Let’s now alter the trigger and grip area. Select the Clip Circle brush and clip a circular shape from the trigger area, as shown in Figure 10-90. Be careful not to let the crosshairs at the center of the circle cross over the edge of the model or you will get unexpected results from your clip. At this stage isolate the weapon grip and modify its shape with the Move brush (Figure 10-91).
Figure 10-90: Use the Clip Circle brush to further trim the trigger area.

Figure 10-91: Isolate the pistol grip and modify its shape with the Move brush.

You can avoid having to mask the other polygroups while you use the Move brush if you enable Group Masking. You’ll find Group Masking under Brush Auto Masking Mask By Polygroups. Set the slider to 100 and the Move brush will only affect the first polygroup you touch for each stroke. It’s a convenient way to ensure you will move only one group at a time without having to go through the extra masking steps.
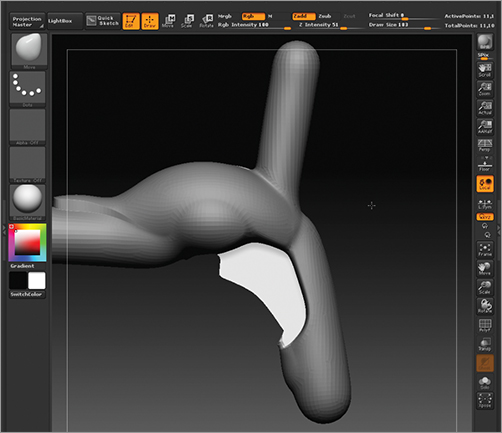
Next you’ll add some more intricate parts to the gun using ShadowBox. First you need to cut a space to place these pieces. Subdivide the mesh by pressing Ctrl+D. This will help you get sharper edges with the next steps. Mask the area shown in Figure 10-92 and use the Clip Curve brush to trim a notch out of the gun.
Figure 10-92: Use the Clip Curve brush to trim out a notch to place some internal components.

The first part you will create is a barrel for the gun. Duplicate the gun under Tool Subtool Duplicate and click the ShadowBox button under the Subtool menu (Figure 10-93). Use Transpose Scale to size the ShadowBox up and place it where the barrel will be (Figure 10-94). Make sure the Mask Rectangle brush is selected. Draw a mask from the side to define the length of the barrel (Figure 10-95a). Rotate to the front view and select the Mask Circle brush. Draw a circular mask to define the shape of the barrel from the front view (Figure 10-95b). Click the ShadowBox button to exit and generate a mesh from your ShadowBox geometry (Figure 10-95c).
Figure 10-93: The ShadowBox button

Figure 10-94: Scale and Transpose the ShadowBox to line up with the barrel placement.

Figure 10-95: Draw a mask to create the barrel shape.

You will now use ShadowBox again to generate more intricate internal parts for the gun. Duplicate the barrel and enable ShadowBox. Clear the mask and place the ShadowBox so it is oriented as shown in Figure 10-96. For the next piece, you will create a mechanical, gear-like structure. Parts like this have what is called radial symmetry. To enable this in ZBrush, open the Transform menu and turn on Symmetry. Click the R button to enable Radial Symmetry (Figure 10-97). This feature allows you to draw in multiple radial sections, simplifying the process of making some mechanical shapes. Using the MaskPen brush and Mask Rectangle, create a shape similar to the one shown in Figure 10-98.
Figure 10-96: Orient the ShadowBox as shown here.

Figure 10-97: Enable Radial Symmetry.

Figure 10-98: This gear form is created with Radial Symmetry turned on.
After one gear is created, several can be duplicated and placed inside the housing of the gun. Figure 10-99 shows a relatively complex internal structure created by duplicating a few simple ShadowBox pieces. See the DVD for a full video of this process in action.
Figure 10-99: This complex internal structure is created by duplicating a few pieces of ShadowBox geometry.

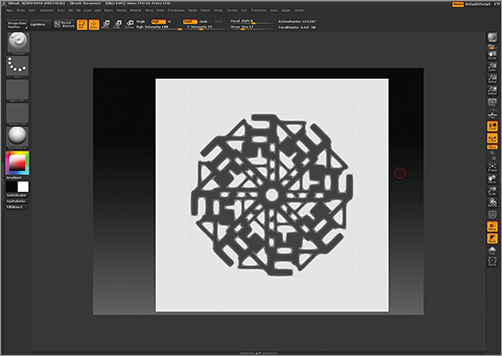
Finally, let’s add some elaborate surface details like grids and vents to the gun. I want to create a vent or air intake valve for the front of the weapon. Select the Mask Pen tool. Mask out an area for the vent, as shown in Figure 10-100. Select the Standard brush with a DragRect stroke and select Alpha 25. Under the Alpha menu, set V Tiles to 32 (Figure 10-101). With ZSub on, drag this alpha into the unmasked area to create a recessed vent structure (Figure 10-102).
Figure 10-100: Mask an area for the vent.
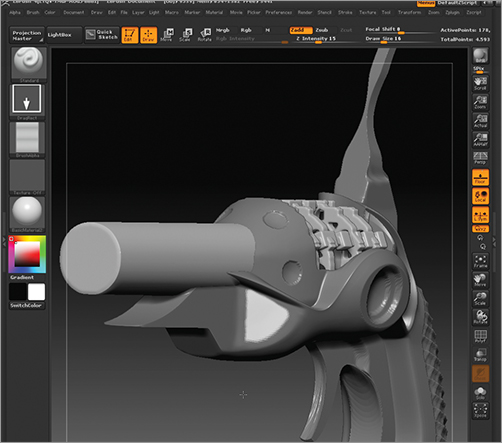
Figure 10-101: Set the V Tiles option to 32 to create a vent alpha.

Figure 10-102: Use the tiled alpha to create this vent structure.

The same alpha can be used to create other forms. Figure 10-103 shows how this alpha is used to create a texture on the grip of the gun. The stroke has been applied twice to make a crosshatched pattern.
Figure 10-103: The pistol grip consists of textures with two crossing strokes of the same alpha used for the vents.

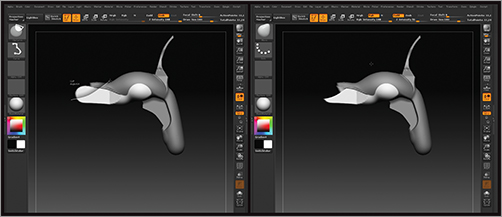
That completes this exercise on building a ray gun in ZBrush. Be sure to see the DVD for a full video of this process where I show a few more tips and tricks to add more surface details with the Clip Circle and Planar brushes. You can see the final gun in Figure 10-104. Also be sure to see the DVD for an entirely separate exercise on building a sci-fi rifle in ZBrush (Figure 10-105).
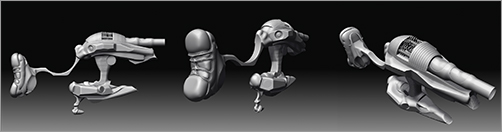
Figure 10-104: The final ray gun

Figure 10-105: Check the DVD for a video demonstrating the process to make this rifle.
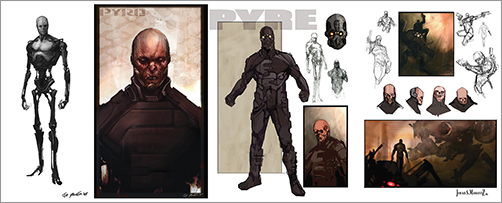
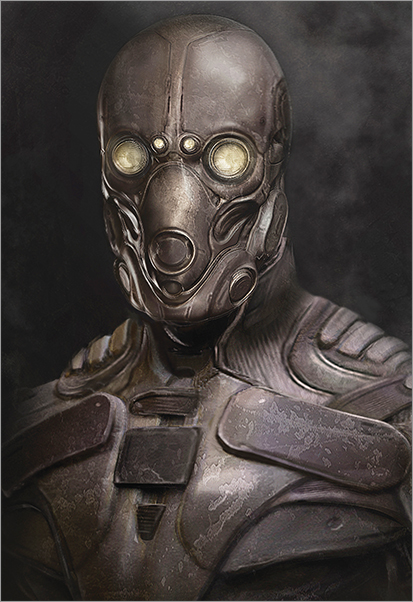
Featured Artist: The Art of Jerad Marantz
Jerad is a freelance concept artist whose striking designs have contributed to films like Clash of the Titans, Nightmare on Elm Street, and Jonah Hex. Jerad is an accomplished painter and sculptor who has incorporated ZBrush into his design process. These images are an original character concept.