
Fetching Our Assets
We know that we want to find a photo from our library and bring it into our project. Like similar functions in iOS, this is referred to as “fetching.” The class we use to do this is PHFetchResult, which has a suite of class methods to fetch our photos from the photo library.
Adding a Camera Button
First we set up our project to allow our user to access this functionality. We have some room in the top-left corner of our root view controller, so let’s set up our functionality there.
Go to the Object library and choose a new Bar Button item to add to the storyboard. Locate the Tweets scene, the one with the table view, and add the button to the top left. Over in the Attributes Inspector, you will have the option from the drop-down menu to set the button to a camera icon.
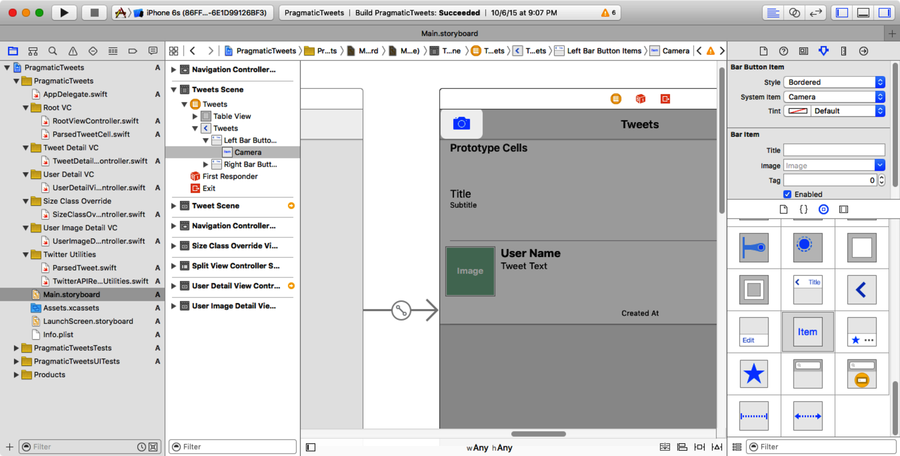
Open the Assistant Editor and connect the button to an IBAction in the RootViewController.swift to create a method that handles the button click.
| | @IBAction func handlePhotoButtonTapped(sender: UIBarButtonItem) { |
| | } |
One last thing we need to do in the root view controller before we move on is import the Photos framework. Scroll to the top of the file and add the following:
| | import Photos |
Finding and Filtering Our Photos
As we mentioned earlier, there are many options for how we want to fetch our assets. We can filter them by type, collection, and whatever other filters/predicates we choose.
We just want to share photos with our Twitter followers, so let’s go ahead and set up our fetch request to go and get access to our photos.
Think back to our Model-View-Controller. Our PHAsset fulfills our Model requirement. The View Controller will fulfill the “C” in “MVC.”
Now we need a photo. Unfortunately, the Photos framework doesn’t provide any sort of a user interface to display and choose photos from the library. We could do that ourselves by building something like a table view with thumbnail images and metadata fetched from the Photos framework. But let’s keep it simple for now. In this example project, we are only going to retrieve the most recent photo taken. That will let us get our feet wet with the Photos framework without having to write a bunch of UI code that’s not relevant to photos.
Navigate back to the handlePhotoButtonTapped method, and implement it like this:
| 1: | @IBAction func handlePhotoButtonTapped(sender: UIBarButtonItem) { |
| - | let fetchOptions = PHFetchOptions() |
| - | PHPhotoLibrary.requestAuthorization { |
| - | (authorized: PHAuthorizationStatus) -> Void in |
| 5: | if authorized == .Authorized { |
| - | fetchOptions.sortDescriptors = |
| - | [NSSortDescriptor (key:"creationDate", ascending:false)] |
| - | let fetchResult = PHAsset.fetchAssetsWithMediaType(.Image, |
| - | options: fetchOptions) |
| 10: | if let firstPhoto = fetchResult.firstObject as? PHAsset { |
| - | self.createTweetForAsset(firstPhoto) |
| - | } |
| - | } |
| - | } |
| 15: | } |
Let’s step through this code piece by piece:
-
On line 2 we need to create an instance of PHFetchOptions. We want to narrow down our search to only our most recent photo; therefore, we must figure out a way to tell the method exactly which photo we want it to return.
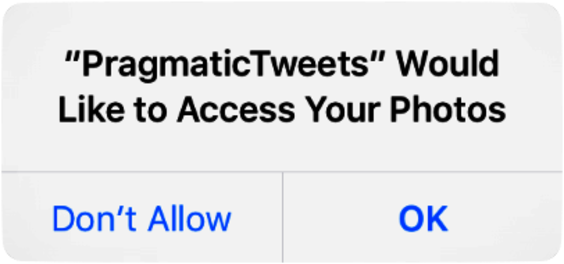
Lines 3--14 request access to the photo library from the user. The photo library requires that the user specifically authorize our Pragmatic Tweets app to access the photo library. If the user does not authorize this, the photos functionality will not work. Users can go to their Settings to authorize it later if they accidentally denied access.
This is a naturally asynchronous action; like requesting access to the Twitter account, we don’t know how long it will take the user to respond to our request. So requestAuthorization takes a closure that will be called when the PHAuthorizationStatus is determined. Our closure runs from lines 4--14.
-
When we’re ready to fetch the assets—and assuming we are authorized to do so—we will be able to request results be sorted in a given order. The fetchAssetsWithMediaType method takes an array of NSSortDescriptors, which we prepare on lines 6--7. Since we want to retrieve our most recent photo, we need to make sure our photos are ordered chronologically. The creationDate descriptor starts with the earliest date first, so we need to specify that we want descending order. We found the creationDate descriptor in the documentation for PHFetchOptions. You can explore there to see how else you can sort your photos.
-
We make our call to fetchAssetsWithMediaType on lines 8--9, passing in the PHAssetMediaType to look for (Images in our case), and the fetchOptions, which include our sort descriptors.
-
Finally, we check the result on lines 10--11 to make sure that there is, in fact, a most recent photo in the library. If there is, we are going to create a tweet from that photo. This calls a createTweetForAsset method that we will be creating next.
Up next, we will need to implement our createTweetForAsset convenience method to generate a tweet that includes our photo. Add the following code underneath our handlePhotoButtonTapped method:
| 1: | func createTweetForAsset(asset: PHAsset) { |
| - | let requestOptions = PHImageRequestOptions() |
| - | requestOptions.synchronous = true |
| - | PHImageManager.defaultManager().requestImageForAsset(asset, |
| 5: | targetSize: CGSize(width: 640.0, height: 480.0), |
| - | contentMode: .AspectFit, |
| - | options: requestOptions, |
| - | resultHandler: {(image: UIImage?, |
| - | info: [NSObject : AnyObject]?) -> Void in |
| 10: | if let image = image |
| - | where SLComposeViewController.isAvailableForServiceType( |
| - | SLServiceTypeTwitter) { |
| - | let tweetVC = SLComposeViewController(forServiceType: |
| - | SLServiceTypeTwitter) |
| 15: | tweetVC.setInitialText("Here's a photo I tweeted. #pragsios9") |
| - | tweetVC.addImage(image) |
| - | dispatch_async(dispatch_get_main_queue(), { () -> Void in |
| - | self.presentViewController(tweetVC, animated: true, |
| - | completion: nil) |
| 20: | }) |
| - | } |
| - | }) |
| - | } |
-
We start on line 2 by creating a PHImageRequestOptions instance. This will be used in a few lines by requestImageForAsset, which takes this options object as a parameter. On line 3, we set the synchronous option to true. We want to make sure that our tweet does not get sent without its photo attached, so we are specifically telling the application to wait until it has the photo.
-
The requestImageForAsset method will give us a UIImage for our photo library PHAsset, and takes a few parameters to specify the image we get back. On line 5, we set the size of our photo to tweet. We could just say we want the photo to be the base size of the photo in our library, but the image might be 4,000 pixels wide, which would take a really long time to upload and probably be overkill for a simple tweet.
-
The contentMode parameter lets us tell the Photos framework what to do if the photo’s aspect ratio doesn’t match the size we just provided. On line 6, we use AspectFit to specify that we want to scale our photo to stay proportional and fit its largest dimension into the returned image. If we specified AspectFill, it would fit the entire size but possibly sacrifice pixels to do so.
-
requestImageForAsset is another asynchronous method, so it lets us use a closure (lines 8--22) to provide the code that will run when the image is done being prepared. We start with an if let where to see that we got a non-nil image (line 10) and that tweeting is available (lines 11--12).
After these checks, we prepare an SLComposeViewController and autopopulate its default text. This is just like what we did so many chapters ago when we prepared our first tweet!
-
An SLComposeViewController can also take an image argument, and that’s what we’ve done all this work to prepare. On line 16, we finally get to set the image on the compose view controller.
-
Finally, we can present the SLComposeViewController, so the user can review the photo and the default text, and send the tweet. Lines 17--20 wrap this with a dispatch_async that puts it on main queue, since we have no idea what queue is running the closure that is providing us with the image.
-
We are now calling our tweet view controller. We are passing our customized tweet into the method and sending it out into the world.

Run the app, tap the photo button, and see the most recent photo attached to the tweet composer. Send the tweet and after a reload, you’ll be able to see it in your timeline.