
Filling In the Table
Let’s think about how we’re going to go from this to a table of real tweets. Since the table can demand the contents of any row at any time, we’ll want to have a data structure representing all the tweets that we want to show in the table. This doesn’t have to be anything fancy; in fact, an array will do just fine.
But an array of what? Well, one approach would be to just create a data type including the parts of a tweet we care about—its text, the screen name of the person who sent it, and so forth—and then have an array of those objects.
Since starting the PragmaticTweets example, we’ve been dealing almost exclusively in classes, because that’s what we inherit from the iOS SDK: we subclassed UIViewController to handle the UI, and subclassed XCTestCase to create unit tests. But back in Chapter 3, Swift with Style, we said one of the great things about Swift was getting away from classes and pass-by-reference. Finally, we have a good opportunity to do just that: if we want a data type representing the important parts of a tweet, a struct fills the bill much better than a class. We don’t need this type to maintain state or have a bunch of state-mutating functionality; we just need a container for values. That’s totally perfect for a struct.
Creating a ParsedTweet Structure
To create a new struct in our project, we use File > New File (⌘N), which causes a sheet to slide out showing templates for new files, which you see in the following figure. From the iOS group on the left, choose Source, and then from the icons on the right, choose the Swift File template, and click Next.

This takes us to the file dialog that indicates where to save the file and which targets will build the class. For the filename, use ParsedTweet. As for the targets, by default only the PragmaticTweets app will be selected, and not the PragmaticTweetsTests or PragmaticTweetsUITests testing targets. This is what we want—we only need the file built for the app itself—so click Create to create a ParsedTweet.swift file in our project.
The ParsedTweet structure doesn’t need to hold onto every field we could get from Twitter for a given tweet—there are hundreds of them—just the ones we want to show in the UI. For now, let’s figure we’ll want the tweet text, the username, a created-at string, and a URL for the user’s avatar. So we define public properties for those in ParsedTweet.swift.
| | struct ParsedTweet { |
| | var tweetText: String? |
| | var userName: String? |
| | var createdAt: String? |
| | var userAvatarURL: NSURL? |
| | } |
We’ll make all of these optionals, since we are in no position to populate them when an instance of the struct is instantiated. The alternative would be to assign a value like an empty string to one of these properties, but it’s more expressive to use the absence of a value to say “this hasn’t been set yet,” even if it might be a bit more work later to defend against the optional and make sure the property isn’t nil.
We can now create ParsedTweet instances in other classes by simply writing code like this:
| | var myTweet = ParsedTweet() |
| | myTweet.userName = "@pragprog" |
| | myTweet.tweetText = "Check out our new iOS book!" |
The struct also gives us a memberwise initializer that takes all the fields at once, so if it’s convenient to do so, we could do this:
| | let myTweet = ParsedTweet(tweetText : "Check out our new iOS book!", |
| | userName: "@pragprog", |
| | createdAt: "2015-08-31 08:19:00 EDT", |
| | userAvatarURL: nil) |
Keep in mind that if we use let, as in the second example, the myTweet structure, and all its properties, are constants and cannot be changed. It’s good Swift practice to make things constant whenever they can be, but if any of the fields might need to change later, use a var.
Building a Table Model of ParsedTweets
Until we’re ready to get real tweets from the Twitter API, we’ll have to make do with some mock data, predictable stand-in values that will let us figure out tables and put off dealing with network stuff. We can create an array of ParsedTweet objects, and just come up with our own values for the tweetText, userName, and createdAt strings.
Actually, let’s start with the URL. Twitter’s new user “egg” icon lives at a set of URLs like https://abs.twimg.com/sticky/default_profile_images/default_profile_0_200x200.png, where the 0 after profile_ can be any number between 0 and 6 inclusive, each showing a different color, and the 200x200 has several replacements for different sizes. For now, we’ll just use this one image over and over. At the top of ViewController.swift, after the imports and before the class declaration, add the following constant:
| | let defaultAvatarURL = NSURL(string: |
| | "https://abs.twimg.com/sticky/default_profile_images/" + |
| | "default_profile_6_200x200.png") |
We had to split the URL string into two lines for the book’s formatting; feel free to write it all on one line. We would if we could.
Now, we can create an array of ParsedTweet objects to serve as our data model. After the curly brace that begins ViewController’s class declaration, declare an array of ParsedTweets, and then inside square braces, use the memberwise initializer to create as many tweet objects as you like (we’ll just use three to save space). The beginning of the class should look like this:
| | var parsedTweets: [ParsedTweet] = [ |
| | ParsedTweet(tweetText : "iOS 9 SDK Development now in print. " + |
| | "Swift programming FTW!", |
| | userName: "@pragprog", |
| | createdAt: "2015-09-09 15:44:30 EDT", |
| | userAvatarURL: defaultAvatarURL), |
| | |
| | ParsedTweet(tweetText : "But was that really such a good idea?", |
| | userName: "@redqueencoder", |
| | createdAt: "2014-12-04 22:15:55 CST", |
| | userAvatarURL: defaultAvatarURL), |
| | |
| | ParsedTweet(tweetText : "Struct all the things!", |
| | userName: "@invalidname", |
| | createdAt: "2015-07-31 05:39:39 EDT", |
| | userAvatarURL: defaultAvatarURL) |
| | ] |
Now that we have an array that can serve as our data source, we can rewrite the UITableViewDataSource methods to use the ParsedTweets in this array to calculate the number of rows and the contents of each. Rewrite those methods as follows:
| | override func numberOfSectionsInTableView(tableView: UITableView) |
| | -> Int { |
| | return 1 |
| | } |
| | |
| | override func tableView(tableView: UITableView, |
| | numberOfRowsInSection section: Int) -> Int { |
| | return parsedTweets.count |
| | } |
| | |
| | override func tableView(tableView: UITableView, |
| | cellForRowAtIndexPath indexPath: NSIndexPath) -> UITableViewCell { |
| | let cell = UITableViewCell(style: .Default, reuseIdentifier: nil) |
| | let parsedTweet = parsedTweets[indexPath.row] |
| | cell.textLabel?.text = parsedTweet.tweetText |
| | return cell |
| | } |
Also, go ahead and delete the titleForHeaderInSection method; we’ll only have a single section from here on, so the title is superfluous.
In this new version, we have a single section, and the number of rows in this section is just the size of the parsedTweets array. Then we use the indexPath’s row property to figure out which ParsedTweet to fetch from our parsedTweets array, and put its tweetText into the cell’s text label.
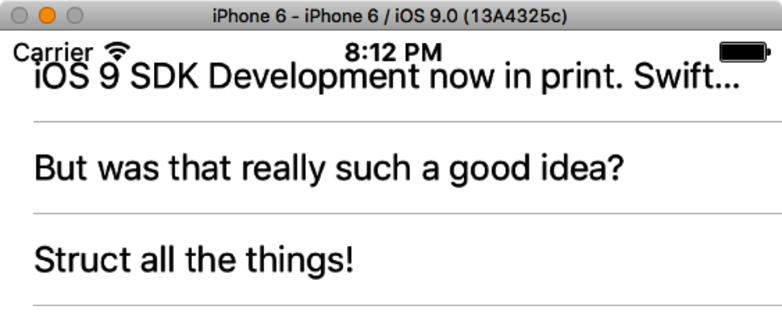
Anyway, run the app now and behold the tweets.
Look at that…we’ve got our tweets in a table view! And they scroll, so if we coded 200 in our mock data array, we could just flick through them.
Of course, the one line of text isn’t big enough for most tweets. So now that we’ve got our data where it needs to be, let’s start improving the table’s appearance.
Reloading Table Contents
One thing that might not be immediately evident but that might come back to bite us later: the only reason we can see any table contents is that the app’s startup will do a one-time presentation of the first view’s contents. Later on, we’ll be updating and changing the table’s contents. So how do we refresh its contents?
We can add ParsedTweet instances to the parsedTweets array, or delete some of its contents, but the array doesn’t have a way to tell the table that its contents have changed, so the table won’t do anything if we just edit the array. As a controller, it’s our job to keep the view and model in sync. UITableView offers methods to notify the table of distinct edits, like insertRowsAtIndexPaths or removeRowsAtIndexPaths. Sometimes, it’s simpler to just do a full-on reload of the table, with reloadData. So let’s revise our old reloadTweets method to do that for us:
| | func reloadTweets() { |
| | tableView.reloadData() |
| | } |
Later on, this view won’t be the first thing we see in the app, so we want to make sure to reload the table automatically any time it appears. Fortunately, we’re already doing that with the call to reloadTweets in the viewDidLoad method.