
How Tests Work in Xcode
Testing functionality was introduced in Xcode 5. Apple based many of its built-in functions on accepted and open source frameworks and has been working very hard to make testing a vital and useful tool in your developer utility belt.
We are going to go over several aspects of testing in Xcode in this chapter. Since we have spent a great deal of time creating and developing the PragmaticTweets app, let’s run it through some tests to see how it works.
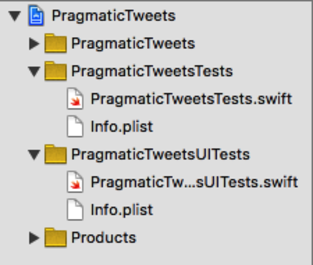
Let’s direct our attention to the File Navigator, shown in this figure. There is a group titled PragmaticTweetsTests. Xcode has conveniently created this group and sample template class, PragmaticTweetsTests.swift, for our first two tests. There is a second group, PragmaticTweetsUITests, with a file PragmaticTweetsUITests.swift; these are our user interface tests, which we’ll try out later in the chapter.

Before we move on to actually looking at the included test files, let’s also look at the Test Navigator (⌘5). Rather than showing test files, this shows the tests themselves, and whether they passed or failed the last time they ran. This is another location in Xcode that makes it easy for you to get an overview of what tests you have and whether or not they are passing.
Click on the PragmaticTweetsTests.swift file in either the Project or the Test Navigator. There are four methods within this class: setUp, tearDown, testExample, and testPerformanceExample. Every test class that we create will have a setUp and a tearDown method. setUp is used to instantiate any boilerplate code you need to set up your tests, and tearDown is used to clear away any of the setup you needed to do for your tests. Whenever we find ourselves repeating code in multiple tests, it’s a candidate for moving into setUp and tearDown. This is the principle of DRY: Don’t Repeat Yourself.
Every test method we create will start with the word “test,” just as the testExample and testPerformanceExample methods demonstrate. The first of these is an example of testing our app’s logic, and the second tests its performance (that is to say, how long it takes to do something). Test classes take no arguments and return no value—this pattern is how our tests are found and executed by the test engine. A test passes if it returns normally, and fails if it fails an assertion method before it returns.
For fun, let’s just run the test included in the template. There are several ways to run your unit tests:
- Keyboard command: ⌘U
- Main menu: Product > Test
- Clicking on the diamond icon next to either the test class or the specific test in Xcode
The first two ways of running tests will run all of your tests, whereas the third way will allow you to run selected tests. This is useful if you have one test that’s failing and you want to focus on that one without having to run all the others.
Run the test in the manner of your choice.
Let’s take a closer look at testExample.
| | func testExample() { |
| | // This is an example of a functional test case. |
| | // Use XCTAssert and related functions to verify your tests produce |
| | // the correct results. |
| | } |
The XCTAssert method mentioned by the comment is provided by the import XCTest statement at the top of the file. It exists to tell the test engine whether a test has passed or failed. Let’s try it out: on a new line in testExample, write:
| | XCTAssert(false, "Pass") |

Oh no! The test stopped working! What happened?
Well, we just changed the conditions of the test. XCTAssert must pass a true condition in its first parameter for the test to pass. Since we programmed the condition to be false, the test fails, and sends the string (which indicates what was supposed to happen) to the test engine, which shows up as an error bar next to the test method. Option-clicking on XCTAssert doesn’t give us nice documentation like most Swift methods, but we’ll cover the most useful XCTest assertions later.
At first blush this might seem like a useless exercise. Why would we want to write a test that always fails when you run it?
We run a test that is designed to fail so that we verify that the testing framework itself is working properly. If we simply create nothing but tests that are supposed to pass, we can’t know for certain that the tests are passing because the code is correct. There could be an error and the tests would pass regardless. By prompting a failure, we now verify that when we write a test that passes that our code is, in fact, working correctly. As one wise person put it, “How do you know your smoke detector works if it never goes off?”