Lesson 2. Set Up and Configure macOS
Goals
![]() Complete an initial configuration of macOS
Complete an initial configuration of macOS
![]() Adjust common system settings
Adjust common system settings
![]() Identify and install a configuration profile
Identify and install a configuration profile
![]() Verify system information
Verify system information
This lesson focuses on both initial setup and ongoing macOS configuration. With a new installation of macOS, you use Setup Assistant for configuration. After that, you almost always use System Preferences and configuration profiles. This lesson also introduces the tools you use to verify system information.
Reference 2.1 Configure a New System
If you are using a new Mac for the first time or you have just completed an upgrade installation of macOS Sierra, you will see Setup Assistant. For new Mac computers or clean installations of macOS, Setup Assistant guides you through the preliminary configuration required for a new system.
If you have just upgraded an existing Mac with a previous version of an Apple operating system, you will still see Setup Assistant, but you will be presented with fewer configuration steps. Most importantly, you will be prompted to enter your Apple ID and password to complete the iCloud setup. Even if you previously set up iCloud on an existing Mac, when Setup Assistant is running you need to reenter your authentication information to complete the upgrade to macOS Sierra.
iCloud is optional and free of charge, and as you’ll see throughout this guide, many powerful macOS Sierra features require iCloud.
Several Setup Assistant steps are optional, and some steps may not appear depending on the Apple operating system configuration. Even so, a few steps are required to set up macOS Sierra. While you’re in Setup Assistant you cannot skip these steps:
![]() Language selection
Language selection
![]() Country selection
Country selection
![]() Keyboard setup
Keyboard setup
![]() Apple terms and conditions acceptance
Apple terms and conditions acceptance
![]() First account creation
First account creation
You can easily change the settings you select in Setup Assistant by accessing corresponding settings in System Preferences. Changing settings after completing Setup Assistant is covered later in this lesson.
Note
Attempting to use the Command-Q keyboard shortcut in Setup Assistant will prompt you to choose to either shut down or continue.
Mac computers managed by a school or business may present different Setup Assistant options than the defaults shown here. In certain managed situations, some of the default screens may be skipped and you may encounter additional organizational configuration screens. These differences are controlled by an administrator via mechanisms outside the Mac. Thus, you may have to contact the organization’s primary administrator to properly complete the Setup Assistant process.
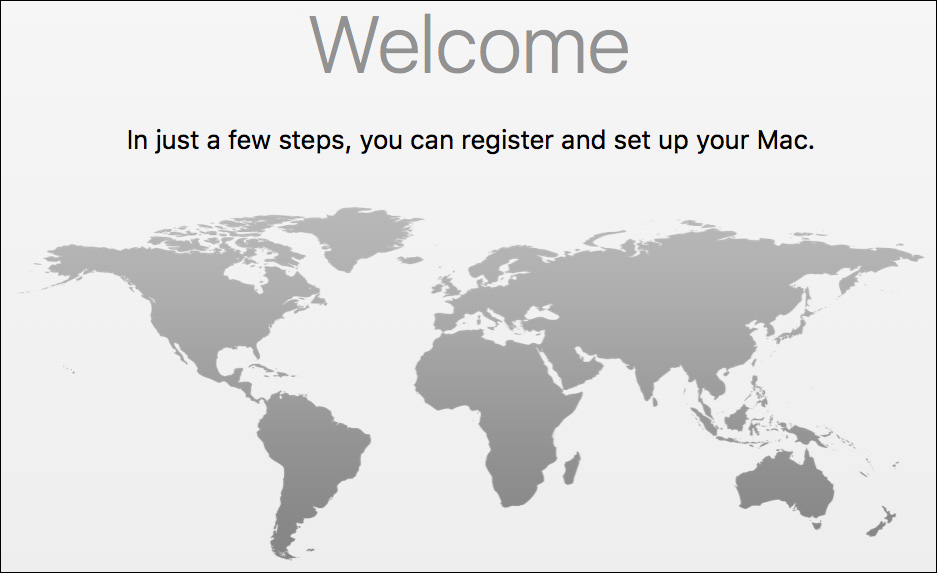
Setup Assistant: Language, Country, and Keyboard
The preliminary screens of Setup Assistant are required to configure appropriate user interaction for the system. If a new Mac has never been used before, the first Setup Assistant screen requires that you select the default language to be used by the system and applications.
Next, the Setup Assistant screen requires that you select your country; this information is used to set regional language options, set the appropriate Apple online stores, and complete the registration processes. At this point, you will also have to select the primary keyboard layout. System language and keyboard layout settings can be changed later from Language & Region preferences.
More Info
Alternatively, during the initial stages of Setup Assistant, users who have a visual disability can choose to enable VoiceOver to interact with macOS using only audio cues. You can find out more about assistive technologies from Apple’s accessibility website, www.apple.com/accessibility/.
Setup Assistant: Network Settings (Optional)
Setup Assistant will attempt to establish a connection to the Internet by automatically configuring the Mac computer’s network settings. It will first attempt to automatically configure via Dynamic Host Configuration Protocol (DHCP) on an Ethernet network or open Wi-Fi network. If a connection is made this way, you won’t be prompted to set up networking.
Otherwise, the assistant will try to figure out which type of network connection you need to set up and present you with the appropriate configuration screen. On most Mac computers, this will be the Wi-Fi network setup screen, where you can select a wireless network and authenticate to it. Alternatively, you can postpone setting up networking at this point, and do it later from Network preferences. Lesson 19, “Manage Basic Network Settings,” covers this topic in greater detail.
Setup Assistant: Transfer Information (Optional)
Using this optional utility, also known as Migration Assistant, you can transfer computer and user information from another computer or a backup to the new system. Completing the transfer from another system enables you to skip most of the remaining steps of Setup Assistant, as the configuration is gathered from the previous system. Lesson 6, “Manage User Home Folders,” covers transferring information via Migration Assistant in greater detail.
If you do not have a previous system to migrate settings and data from, leave the default choice, and click Continue to proceed with the Setup Assistant process.
Setup Assistant: Location Services (Optional)
Enabling Location Services will allow the system and applications to locate your Mac using a Wi-Fi–based geolocation technology. Location Services is required for Find My Mac, which can also be enabled later during Setup Assistant. You can further adjust Location Services in Security & Privacy preferences. Lesson 7, “Manage Security and Privacy,” covers Location Services in greater detail.
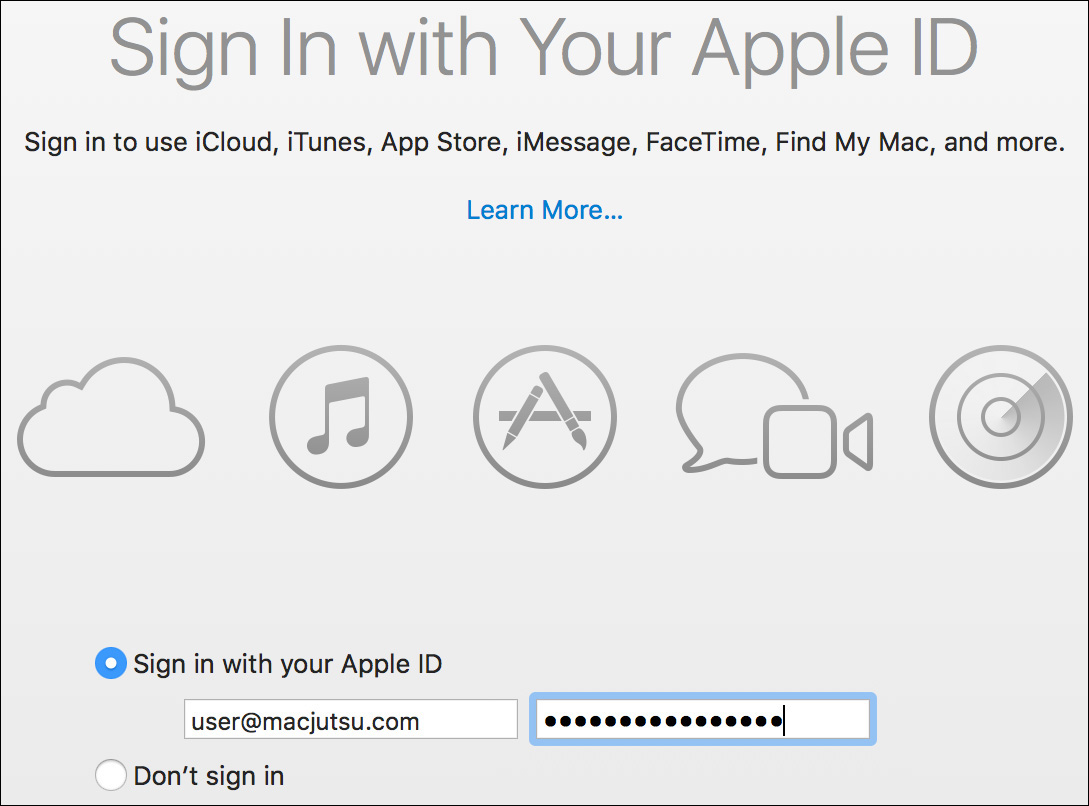
Setup Assistant: Sign In with Your Apple ID (Optional)
Again, both new systems and systems upgraded to macOS Sierra may prompt you to enter your Apple ID authentication. New systems will present this screen only if the Mac is connected to the Internet. At this screen you can enter an existing Apple ID, recover a lost Apple ID, or create a new Apple ID.
About Apple ID
An Apple ID is free to set up and provides login access for Apple online and store services. If you have ever purchased anything online from Apple, such as from the iTunes Store, you already have an Apple ID.
Once you have entered or created an Apple ID during Setup Assistant, the account is automatically configured for several services, including Messages, FaceTime, Game Center, and iCloud. Additionally, if the Apple ID has been previously used for purchasing, it will be automatically configured in the various online store applications including the Mac App Store, iTunes Store, and iBooks Store. If you use separate Apple IDs for iCloud and store purchases, you also have the option to enter both Apple IDs during the Setup Assistant process. Lastly, in subsequent Setup Assistant steps, this Apple ID will be preentered for optional configuration of computer account setup and system registration.
More Info
For more information about Apple ID, see the Apple ID Support website, https://support.apple.com/apple-id.
About Two-Step Verification and Two-Factor Authentication
Your Apple ID grants access to so many Apple services and features that protecting access to your Apple ID is paramount. No longer is using only a name and password considered adequate security. Thus, to significantly improve the security of an Apple ID, you can enable two-step verification or two-factor authentication. Although these two security measures for Apple ID have differences, they are fundamentally similar in that they provide additional authentication mechanisms beyond name and password.
Two-step verification for Apple ID was introduced in 2013 and can be enabled from the Apple ID account page, https://appleid.apple.com/. Because of its age, two-step verification can support older Mac operating systems and iOS versions.
Two-factor authentication uses improved methods to trust devices and deliver verification codes, and offers a more streamlined user experience. However, two-factor authentication is only available to Apple IDs with iCloud enabled and at least one device that’s using iOS 9 or OS X El Capitan 10.11 or later. Further, two-factor authentication can be enabled only from a Mac or iOS device meeting these system requirements.
When entering an Apple ID while using the macOS Sierra Setup Assistant, a variety of situations can occur depending on the security configuration of your Apple ID:
![]() If you’re entering an Apple ID that already has two-step verification or two-factor authentication enabled, you will be prompted to verify your Apple ID via additional steps. At the time of this writing, if your Apple ID has two-step verification enabled, you are not required to update to two-factor authentication.
If you’re entering an Apple ID that already has two-step verification or two-factor authentication enabled, you will be prompted to verify your Apple ID via additional steps. At the time of this writing, if your Apple ID has two-step verification enabled, you are not required to update to two-factor authentication.
![]() If you’re creating a new Apple ID, you will be prompted to enter security information, including the option to enable two-factor authentication. Because you’re using macOS Sierra, you will not have the option to enable the older two-step verification method.
If you’re creating a new Apple ID, you will be prompted to enter security information, including the option to enable two-factor authentication. Because you’re using macOS Sierra, you will not have the option to enable the older two-step verification method.
![]() If you’re entering an Apple ID that hasn’t been used in a while and doesn’t have additional security features enabled, you will be prompted to update your security settings, including optionally enabling two-factor authentication. Again, because you’re using macOS Sierra, you will not have the option to enable the older two-step verification method.
If you’re entering an Apple ID that hasn’t been used in a while and doesn’t have additional security features enabled, you will be prompted to update your security settings, including optionally enabling two-factor authentication. Again, because you’re using macOS Sierra, you will not have the option to enable the older two-step verification method.
More Info
For more information about two-step verification, see Apple Support article HT204152, “Frequently asked questions about two-step verification for Apple ID.” For more information about two-factor authentication, see Apple Support article HT204915, “Two-factor authentication for Apple ID,” article HT205075, “Availability of two-factor authentication for Apple ID,” and article HT207198, “Switch from two-step verification to two-factor authentication.”
About iCloud
iCloud is a free cloud-storage and communication service that you can set up on any Apple device. Though not required for completing Setup Assistant, iCloud is the easiest way to share information between macOS, iOS, and even non-Apple devices. As you will see throughout this guide, macOS Sierra features deep integration with iCloud services.
Only Apple IDs that have signed in to iCloud on a Mac or an iOS device have access to iCloud services. If an existing Apple ID has never been used for iCloud, entering this account during Setup Assistant will upgrade the Apple ID to include iCloud services. Further, Setup Assistant will automatically configure your Mac to use iCloud for most services.
The following iCloud services will be enabled by default in most cases: iCloud Drive, Photos, Contacts, Calendars, Reminders, Safari, Notes, and Find My Mac. If the Apple ID you enter belongs to the @mac.com, @me.com, or @icloud.com domain, then Mail is also automatically configured. After you create your local computer account, Setup Assistant will also prompt you to enable iCloud Keychain.
If you’re entering an Apple ID that belongs to someone under the age of 13 (made possible via Apple School Manager or iCloud Family Sharing), no iCloud services will be enabled by default.
After setup, you can verify and modify iCloud service settings from iCloud preferences. iCloud is covered in this guide where appropriate—specifically, in Lesson 7, “Manage Security and Privacy,” Lesson 17, “Manage Documents,” and Lesson 22, “Manage Network Services.”
More Info
For more information about iCloud, see the iCloud Support website, https://support.apple.com/icloud.
Setup Assistant: Terms and Conditions
Accepting the Apple terms and conditions is a requirement to complete Setup Assistant. The content of the Terms and Conditions page will vary depending on whether you entered an Apple ID in the previous step. Accepting the terms and conditions does not send any personal or technical information to Apple. In fact, you can accept them even if your Mac is offline and never accesses the Internet.
More Info
For more information about Apple terms and conditions, visit the Apple Legal website, at www.apple.com/legal/.
Setup Assistant: Create a Computer Account
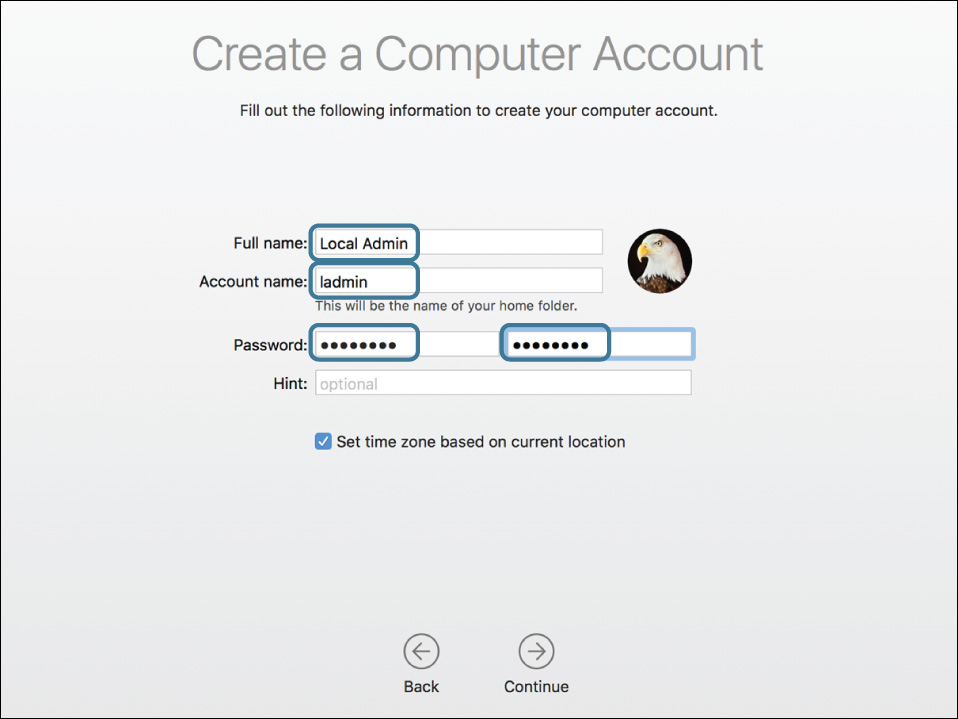
After the Terms and Conditions step, you arrive at one of the most important steps of the setup process, the “Create a Computer Account” screen. Here you must create the initial administrative user account for the system. At first, this account will be the only administrative user account allowed to modify system settings, including the creation of additional user accounts. Therefore, until you create additional administrative user accounts, you must remember the authentication information for this account.
Apple ID Provided During Setup
If you previously entered an Apple ID, that information will be used to configure services for a new local administrator account. As a default in macOS Sierra, you can also optionally use your Apple ID information to create the new computer user account. Setup Assistant will automatically populate the full name based on your Apple ID. The account name, used to create the user’s home folder, is also prepopulated. For either name you can enter something different than your Apple ID.
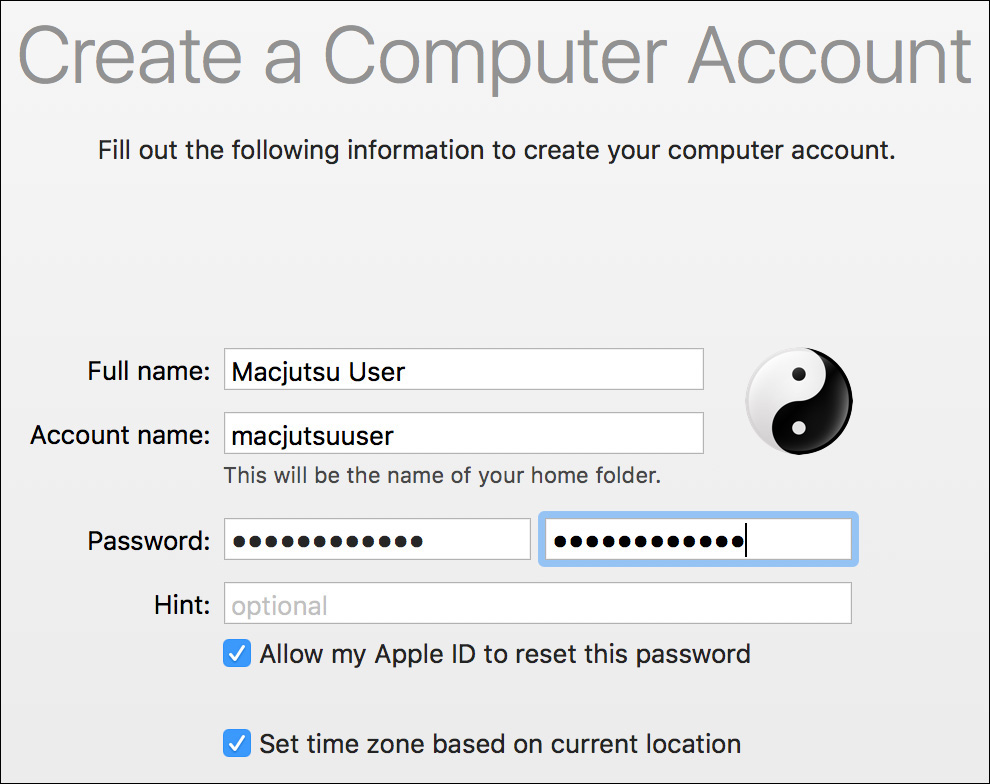
You must provide a new password for the local administrator account. Importantly, the password you define for this account does not need to match the Apple ID password.
Note
Your Apple ID and your local computer account are two separate accounts. Even if you set the names and passwords to match, the system does not synchronize the names or password between the accounts. In other words, if you change the names or password for one account, it will not automatically change the other account.
As you can see in the previous screenshot, two methods are provided to help you recover from a lost password. First, you can define a password hint, which is a clue intended to help you if you forget this account’s password. Although you can define more than one word for the password hint, you cannot set the password hint to the same text as the password. In this case, a better choice is to allow your Apple ID to reset this account’s password. This feature can also be disabled, but it will come in handy later should you forget your account password.
Apple ID Not Provided During Setup
If have not entered an Apple ID during Setup Assistant, the name fields will not be prepopulated and you will not have the option to reset the computer account password with an Apple ID. However, after setup, you can modify local user accounts from the Users & Groups preferences, and adjust iCloud service settings from the iCloud preferences. Additional user account creation and management are detailed in Lesson 5, “Manage User Accounts.”
Time Zone
Finally, below the user information, you’ll note that macOS is configured to automatically set the time zone based on the computer’s location. The system is also configured to automatically set the date and time using the Apple time servers. The automatic configuration of the time requires an Internet connection and that Location Services be enabled.
If you choose not to set the time via Location Services or it isn’t enabled, you will be required to manually set a time zone for the system by selecting a city in your time zone. After setup, you can verify and modify these settings from the Date & Time preferences.
Setup: iCloud Keychain (Optional)
After creating the local administrator account, if you previously entered an Apple ID, you will be prompted to optionally enable iCloud Keychain. This feature securely saves your private information, like service usernames and passwords, to your iCloud account. This allows for easy access from multiple devices. If your Apple ID is using two-factor authentication then iCloud Keychain setup is automatic. For Apple IDs without two-factor authentication, enabling iCloud Keychain will prompt you to set up an iCloud Security Code if it hasn’t already been set.
If you choose not to set up iCloud Keychain at this point, you can do so later from the iCloud Preferences. Lesson 8, “Manage Password Changes,” covers this topic in greater detail.
Setup: iCloud Drive (Optional)
If you previously entered an Apple ID that has not been upgraded to support iCloud Drive, you will be prompted to upgrade your previously stored iCloud documents. This one-time process is required if you intend to access documents stored in iCloud on OS X Yosemite 10.10 and later or iOS 8 and later devices. However, if you are setting up a new Apple ID with iCloud, or if you have already been using iCloud Drive, your account will not need to be upgraded.
New in macOS Sierra is the ability to save the user’s local Desktop and Documents folders to iCloud Drive. Users signed in with an Apple ID that supports iCloud Drive will see the option to move their local Documents and Desktop folders to iCloud Drive.
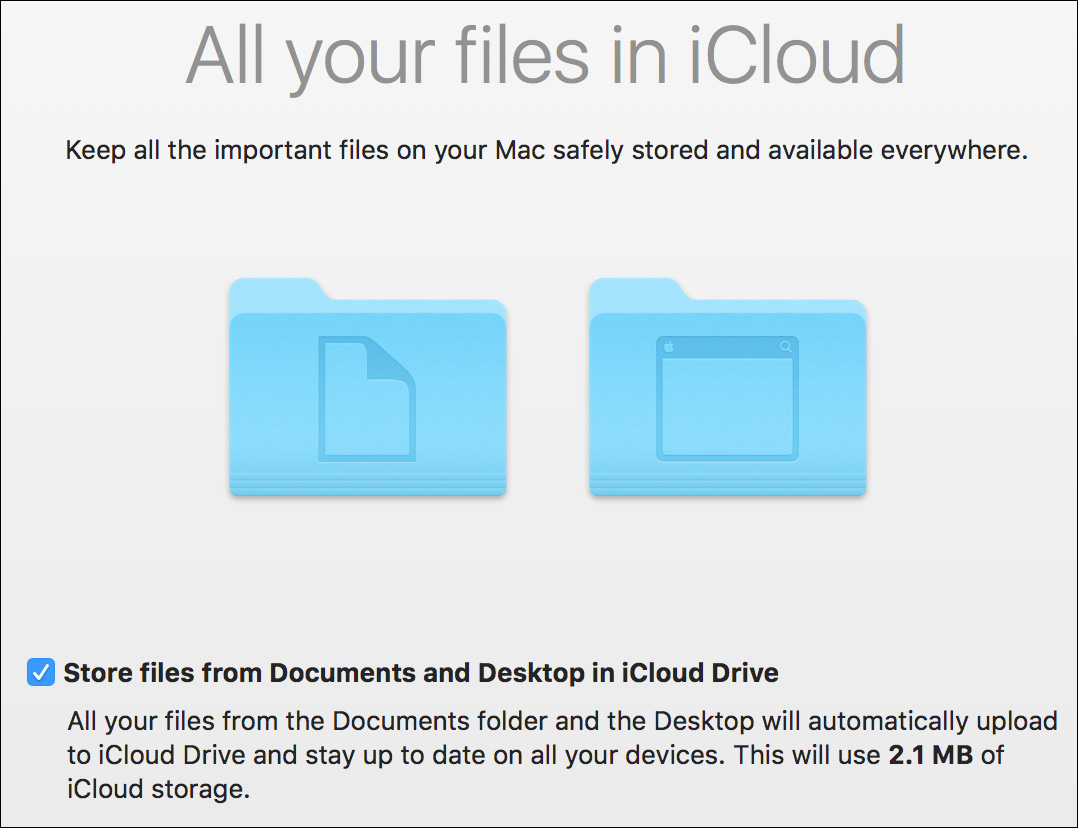
If you choose not to upgrade to iCloud Drive or move the Documents and Desktop folders to iCloud Drive at this point, you can do so later from the iCloud preferences. Lesson 17, “Manage Documents,” covers this topic in greater detail.
Setup: FileVault Disk Encryption (Optional)
FileVault can be used to protect the system volume by encrypting its contents. If you are working through Setup Assistant on a late-model portable Mac that doesn’t have FileVault enabled, you may be prompted to enable this feature. This screen will appear on both new systems and systems upgraded to macOS Sierra, but only if the system has a single local user account and that account has also signed in to iCloud.
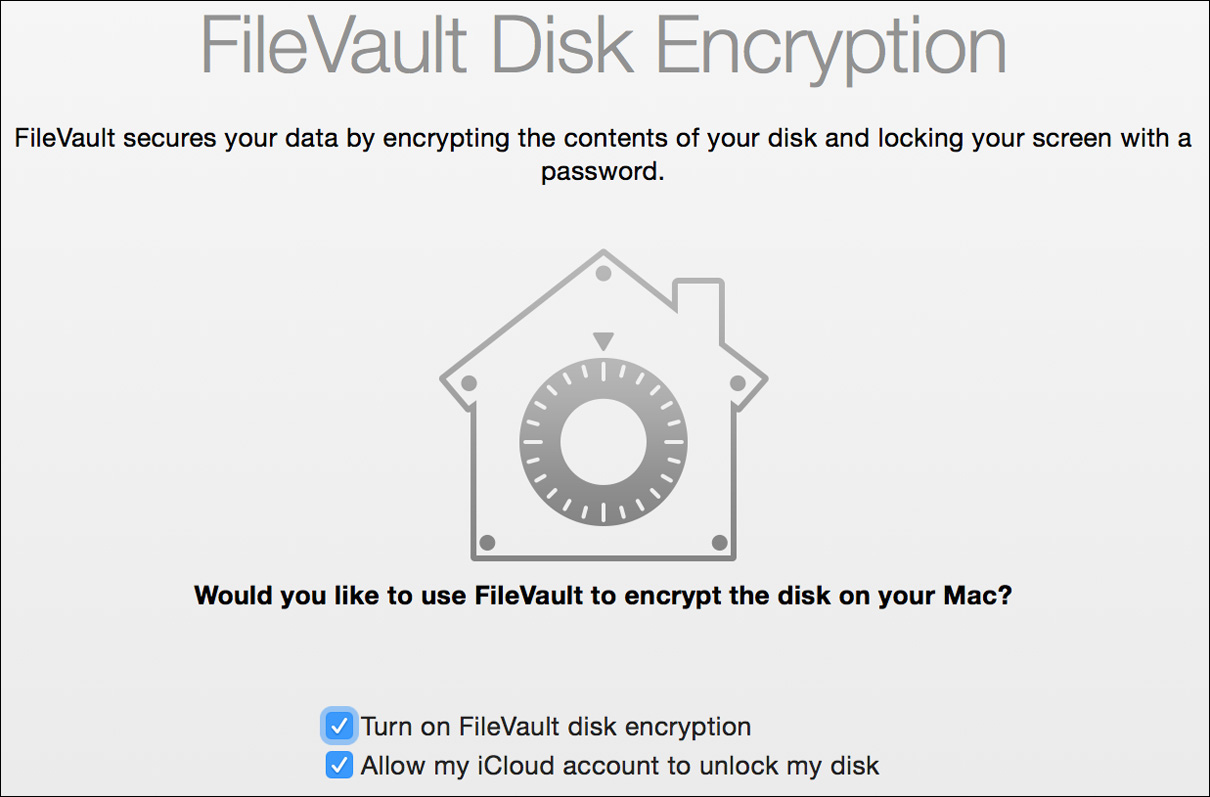
If you select the option to turn on FileVault, you will also be allowed to save a FileVault recovery key to iCloud. If you don’t choose the option to allow iCloud to unlock the disk, then you will be presented with another screen showing the FileVault recovery key. In this case, you are responsible for manually saving the recovery key to a safe location.
Note
The macOS interface sometimes uses “iCloud account” instead of “Apple ID.” However, because all Apple services, including iCloud, are accessed via Apple ID authentication, this guide uses the term “Apple ID” when discussing Apple service authentication.
After Setup Assistant is complete, the system will begin to encrypt the contents of the system volume. The computer will not have to restart, and the encryption will complete silently in the background. Because this option appears only on systems with a single local user account, only that local account will be allowed to unlock the encrypted system during startup. If the account password is lost, the disk will remain locked unless it is reset using a FileVault recovery key.
If you choose not to enable FileVault at this point, you can do so later from the Security & Privacy preferences. Lesson 10, “Manage FileVault,” covers this topic in greater detail.
Setup: Diagnostics & Usage (Optional)
By default, macOS is configured to automatically send diagnostic and usage information to Apple and third-party developers. Both of these feedback mechanisms allow developers to improve system and application performance. Providing this type of feedback may be a privacy concern for some, so it can be disabled as well. After setup, you can verify and modify these settings from the Security & Privacy preferences, as covered in Lesson 7, “Manage System Security.”
Setup: Siri (Optional)
New in macOS Sierra is the ability to vocally request actions via Siri. This virtual assistant can perform tasks or find things both locally on the Mac and on the Internet. Siri uses a microphone to listen for your requests. Some may consider this a security concern, so during Setup Assistant you have the option to disable Siri. After setup, you can verify and modify Siri settings from the Siri preferences, as covered in Lesson 7, “Manage Security and Privacy.”
More Info
The latest MacBook computers featuring Touch ID will present additional setup screens. You can find out more about this in Apple Support article HT207054, “Use Touch ID on MacBook Pro.”
Reference 2.2 Manage System Settings
Once Setup Assistant has completed the initial configuration, you’ll find that there are two primary methods for modifying macOS system and user settings: System Preferences and profile installation.
System Preferences
The System Preferences application is the primary interface for adjusting user and system settings. You will use System Preferences throughout this guide and anytime you are setting up or reconfiguring a Mac system. The quickest access to System Preferences is from the Apple menu, because it’s available from any application that shows the menu bar.
The System Preferences application can also be found in the /Applications folder. You can use any shortcut method you like to access the System Preferences application, including clicking its icon in the Dock. With a default installation of macOS, System Preferences appears in the Dock, but it can also be removed like any other icon in the Dock.
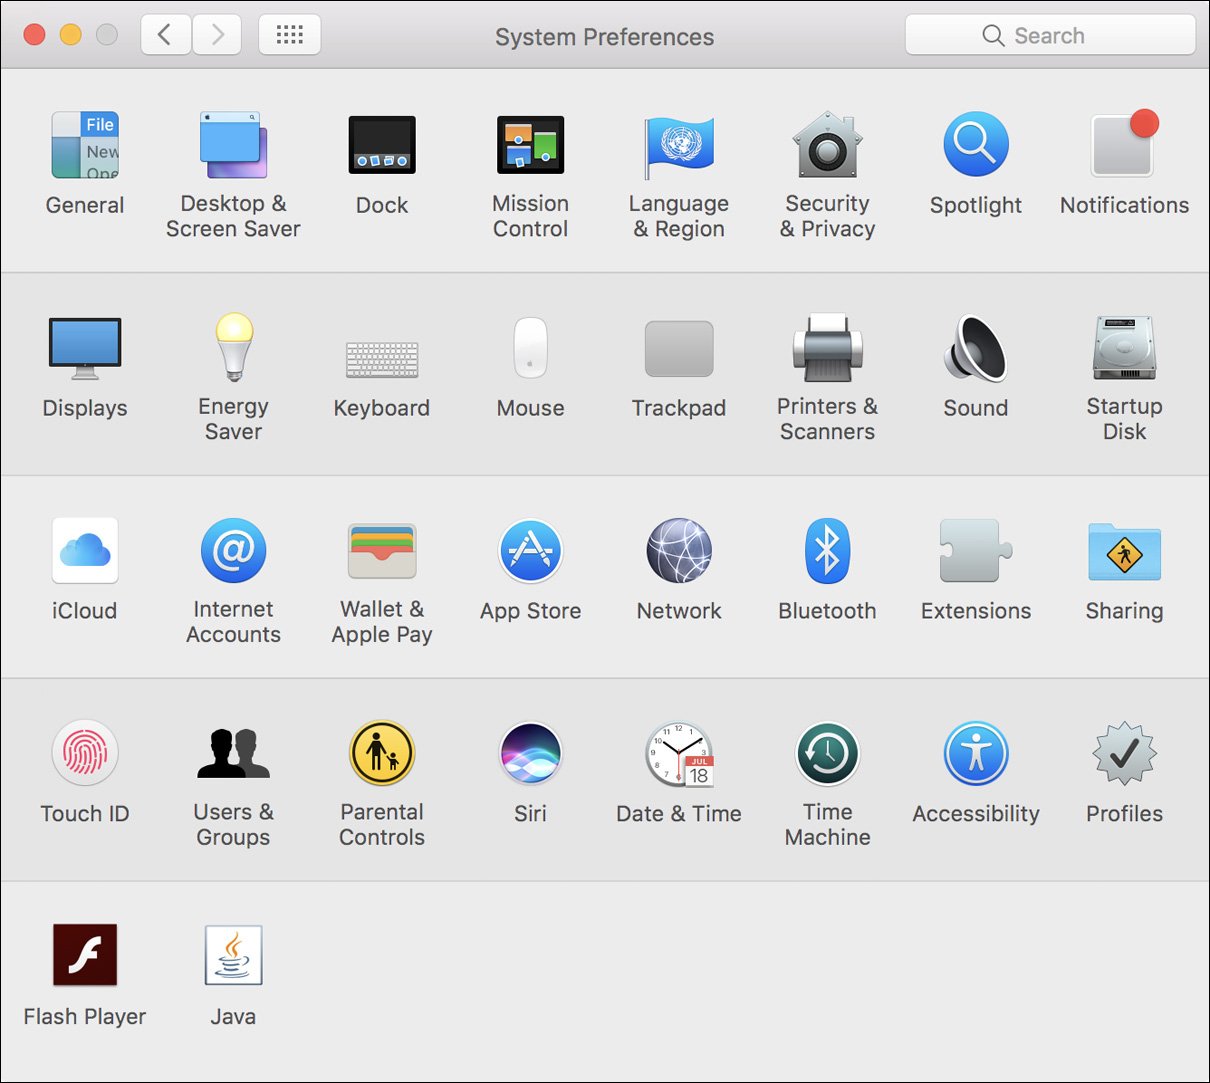
When you open System Preferences, you’ll notice it is divided into four or five separate categories (rows) of preference icons. The first four categories of preference icons are built into macOS. Although the rows are not labeled in the interface, the first four categories represent personal, hardware, Internet, and system settings. A fifth, and final, category of preference icons will automatically appear if any third-party preferences are installed.
Tip
While you’re in System Preferences, the View menu can give you quick access to all the preferences. You can choose to organize the preferences alphabetically or to hide individual preferences.
If you are ever confused about where to find a particular setting among the various preferences, use the Spotlight search option in the upper-right corner of the System Preferences window. Entering text in this field will automatically highlight preferences containing your search criteria.
Accessing a set of preferences is as simple as clicking the relevant preference icon. Most System Preferences changes are instantaneous and don’t require you to click an Apply or OK button. In the System Preferences toolbar, clicking the Show All button (representing a grid of icons) to the right of the navigation arrows returns you to the view of all preferences.

You may notice that some preferences have a lock in the lower-left corner. These can be accessed only by an administrative user account. If a set of preferences you need to access is locked from editing, simply click the lock icon, and then authenticate as an administrative user to unlock it.

If you are logged in as a nonadministrative user in macOS, more preferences will be locked than if you are logged in as an administrative user. For example, if you are logged in as an administrative user, Mac App Store preferences will not show the lock icon, whereas if you are logged in as a nonadministrative user, Mac App Store preferences will be locked by default.
The lock icon appears in a variety of places, not just in System Preferences. The lock icon is a general indication that access to the item requires administrative authentication. This is often the case when an item represents a change that affects all users.
Configure via Profile
An alternative method for system setup is to install profiles. Profiles were originally created to provide easy configuration and management for iOS devices, but they are now also used in macOS.
A profile is a document that includes instructions for specific settings. For example, profiles can contain settings for Internet accounts or network preferences. Profile documents can be identified by their icon and the filename extension of .mobileconfig.
When a profile is installed, user and system settings are automatically configured based on the profile’s content. Thus, an administrator can create a profile that contains a complex variety of settings and then share this profile document with multiple users. The users can then easily install the profile themselves instead of having to manually configure settings. In other words, profiles can save administrators as well as users a lot of time.
Both Apple and third-party developers provide software for creating profiles. Apple alone is responsible for multiple tools that can create profiles, including Xcode, the Apple Configurator application, and the Profile Manager service of macOS Server.
Different general types of profiles are tailored to specific purposes. For example, configuration profiles contain settings that automatically configure certain functions. Trust profiles contain digital certificates, which are used to validate and secure service connections. Enrollment profiles are used to establish a connection to a profile management service, more commonly known as a mobile device management (MDM) service.
Administrators can provide profiles through any means that one would use to share any other document. For example, an administrator could send a profile via email or make it available as a download from a link on a website. Alternatively, administrators can automatically push profiles to a macOS system that is enrolled in an MDM service like that provided by the Profile Manager service of macOS Server. Details regarding the creation of profiles are beyond the scope of this guide, but every Mac administrator should be familiar with how to identify and verify these profiles.
More Info
You can find out more about Profile Manager in macOS Server at www.apple.com/macos/server/.
Profile Installation
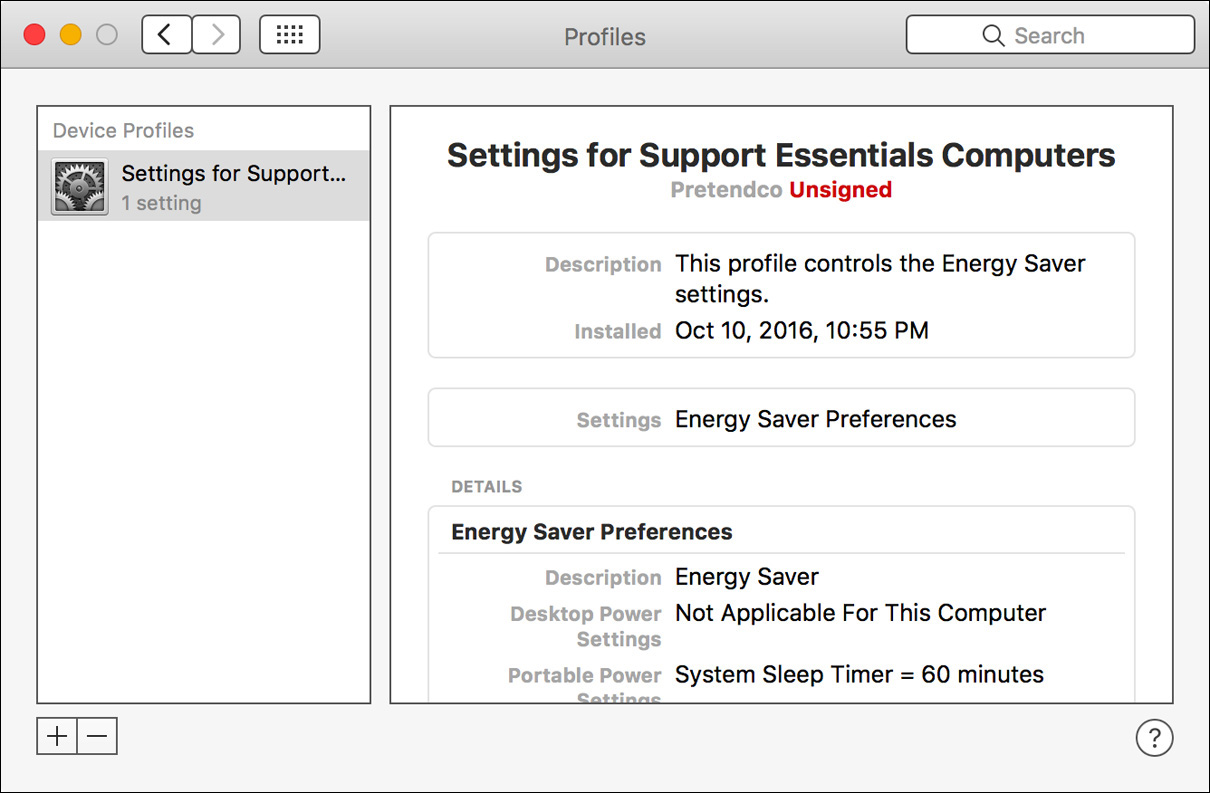
If you are presented with a profile that needs to be installed, simply double-click the file to install it. This automatically opens the profile document in the Profiles pane of System Preferences. Profiles preferences appear only when profiles are installed.
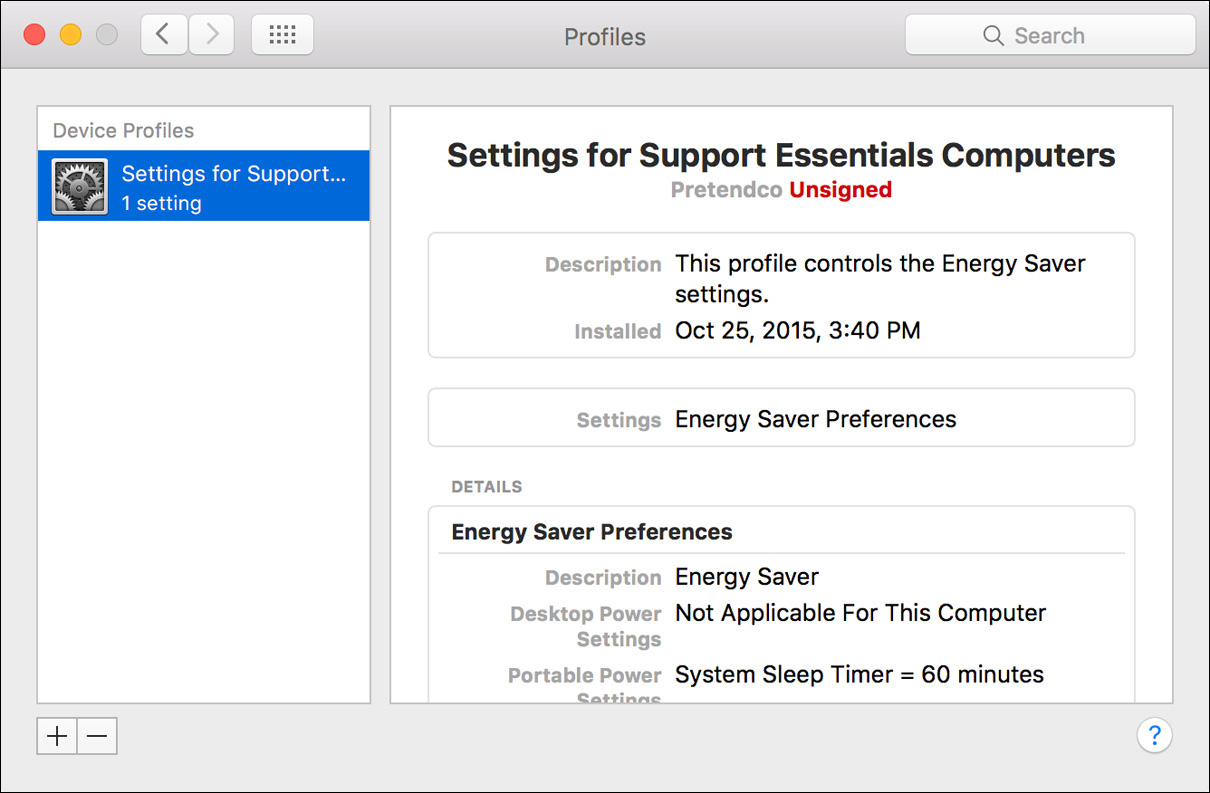
From Profiles preferences, any user with administrative privileges can install, verify, or delete a profile. The previous screenshot shows an installed trust profile that contains a digital certificate. Delivering this type of information via a profile is ideal, because it simplifies a process that would take several more complicated steps using a traditional method.
Note
The installation of some profiles may require entering additional authentication information. For example, a profile that configures VPN settings will likely require that the user enter a password to authenticate a VPN session.
Verifying the results of an installed profile is a bit more difficult, because the profile could contain multiple settings that affect a variety of services and applications. However, inspecting the details section of an installed profile in Profiles preferences is a good starting point. Again, in the previous example, the Settings section shows that this is a trust profile containing a digital certificate. As covered in Lesson 8, “Manage Password Changes,” you can open the Keychain Access application to verify the installation of this certificate.
Reference 2.3 Inspect System Information
Knowledge of your Mac computer’s specifications is always important when installing new software, updating installed software, performing maintenance, or troubleshooting a problem. In this section you will learn how to gather essential system information with the About This Mac window, the System Information application, and the Console application.
About This Mac Window
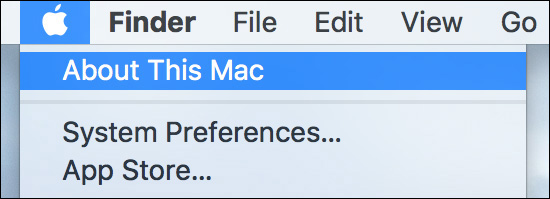
Your first stop in discovering a Mac computer’s specifications is the About This Mac window. You can open it from any application by choosing About This Mac from the Apple menu.
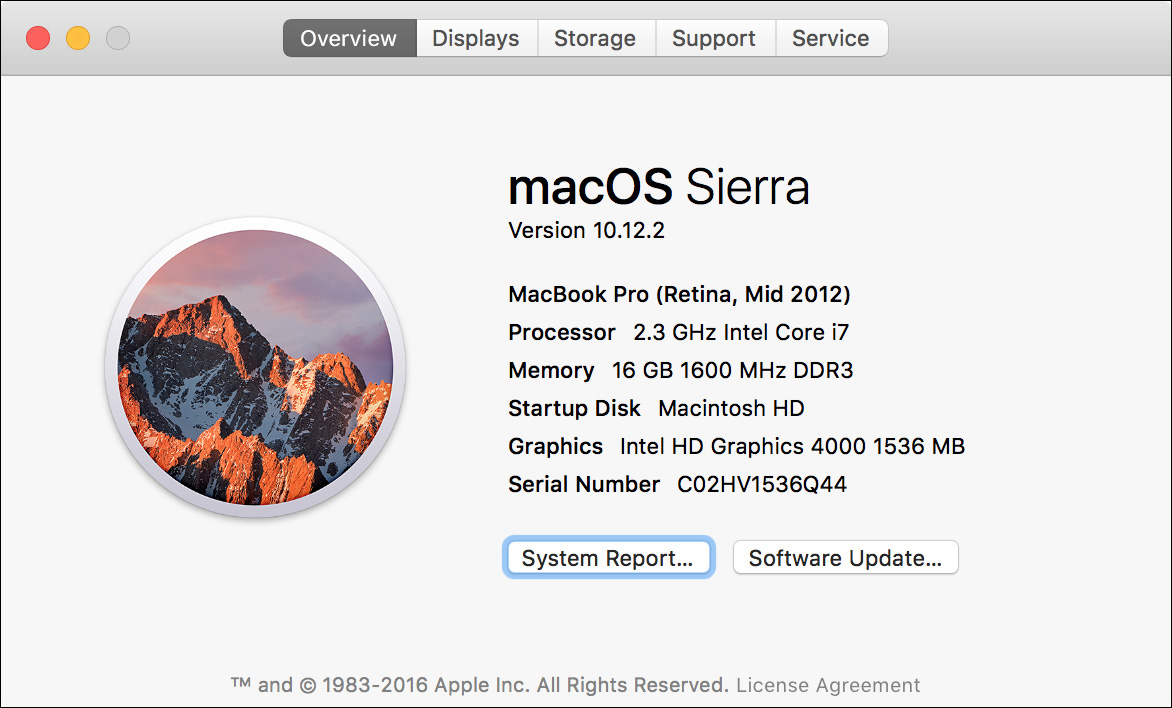
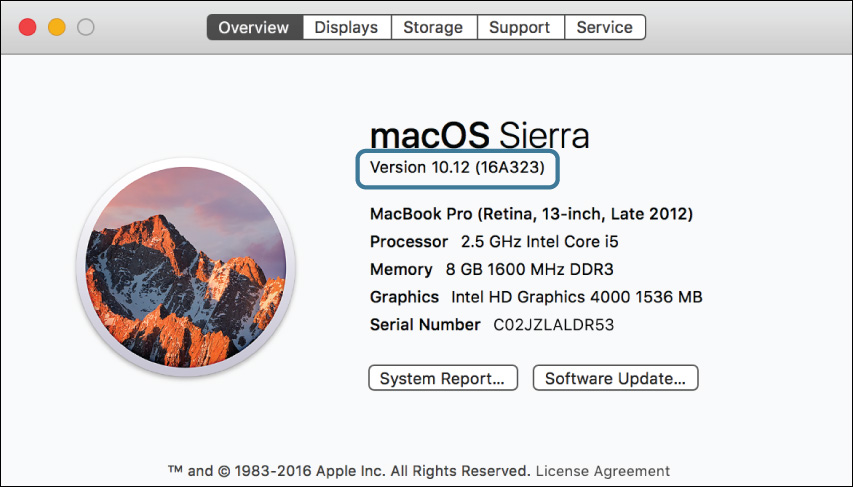
The initial view of the About This Mac window shows you the system software version, Mac model name, processor type and speed, total system memory, graphics card information, and Mac serial number. Clicking the system version number reveals the system build number.
Mac computers that have had their logic boards improperly replaced may not display the correct serial number in the About This Mac window.
Of the information in the About This Mac window, a few items are vital to the identification of the macOS system and Mac hardware:
![]() System version number—This number represents the specific system software version currently installed on the computer. The first part, 10, obviously represents the tenth generation of the Mac operating system. The second section, 12, represents the twelfth major release of macOS. The final portion, in this case 2, represents an incremental update to the operating system. Incremental updates generally offer few feature changes but often include a number of security and bug fixes.
System version number—This number represents the specific system software version currently installed on the computer. The first part, 10, obviously represents the tenth generation of the Mac operating system. The second section, 12, represents the twelfth major release of macOS. The final portion, in this case 2, represents an incremental update to the operating system. Incremental updates generally offer few feature changes but often include a number of security and bug fixes.
![]() System build number—This appears when you click the system version number and is an even more granular representation of the specific system software version installed on the computer. Apple engineers create hundreds of versions of each system software release as they refine the product. The build number is used to track this process. Also, you may find that the computer-specific builds of macOS that come preinstalled on new Mac hardware differ from the standard installation builds. This is an important detail to note if you are creating system images for mass distribution—computer-specific builds of macOS may not work on other types of Mac hardware.
System build number—This appears when you click the system version number and is an even more granular representation of the specific system software version installed on the computer. Apple engineers create hundreds of versions of each system software release as they refine the product. The build number is used to track this process. Also, you may find that the computer-specific builds of macOS that come preinstalled on new Mac hardware differ from the standard installation builds. This is an important detail to note if you are creating system images for mass distribution—computer-specific builds of macOS may not work on other types of Mac hardware.
![]() Mac model name—The Mac computer’s model name is most often derived from the product marketing name for the Mac, followed by a relative release date. For example, the previous screenshot was taken on a “MacBook Pro Retina, Mid 2012.” Because Apple releases very few Mac models each year, this naming convention is specific enough for hardware support identification.
Mac model name—The Mac computer’s model name is most often derived from the product marketing name for the Mac, followed by a relative release date. For example, the previous screenshot was taken on a “MacBook Pro Retina, Mid 2012.” Because Apple releases very few Mac models each year, this naming convention is specific enough for hardware support identification.
![]() Mac serial number—The hardware serial number is also located somewhere on the Mac case, but sometimes it can be difficult to find. Serving the same purpose here as it does on many other mass-produced products, the serial number is a unique number used to identify that particular Mac for maintenance and service issues.
Mac serial number—The hardware serial number is also located somewhere on the Mac case, but sometimes it can be difficult to find. Serving the same purpose here as it does on many other mass-produced products, the serial number is a unique number used to identify that particular Mac for maintenance and service issues.
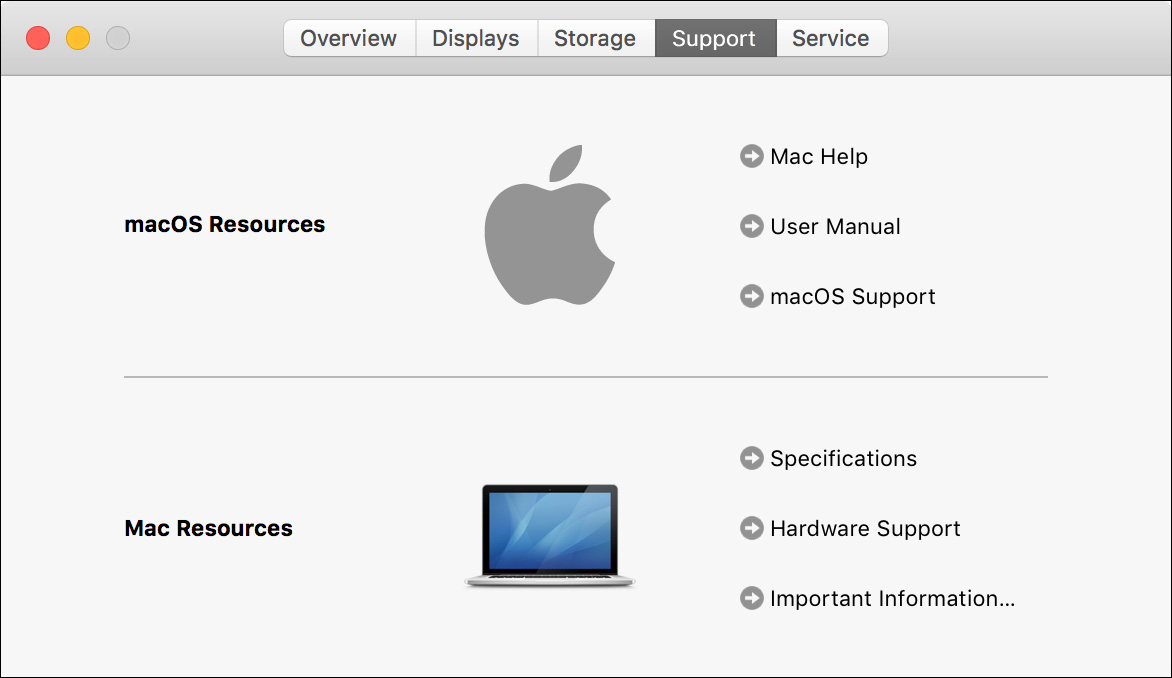
Clicking the buttons across the About This Mac window’s toolbar reveals more details about the computer’s hardware and support options. Quite possibly the best feature of this window is the Support and Service buttons, which link directly to specifically useful areas of the Apple Support website. The contents of the links are generated dynamically to show the most up-to-date support information about macOS and your Mac. For example, the Specifications link opens a webpage with the full specifications for your specific Mac.
System Information Application
The information in the About This Mac window is only the tip of the iceberg compared with what you can find via the System Information (formerly System Profiler) application. From the About This Mac window, click the System Report button to open System Information. You can also open this application in the Finder by double-clicking /Applications/Utilities/System Information.app. Opening using either method opens a new System Information window revealing all available reporting options.
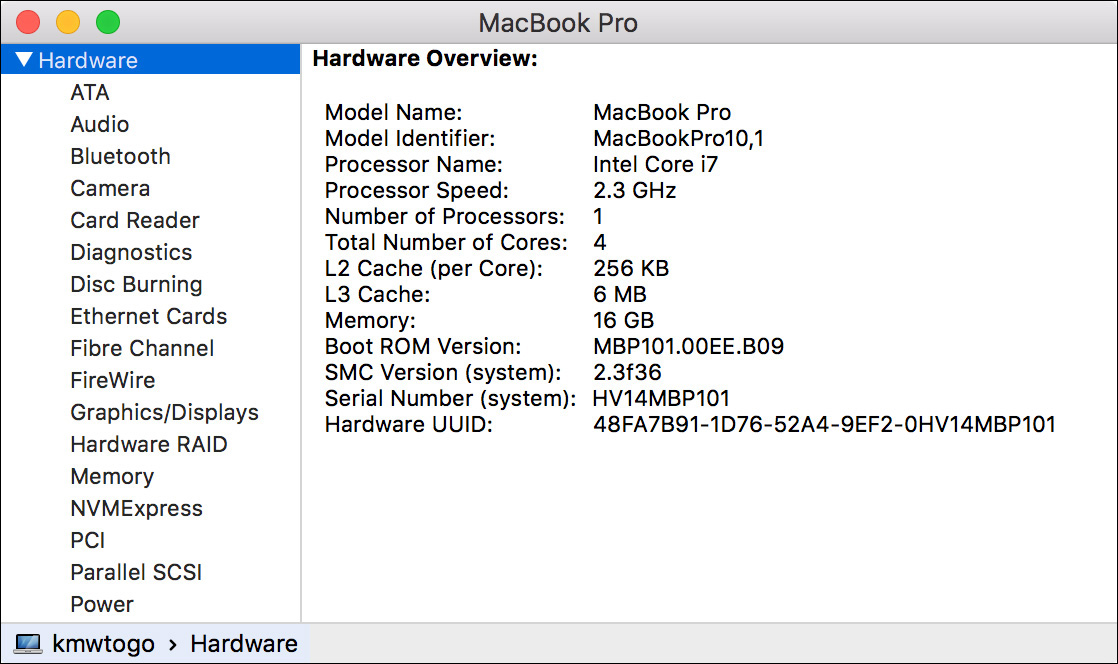
You will use System Information to locate critical system details in nearly every lesson of this guide. Additionally, one of the most important uses of System Information is as a documentation tool. Anytime you need to document the current state of a Mac, you can use System Information to create a detailed system report by choosing File > Save from the menu. This creates a System Information–specific file (with the .spx filename extension) that can be opened from other macOS systems.
Tip
For quick access to the System Information application, select the Apple menu and then hold down the Option key. The About This Mac menu option changes to System Information while the Option key is pressed.
Console Application
In general, when using macOS, error dialogs will appear only if the issue is something relatively easy for users to resolve on their own, or if the issue presents a significant problem that requires immediate attention. Otherwise, processes and applications that are running will often leave more detailed information in log files found throughout the system. The idea is that log files can contain a lot more information that would be useful for an administrator or developer, but would be too much for a user to understand if presented in an error dialog.
Although these log files are stored in various locations on the system disk, you can easily locate and inspect log files via the /Applications/Utilities/Console.app. Opening Console reveals a list of log files under the Reports column. You’ll note some items in the Reports column are actually folders containing additional multiple log files. Simply select an item in the Reports column to reveal its contents.
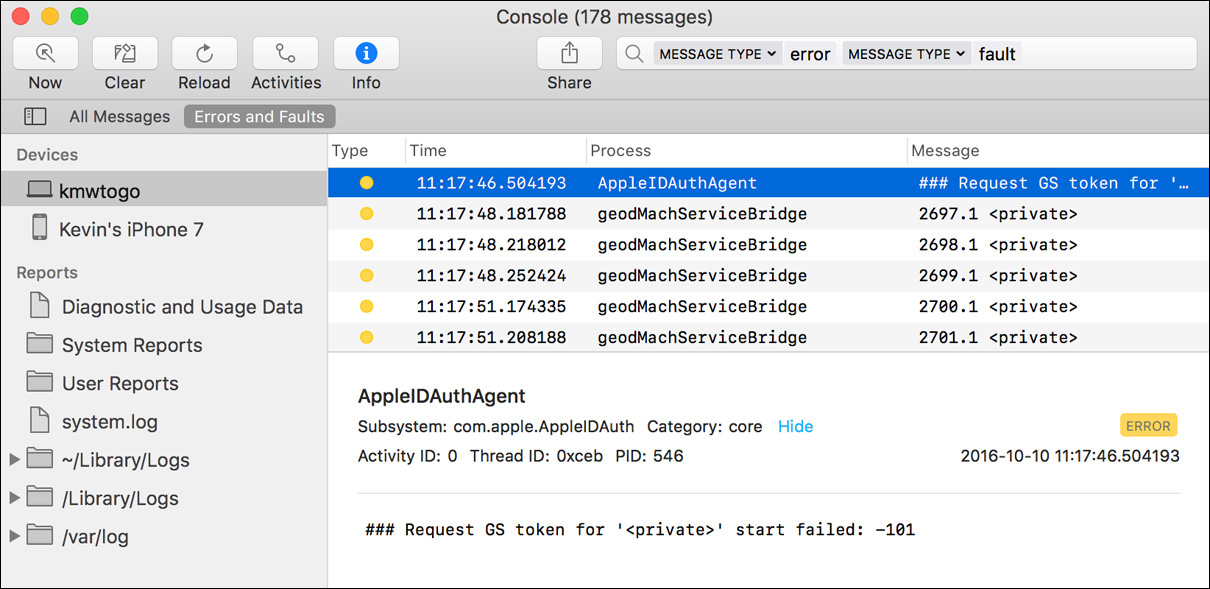
The Console application is all new for macOS Sierra and includes useful new features such as the ability to easily find errors across all log files, and the ability to view the log files from iOS and tvOS devices connected via USB. Additionally, should you need to share a log file with others, you can do so easily by selecting the log file and then clicking the Share button in the toolbar.
You will use Console throughout this guide to uncover detailed information for various applications and processes.
Exercise 2.1 Configure a New macOS System for Exercises
![]() Prerequisites
Prerequisites
![]() This exercise is necessary only if you have not already set up your computer. If you are using a Mac computer with existing accounts, perform Exercise 2.2, “Configure an Existing macOS System for Exercises,” instead.
This exercise is necessary only if you have not already set up your computer. If you are using a Mac computer with existing accounts, perform Exercise 2.2, “Configure an Existing macOS System for Exercises,” instead.
![]() Your computer must have a new installation of Sierra and not have been set up yet.
Your computer must have a new installation of Sierra and not have been set up yet.
The initial macOS configuration is simple, thanks to Setup Assistant. However, in this lesson you will learn how a few of these initial configuration settings can have fundamental and widespread effects on the system.
In this exercise, you will configure a clean installation of macOS on your class computer. Configuring macOS for this class entails answering a few basic questions and setting up the initial administrator user account. Completing these tasks will acquaint you with the Setup Assistant application.
Configure macOS with Setup Assistant
The following steps walk you through the basic setup of macOS using Setup Assistant:
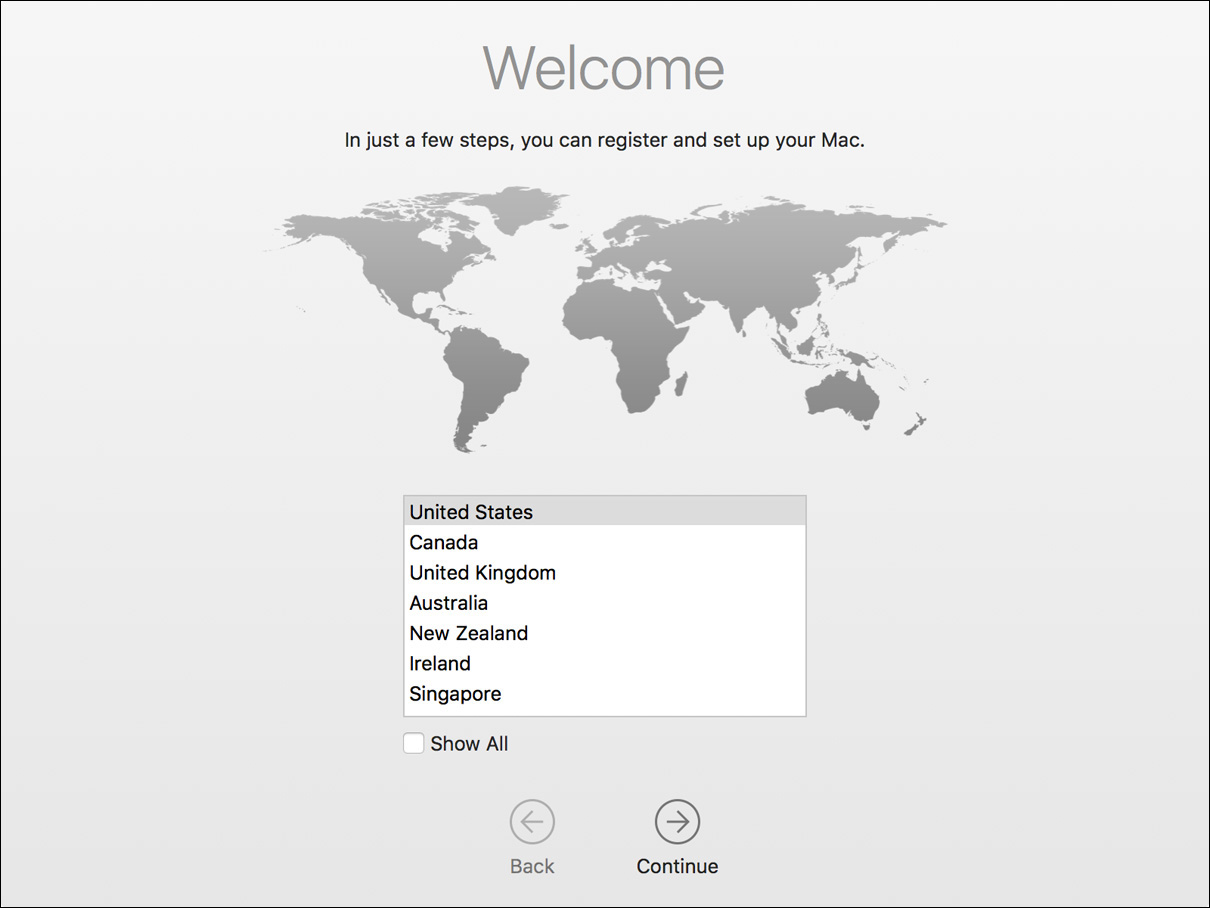
1 At the Welcome screen, select the appropriate region, and click Continue.
Note
If you pause for a few moments at the Setup Assistant Welcome screen, a VoiceOver tutorial begins. This is an optional tutorial that explains how to use the VoiceOver assistance technology designed for those with disabilities.
2 At the Select Your Keyboard screen, select the appropriate keyboard layout, and click Continue.
Setup Assistant evaluates your network environment and tries to determine whether you are connected to the Internet. This can take a few moments.
3 If you are asked to select your Wi-Fi network or how you connect to the Internet, configure it appropriately for your Internet connection. If you are performing this exercise in a class, please ask your instructor how you should configure your computer.
If you are not asked about your Internet connection, your computer’s network settings have already been configured via DHCP, and you may move on to step 4.
4 At the “Transfer Information to This Mac” screen, select “Don’t transfer any information now,” and click Continue.
If you were replacing a computer, the other options would assist you in migrating user data and system information from the old computer to the new one.
5 If the “Enable Location Services” screen appears, select “Enable Location Services on this Mac,” and click Continue.
6 If the “Sign in with Your Apple ID” screen appears, select “Don’t sign in,” click Continue, and then click Skip in the confirmation dialog that appears.
You will set up an Apple ID account in a later exercise.
7 At the “Terms and Conditions” screen, read the macOS software license agreement. If there is more than one agreement, you may need to click “more” under each agreement to get the full text. When you have finished reading, click Agree.
8 In the confirmation dialog that appears, click Agree.
9 At the “Create a Computer Account” screen, enter the following information:
Note
It is important that you create this account as specified here. If you do not, future exercises may not work as written. This guide uses this bold blue text to indicate text you should enter exactly as shown.
Full name: Local Admin
Account name: ladmin
Password: If you are performing this exercise in a class, enter ladminpw in the Password and Verify fields. If you are performing this exercise on your own, select a more secure password for the Local Admin account. Be sure to remember the password you have chosen since you will need to reenter it periodically as you use this computer.
You may provide a password hint and change the other options if you want.
Note
“ladminpw” is too easy to guess to provide any real security, and should never be used for anything other than classroom or demonstration purposes. On “real” computers, you should always use unpredictable passwords.
10 Click Continue.
11 If you are prompted to, select your location to set the computer’s time zone; then click Continue.
12 If you are prompted to share diagnostics and usage, choose whether you want to share diagnostic information with Apple and application developers, and then click Continue.
13 If you are prompted to enable Siri, deselect “Enable Siri on this Mac,” and click Continue.
14 If you are prompted to set up Touch ID, click Continue, then click Set Up Touch ID Later, then click Continue in the confirmation dialog. These exercises do not use Touch ID.
Skip Exercise 2.2, “Configure an Existing macOS System for Exercises,” and proceed to Exercise 2.3, “Examine System Preferences,” to configure your preference settings.
Exercise 2.2 Configure an Existing macOS System for Exercises
![]() Prerequisites
Prerequisites
![]() Your computer must be running macOS Sierra.
Your computer must be running macOS Sierra.
![]() Your computer must already have been set up, and you must have an existing administrator account on it. If your computer has not been set up (that is, if the initial administrator account has not been created), perform Exercise 2.1, “Configure a New macOS System for Exercises,” instead.
Your computer must already have been set up, and you must have an existing administrator account on it. If your computer has not been set up (that is, if the initial administrator account has not been created), perform Exercise 2.1, “Configure a New macOS System for Exercises,” instead.
To provide a consistent environment for the rest of the exercises in this guide, you will use System Preferences to create a new administrator account.
Create a New Administrator Account in System Preferences
1 If necessary, log in to your existing administrator account.
2 From the Apple menu, choose System Preferences.
3 In System Preferences, click Users & Groups.
4 In the lower-left corner, click the lock icon.
5 In the dialog that appears, enter the password for your existing administrator account, and click Unlock.
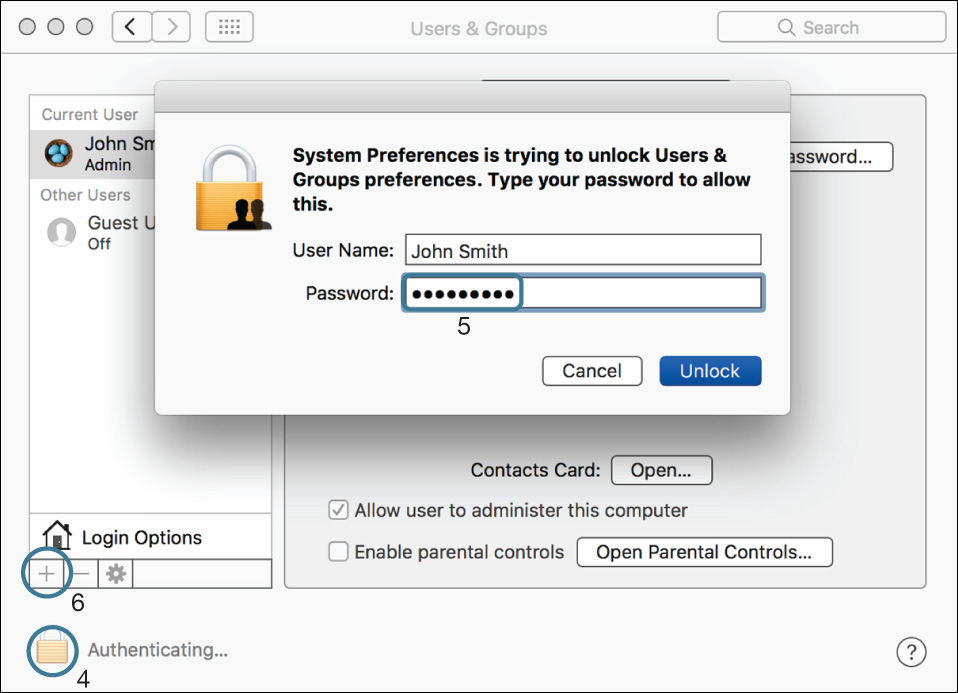
6 Click the Add (+) button below the user list.
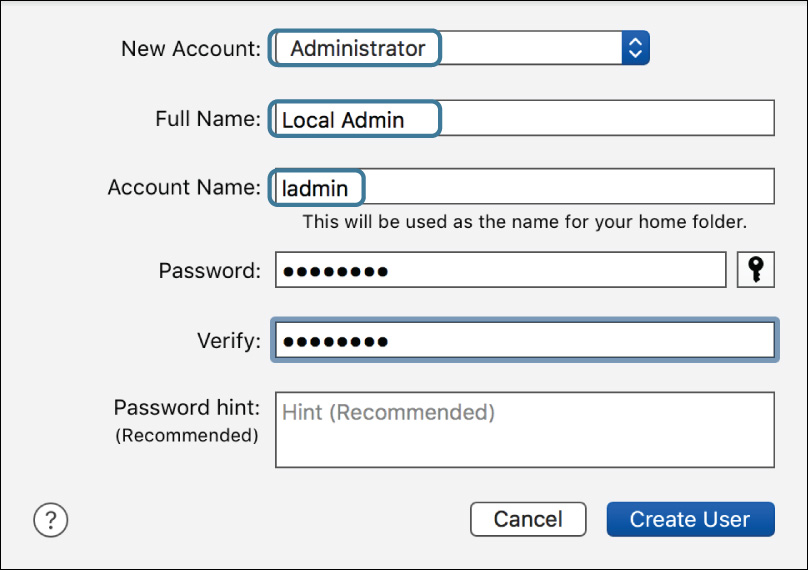
7 In the dialog that appears, enter the following information:
Note
It is important that you create this account as specified here. If you do not, future exercises may not work as written. If you already have an account named “Local Admin” or “ladmin,” you will have to use a different name here and then remember to use your substitute name throughout the rest of the exercises. This guide uses this bold blue text to indicate text that you should enter exactly as shown.
New Account: choose Administrator
Full Name: Local Admin
Account Name: ladmin
If you are performing this exercise in a class, enter ladminpw in the Password and Verify fields. If you are performing this exercise on your own, select a more secure password for the Local Admin account. Be sure to remember the password you have chosen since you will need to reenter it periodically as you use this computer.
Note
“ladminpw” is too easy to guess to provide any real security, and should never be used for anything other than classroom or demonstration purposes. On “real” computers, you should always use unpredictable passwords.
You may provide a password hint if you want.
8 Click Create User.
9 If you are prompted to turn off automatic login, click Turn Off Automatic Login.
10 Quit System Preferences, and log out.
11 At the login screen, select the Local Admin account, and enter its password (ladminpw, or whatever you chose earlier).
12 Press Return.
13 When you are prompted to sign in with your Apple ID, select “Don’t sign in,” and click Continue.
You will set up an Apple ID account in a later exercise.
14 When a dialog appears asking if you are sure you want to skip signing in, click Skip.
15 If you are prompted to enable Siri, deselect “Enable Siri on this Mac,” and click Continue.
16 If you are prompted to set up Touch ID, click Continue, then click Set Up Touch ID Later, then click Continue in the confirmation dialog. These exercises do not use Touch ID.
17 If you are prompted to share diagnostic data with application developers, choose whether you want to do so, and click Continue.
Proceed to Exercise 2.3, “Examine System Preferences,” to configure your preference settings.
Exercise 2.3 Examine System Preferences
![]() Prerequisite
Prerequisite
![]() You must have created the Local Admin account in either Exercise 2.1, “Configure a New macOS System for Exercises,” or Exercise 2.2, “Configure an Existing macOS System for Exercises.”
You must have created the Local Admin account in either Exercise 2.1, “Configure a New macOS System for Exercises,” or Exercise 2.2, “Configure an Existing macOS System for Exercises.”
In this exercise, you will configure some preference settings to make the rest of the exercises easier. This exercise also introduces configuring application and system preferences in macOS.
Adjust Finder Preferences
The default Finder settings make it easy for users to find and work with their own files but are not optimal for system administrators who frequently access files outside their home folder. Since you will be exploring the macOS system more than working with your own files, some customization is in order.
1 If a notification informs you that software updates are available for your computer, click Later, and select Remind Me Tomorrow from the pop-up menu that appears.
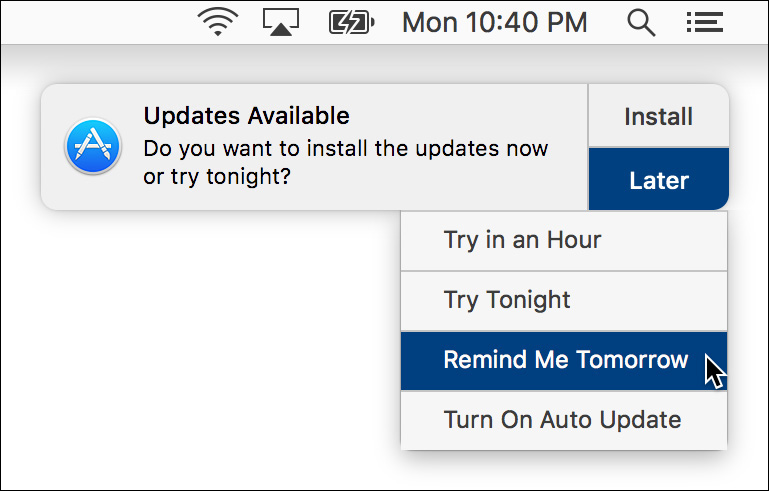
You will install updates during the Lesson 4, “Update macOS Software,” exercises.
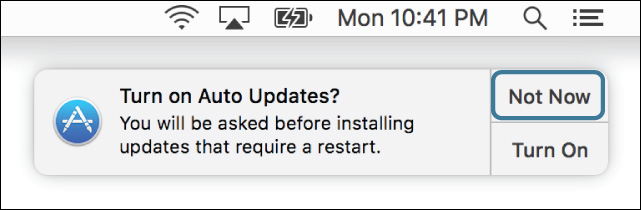
2 If a notification suggests turning on auto updates, click Not Now.
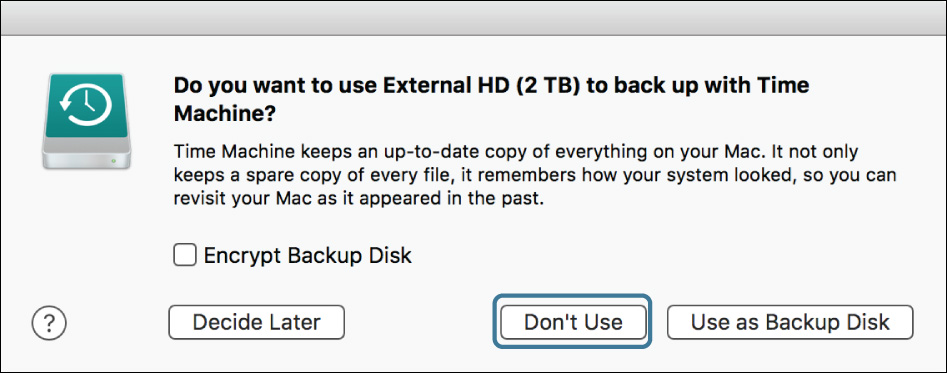
3 If any dialogs open with a “Do you want to use <some volume> to back up with Time Machine?” prompt, click Don’t Use in each dialog.
4 From the menu bar, choose Finder > Preferences. If you prefer, you can use the keyboard shortcut Command-Comma instead.
You can configure the Finder preferences in much the same way as any other macOS application.
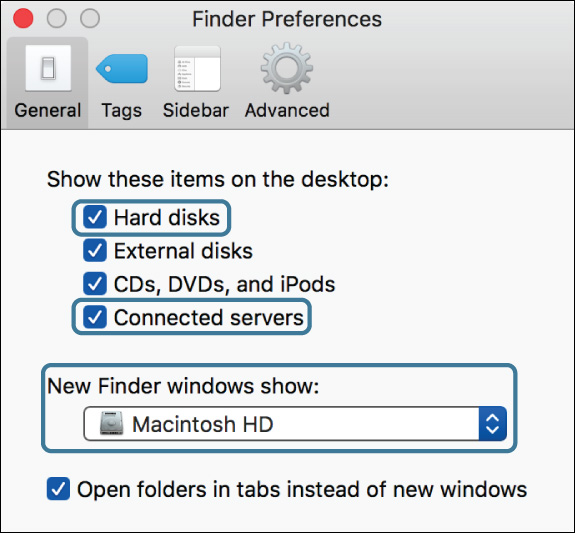
5 Select the options to show hard disks and connected servers on the desktop.
6 From the “New Finder windows show” pop-up menu, choose your startup volume (typically named Macintosh HD).
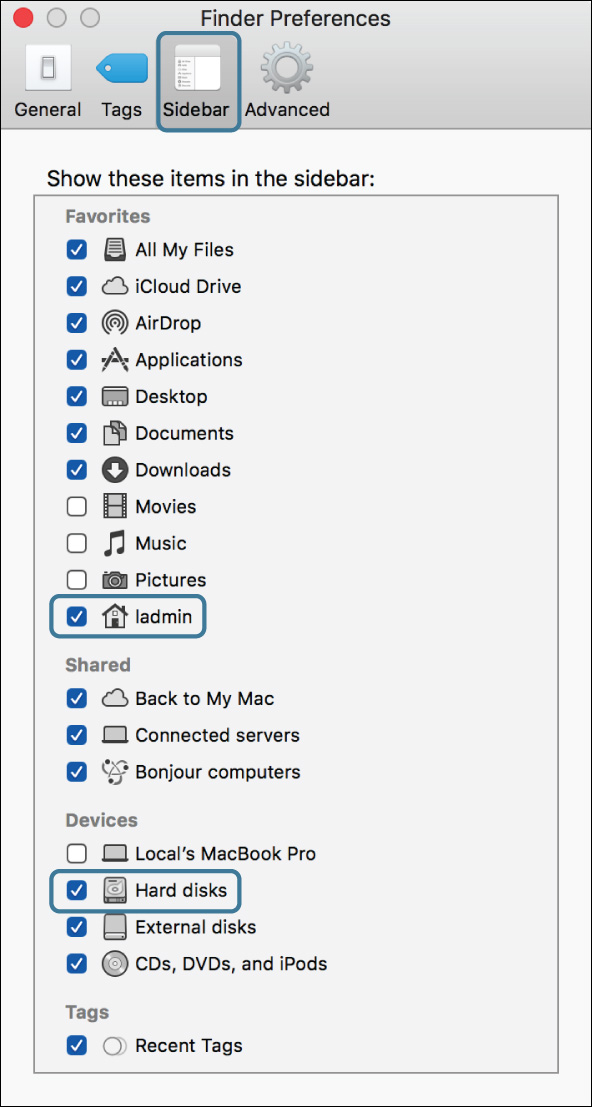
7 At the top of the Finder Preferences window, click the Sidebar button.
8 Select “ladmin” in the Favorites section of the sidebar and “Hard disks” in the Devices section. “Hard disks” should be fully selected (a check mark in the checkbox), not just partially selected (a dash in the checkbox).
9 Close the Finder Preferences window.
Set the Computer Name
If you are performing these exercises as part of a class, your computer has the same name as all the other students’ computers. To avoid confusion, give your computer a unique name.
1 From the Apple menu, choose System Preferences.
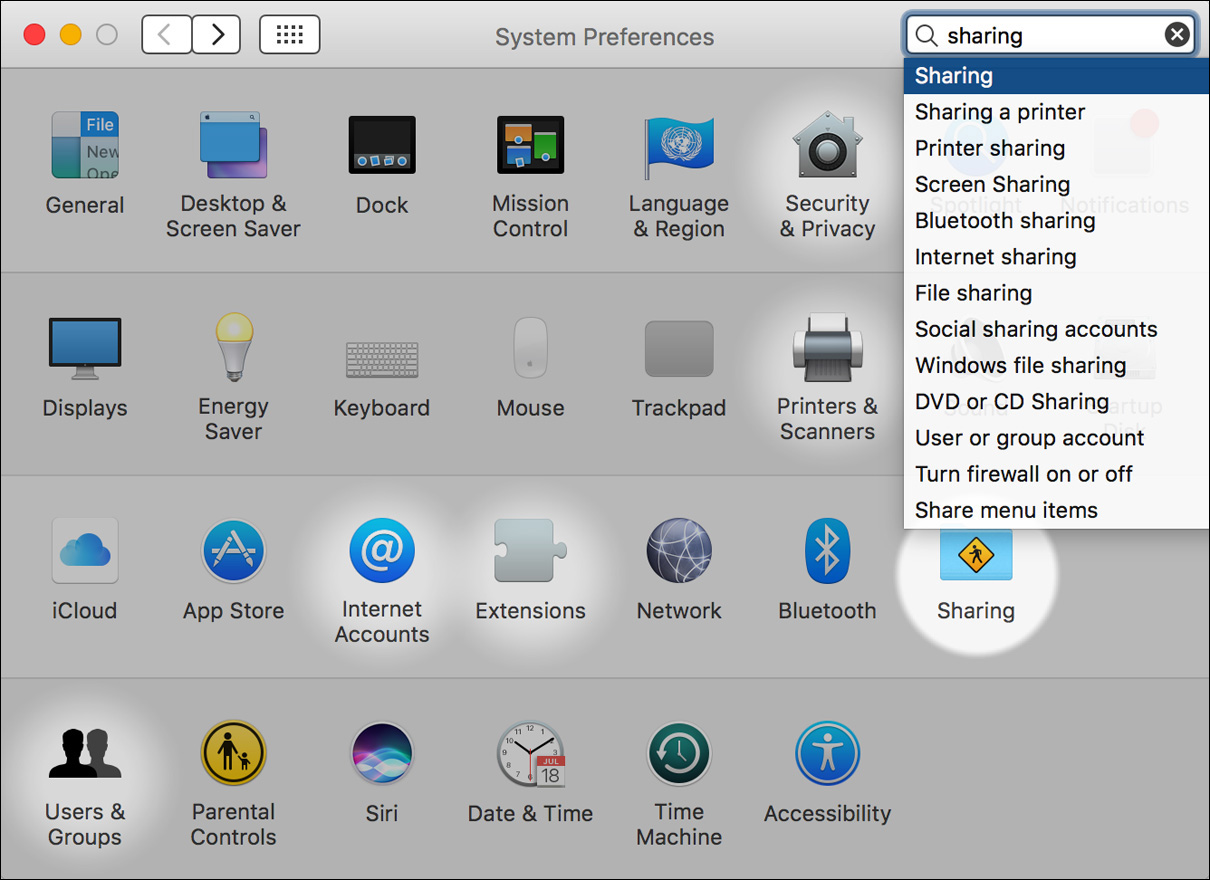
2 In System Preferences, click the icon for Sharing preferences.
Tip
If you aren’t sure where to find something in System Preferences, you can use the Spotlight search field in the top right of the window. It searches for matching or related settings and highlights the preference panes where they are located.
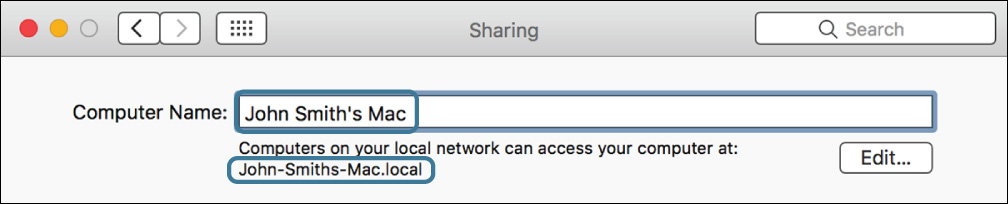
3 Enter a unique name for your computer in the Computer Name field. If you are performing these exercises in a class, your instructor may recommend a naming convention.
4 Press Return.
Notice that your local host name (.local name) that is displayed under your computer name updates to match your new computer name.
5 Depending on whether you are performing these exercises in a class or on your own, you may or may not need to set up the Remote Management service.
If you are performing these exercises on your own, skip ahead to “Adjust Your Trackpad/Mouse Preferences.”
6 If you are performing these exercises in a class, select the Remote Management checkbox.
Note
In a classroom situation, Remote Management allows your instructor to control the keyboard and mouse, gather information, and update your Mac throughout this course, enabling him or her to assist you with steps if necessary.
A dialog asks what you want users to be able to do using Remote Management.
7 Hold down the Option key while clicking one of the checkboxes to select all the options in the dialog.
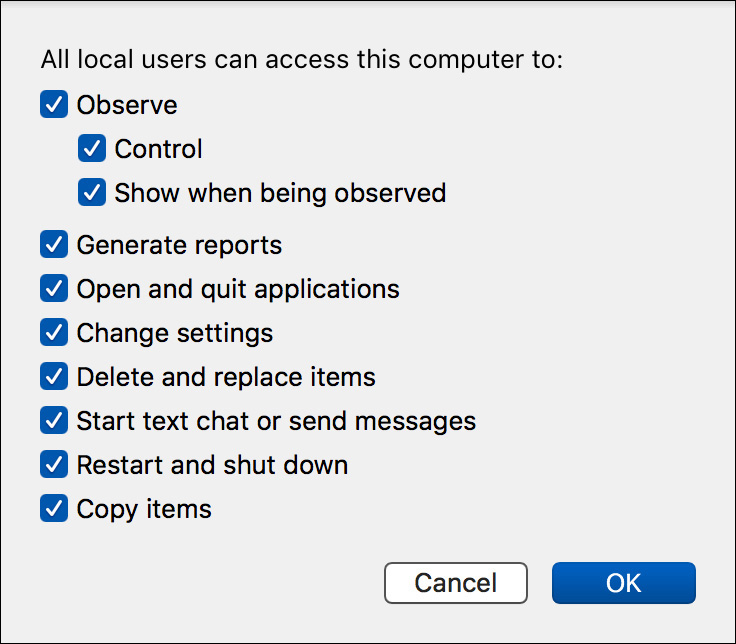
8 Click OK.
Adjust Your Trackpad/Mouse Preferences
In macOS you can customize the user interface to fit your personal preferences. For example, depending on what you are used to, you may want to change the default scrolling behavior. Also, you can control how the system recognizes primary and secondary mouse clicks (analogous to left- and right-clicks in other operating systems).
Note that since Control-click always works as a secondary click, these instructions describe it as Control-click.
1 Click the Show All (grid icon) button in the toolbar.

2 If you are using a trackpad, select the Trackpad pane.
![]() Adjust the “Tap to Click” and “Secondary click” options to your liking. (A secondary click opens shortcut menus, normally the right mouse button or Control-click.)
Adjust the “Tap to Click” and “Secondary click” options to your liking. (A secondary click opens shortcut menus, normally the right mouse button or Control-click.)
![]() Click “Scroll & Zoom,” and use the “Scroll direction: natural” option to adjust which direction it works. The default is that moving two fingers up moves the window contents up.
Click “Scroll & Zoom,” and use the “Scroll direction: natural” option to adjust which direction it works. The default is that moving two fingers up moves the window contents up.
![]() Check the other options under “Scroll & Zoom” and “More Gestures” and make any appropriate changes.
Check the other options under “Scroll & Zoom” and “More Gestures” and make any appropriate changes.
3 If you are using a mouse, select the Mouse pane.
![]() If your mouse has a scroll wheel (or equivalent), use the “Scroll direction: natural” option to adjust in which direction it works. The default is that pushing the wheel up moves the window contents up.
If your mouse has a scroll wheel (or equivalent), use the “Scroll direction: natural” option to adjust in which direction it works. The default is that pushing the wheel up moves the window contents up.
![]() If your mouse has multiple buttons, use the “Primary mouse button” option to control which button is the primary (used for selecting; usually the left button) and which button is the secondary (used for opening shortcut menus; usually the right button or Control-click).
If your mouse has multiple buttons, use the “Primary mouse button” option to control which button is the primary (used for selecting; usually the left button) and which button is the secondary (used for opening shortcut menus; usually the right button or Control-click).
4 Quit System Preferences.
Proceed to either Exercise 2.4, “Download the Student Materials in a Classroom,” or Exercise 2.5, “Download the Student Materials Independently,” depending on whether you are performing these exercises in a classroom or independently.
Exercise 2.4 Download the Student Materials in a Classroom
![]() Prerequisites
Prerequisites
![]() You must have performed Exercise 2.3, “Examine System Preferences.”
You must have performed Exercise 2.3, “Examine System Preferences.”
![]() You must be performing these exercises in a class or have set up your own server configured as in the Mainserver Setup Instructions file. If you are following these exercises on your own and have not set up a server to support the exercises, perform Exercise 2.5, “Download the Student Materials Independently,” instead.
You must be performing these exercises in a class or have set up your own server configured as in the Mainserver Setup Instructions file. If you are following these exercises on your own and have not set up a server to support the exercises, perform Exercise 2.5, “Download the Student Materials Independently,” instead.
Note
This exercise is for students performing these exercises in a classroom environment. You can also use this exercise if you have set up another Mac computer as a server to support these exercises. If you want to do this, navigate to www.peachpit.com/register (you’ll need to create an account if you don’t already have one) and enter this book’s ISBN number (9780134713854). Answer the challenge question as proof of purchase; then go to the Registered Products tab on your Account page. Click the Access Bonus Content link below the title of your product to proceed to the download page. Then download the Mainserver Setup Instructions file onto the computer you will use as a server, and follow the enclosed instructions.
If you are following these exercises on your own and have not set up a server to support the exercises, perform Exercise 2.5, “Download the Student Materials Independently,” instead.
In this exercise, you will download the student materials required for the rest of the exercises in the guide.
Connect to Mainserver
You need to connect to the file server (called Mainserver) to download the student materials. The details of networking, connecting to, and providing network services will be covered in later lessons.
1 If necessary, open a new Finder window by choosing File menu > New Finder Window or by using the shortcut Command-N.
Look for the server named Mainserver in the Shared section of the sidebar. If Mainserver is not shown, click All to view all the shared items.
2 Select Mainserver. If you had to click All in the previous step, you will have to double-click the Mainserver icon.
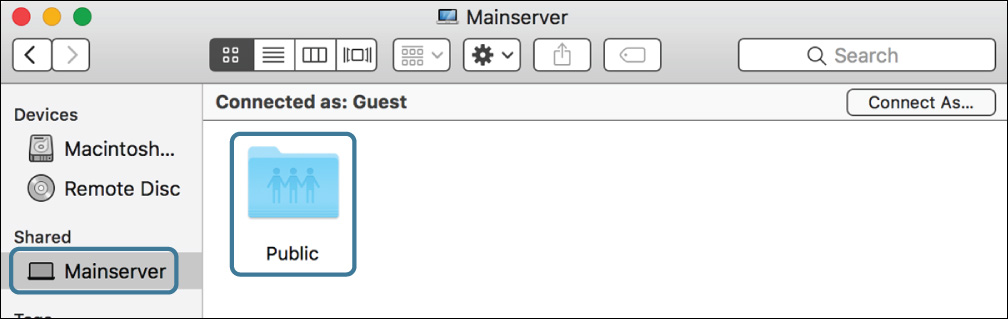
3 Open the Public folder.
Copy the StudentMaterials Folder to Your Computer
1 In the Public folder, select (single-click) the StudentMaterials folder.
2 Copy the folder by choosing Edit menu > Copy “StudentMaterials” from the menu bar, by pressing Command-C, or by Control-clicking the folder and choosing Copy “StudentMaterials” from the shortcut menu.
3 Open the Macintosh HD (either from your desktop or from the Finder window sidebar).
4 Open the Users folder.
5 Open the Shared folder.
6 Paste the StudentMaterials folder into the Shared folder by choosing Edit menu > Paste Item, by pressing Command-V, or by Control-clicking in the Shared folder and choosing Paste Item from the shortcut menu.
This creates a copy of the student materials on your computer. If your instructor has included software updates in the student materials, it may take several minutes to download them. You do not need to wait for it to finish.
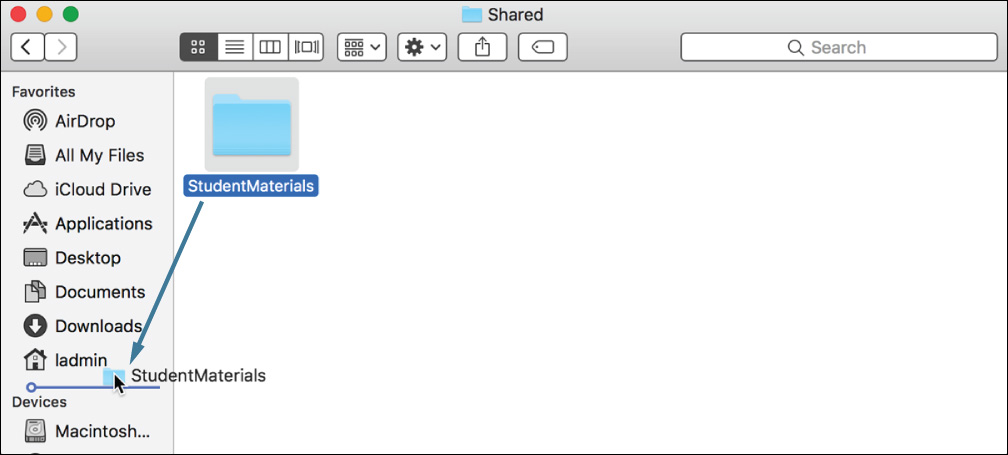
7 Drag your copy of the StudentMaterials folder to the right side of the dividing line in the Dock. (The Dock is divided into two sections; the left side holds applications, and the right side holds folders and documents.) Be sure to place it between other entries (so it is added to the Dock) rather than over another entry (which would move it into that folder).

You will be opening the StudentMaterials folder frequently, and this gives you an easy shortcut to it.
8 Optionally, you can drag the StudentMaterials folder to the Finder sidebar in the Favorites section to give yourself another shortcut to access it. As in the Dock, be sure to place it between other entries.

9 Choose Go menu > Applications (or use the shortcut Command-Shift-A).
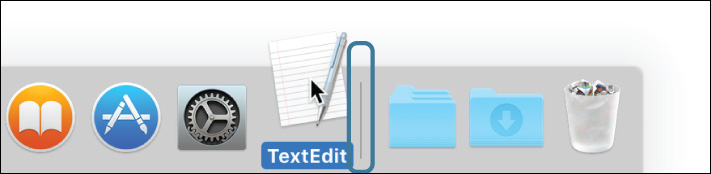
10 Drag the TextEdit application into the left side of your Dock so that you will always have an easy way to launch it.
11 If it hasn’t finished yet, wait for the StudentMaterials folder to finish downloading to your computer.
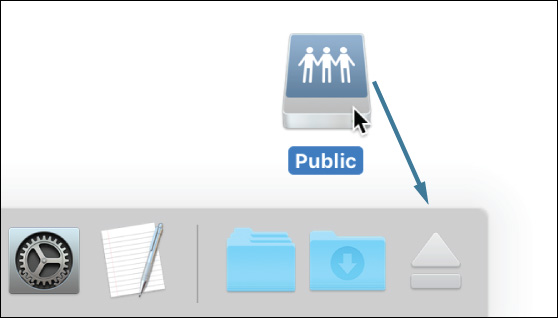
12 Unmount the Public folder by dragging its icon from the Desktop onto the eject icon at the right side of the Dock. The eject icon replaces the Trash icon when something ejectable is selected.
You should now skip Exercise 2.5, “Download the Student Materials Independently,” and proceed to Exercise 2.6, “Install a Configuration Profile.”
Exercise 2.5 Download the Student Materials Independently
![]() Prerequisites
Prerequisites
![]() You must have performed Exercise 2.3, “Examine System Preferences.”
You must have performed Exercise 2.3, “Examine System Preferences.”
![]() Do not perform this exercise if you are in a class or have set up your own server configured as in the Mainserver Setup Instructions file. If you have access to a server configured to support these exercises, perform Exercise 2.4, “Download the Student Materials in a Classroom,” instead.
Do not perform this exercise if you are in a class or have set up your own server configured as in the Mainserver Setup Instructions file. If you have access to a server configured to support these exercises, perform Exercise 2.4, “Download the Student Materials in a Classroom,” instead.
In this exercise, you will download the student materials required for the rest of the exercises in the course.
Download the StudentMaterials Folder from the Web
You need to connect to the Pearson Education web server to download the student materials.
1 Open Safari.
2 Navigate to www.peachpit.com/register.
3 Enter the ISBN number for this book: 9780134713854.
4 If you already have a Peachpit account, sign in to it. If you do not, follow the prompts to create one.
5 Answer the challenge question[s] as proof of purchase.
6 Click the Registered Products tab on your Account page.
7 Click the Access Bonus Content link below the title of your product to proceed to the download page.
Note
If you purchase or redeem a code for the electronic version of this guide directly from Peachpit, the student materials will automatically appear on the Registered Products tab without the need to redeem an additional code.
Note
If you have access to another computer running macOS Sierra and want to configure it as a server to support these exercises, do not download the student materials here. Instead, download the Mainserver Setup file onto the computer you will use as a server, and follow the enclosed Mainserver Setup Instructions.
8 Click the link to download StudentMaterials.zip.
The student materials for these exercises will be downloaded as a ZIP archive and automatically expanded into the StudentMaterials folder.
9 Click the Downloads (down-arrow icon) button near the top right of the window.
10 Click the view (magnifying-glass icon) button next to StudentMaterials.
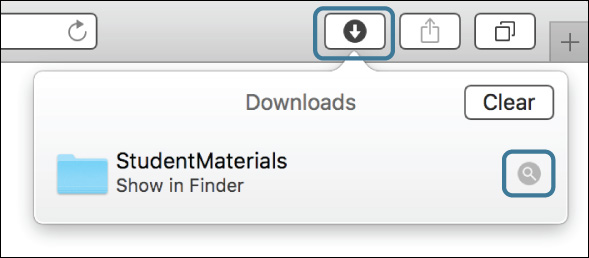
Your Downloads folder opens in the Finder, showing the StudentMaterials folder inside it.
11 On your desktop, find the icon for your startup disk (generally Macintosh HD), and double-click it.
This opens a new Finder window showing the contents of the startup disk.
12 Open the Users folder.
13 Open the Shared folder.
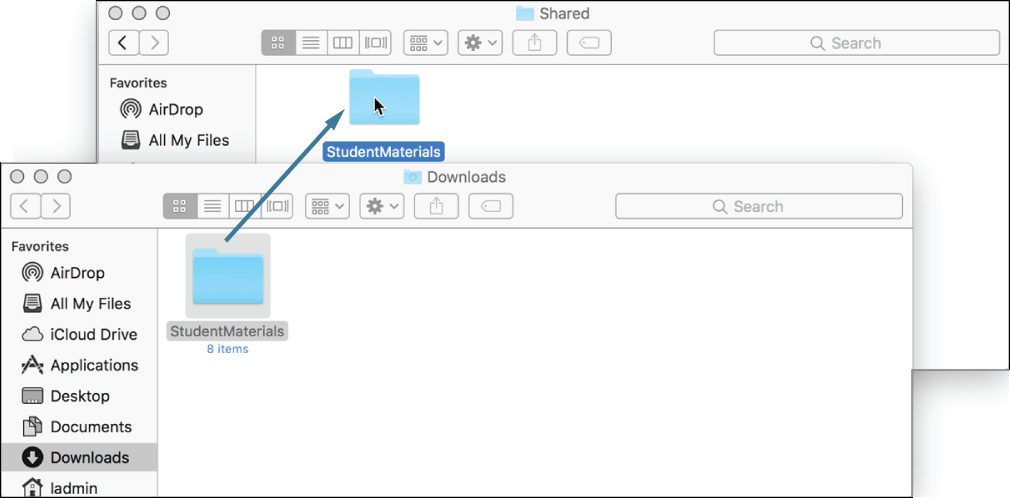
14 Drag the StudentMaterials icon from the Downloads folder into the Shared folder.
15 Close the Downloads folder.
16 Drag the StudentMaterials icon from the Shared folder to the right side of the dividing line in the Dock. (The Dock is divided into two sections; the left side holds applications, and the right side holds folders and documents.) Be sure to place it between other entries (so it is added to the Dock) rather than over another entry (which would move it into that folder).

You will be opening the StudentMaterials folder frequently, and this gives you an easy shortcut to it.
17 Optionally, you can also drag the StudentMaterials folder to the Finder sidebar in the Favorites section to give yourself another shortcut to it. As in the Dock, be sure to place it between other entries.
18 Choose Go menu > Applications (or use the shortcut Command-Shift-A).
19 Drag the TextEdit application into the left side of your Dock so that you will always have an easy way to launch it.

Exercise 2.6 Install a Configuration Profile
![]() Prerequisite
Prerequisite
![]() You must have downloaded the StudentMaterials folder, using the instructions in either Exercise 2.4, “Download the Student Materials in a Classroom,” or Exercise 2.5, “Download the Student Materials Independently.”
You must have downloaded the StudentMaterials folder, using the instructions in either Exercise 2.4, “Download the Student Materials in a Classroom,” or Exercise 2.5, “Download the Student Materials Independently.”
In addition to manually configuring settings on macOS computers, you can control a computer’s settings by installing profiles. This capability allows you to easily standardize the configuration across multiple computers.
In this exercise, you will demonstrate this by setting your Energy Saver settings with a configuration profile.
Change Your Energy Saver Settings with a Configuration Profile
1 If necessary, open System Preferences by choosing it from the Apple menu.
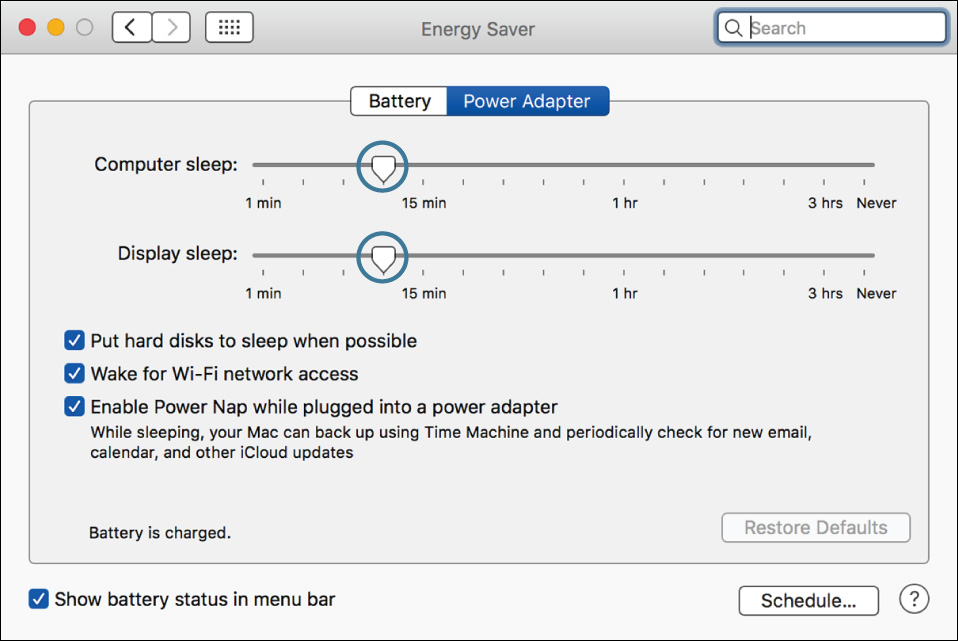
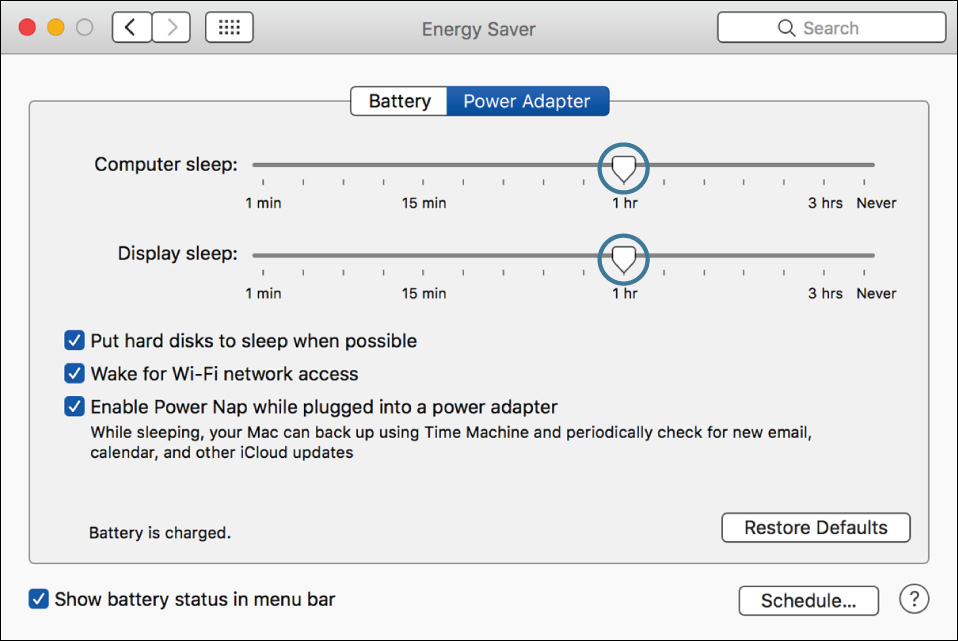
2 Select the Energy Saver pane.
3 Note your computer’s sleep settings. Depending on the model you are using, they may differ from those shown here.
4 Quit System Preferences.
5 Open the StudentMaterials folder. Remember that you put a shortcut to it in your Dock.
6 Open the Lesson2 folder.
7 Open Energy_Saver.mobileconfig.
The profile automatically opens in the Profiles pane of System Preferences.
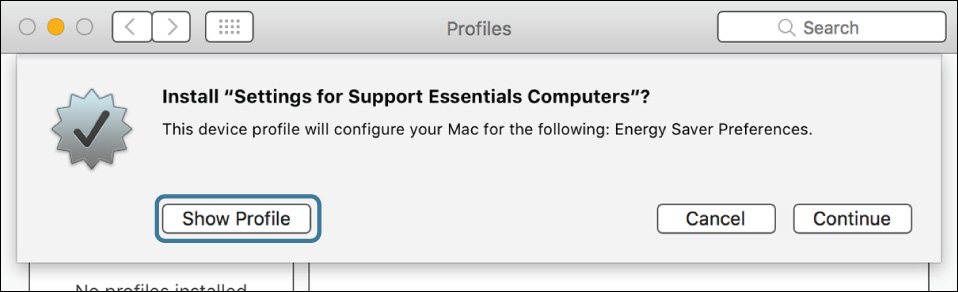
8 Click Show Profile to display the details of the profile and its payload (the settings it contains). You will need to scroll down to see its full contents.
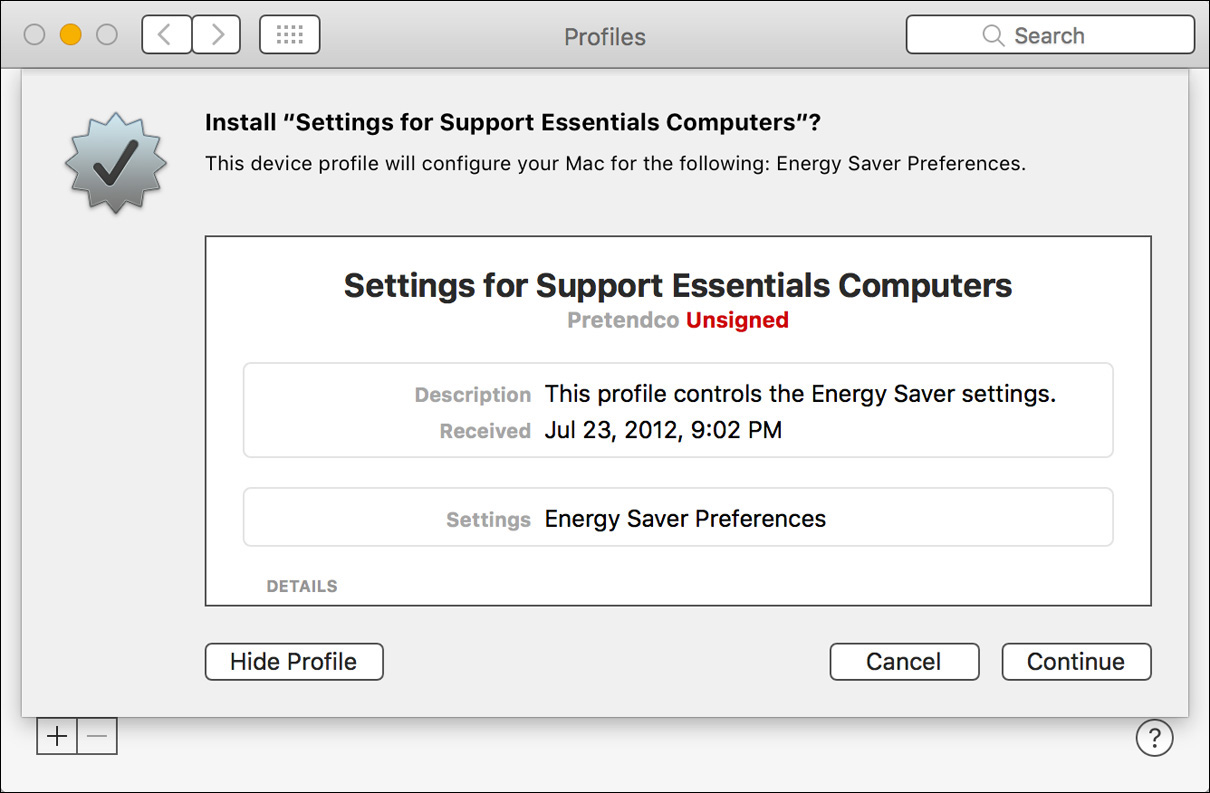
9 Click Continue.
10 Click Install.
11 Enter the Local Admin account’s password (ladminpw, or whatever you chose earlier) when prompted.
The Profile pane now lists the configuration profile as installed.
12 Click the Show All (grid) button in the toolbar, and then select the Energy Saver pane.
The Energy Saver settings have changed to match those in the profile.
Note
Although the new Energy Saver settings take effect immediately, the display in System Preferences does not always update. If you still see the old settings, try logging out and back in to the Local Admin account, and then recheck System Preferences.
13 Quit System Preferences.
Exercise 2.7 Examine System Information
System Information is the primary tool for gathering configuration information in macOS. In this exercise, you will explore its features.
Use About This Mac and System Information
System Information displays information and options for repair and warranty coverage of your computer.
1 From the Apple menu, choose About This Mac.
A dialog appears showing basic information about your computer.
2 Click the macOS version number (below the large “macOS Sierra”). The build number (a more specific identifier for the version of macOS you are using) is displayed.
3 Click through the Displays, Storage, and (if it is shown) Memory tabs in the About This Mac window’s toolbar to view more information about your computer hardware configuration.
4 Click the Service tab.
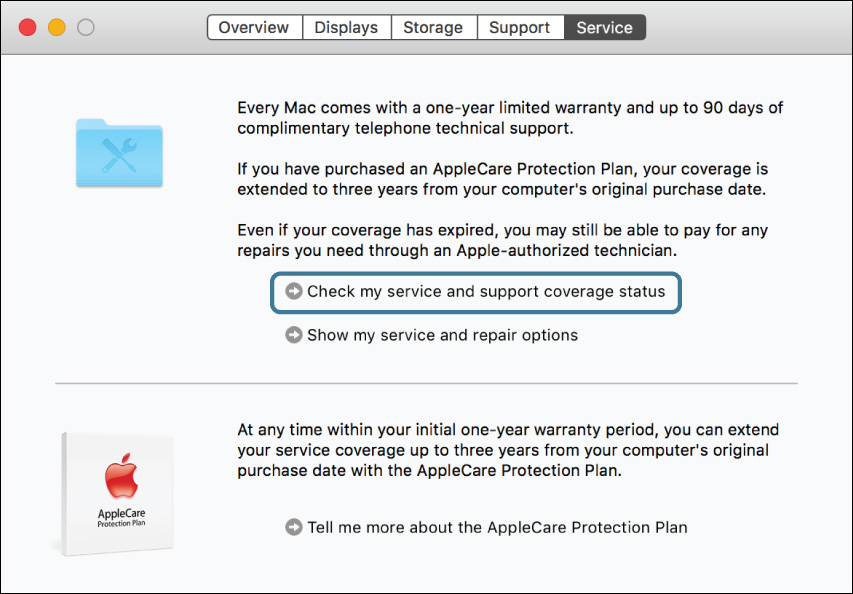
5 Click “Check my service and support coverage status.”
6 In the confirmation dialog that appears, click Allow.
Safari opens and displays a coverage check page at apple.com.
7 If the website asks you to enter a code (a CAPTCHA challenge), do so.
The coverage page shows your computer model name and warranty status.
8 Quit Safari.
9 In the About This Mac window, click Overview.
10 Click the System Report button.
System Information opens and displays a more detailed report about your computer hardware, network, and software configuration.
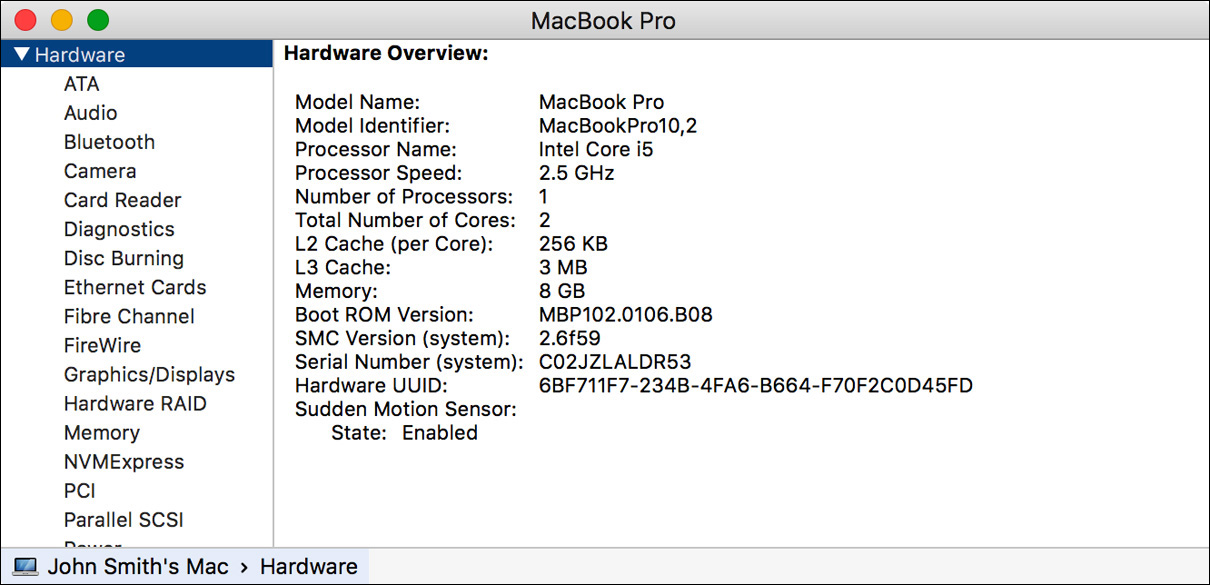
11 Explore the system report by clicking information categories in the report’s sidebar. Some categories may take a while to load.
12 From the menu bar, choose File > Save, enter a name for your system’s report, and then click Save.
When saving reports like this, it can be helpful to choose a naming convention that includes the computer name (or other identifier) and the date.
System Information finishes gathering information on your computer and saves it in a report that documents your computer’s current status.
13 Quit System Information.
Tip
You can also find the System Information application in the /Applications/Utilities folder or in the Other section of Launchpad. You can use any shortcut method you like to access System Information, including placing it in the Dock.
Tip
You can also directly access System Information from the Apple menu by holding the Option key. This changes the About This Mac menu choice to System Information. When you open System Information directly, you skip the summary About This Mac window and are presented with the full system report.