
In the last recipe, we made all the preparations required for deploying VSM. In this recipe, we will learn how to automatically deploy VSM on all the nodes.
- In this demonstration, we will use CentOS7 as the base operating system; let's download the VSM repository for CentOS7. Log in to the
vsm-controllernode ascephuserand get VSM:$ wget https://github.com/01org/virtual-storage-manager/releases/download/v2.0.0/2.0.0-216_centos7.tar.gzNote
VSM is also available for the Ubuntu OS and can be downloaded from https://github.com/01org/virtual-storage-manager.
- Extract VSM:
$ tar -xvf 2.0.0-216_centos7.tar.gz
$ cd 2.0.0-216
$ ls -la

- Set the Controller node and agent node's address; add the following lines to the
installrcfile:AGENT_ADDRESS_LIST="192.168.123.101 192.168.123.102 192.168.123.103" CONTROLLER_ADDRESS="192.168.123.100"
- Verify the
installrcfile:$ cat installrc | egrep -v "#|^$"
- In the
manifestfolder, create directories using the name of the management IP of thevsm-controllerandvsm-nodes:$ cd manifest $ mkdir 192.168.123.100 192.168.123.101 192.168.123.102 192.168.123.103
- Copy the sample cluster manifest file to
192.168.123.100/cluster.manifest, which is thevsm-controllernode:$ cp cluster.manifest.sample 192.168.123.100/cluster.manifest - Edit the cluster manifest file that we added in the last step with the following changes:
$ vim 192.168.123.100/cluster.manifest
You should know that in a production environment, it's recommended that you have separate networks for Ceph Management, Ceph Public, and Ceph Cluster traffic. Using the
cluster.manifestfile, VSM can be instructed to use these different networks for your Ceph cluster: - Edit the
manifest/server.manifest.samplefile and make the following changes:- Add the VSM controller IP,
192.168.123.100, under the[vsm_controller_ip]section. - Add a disk device name for
[sata_device]and[journal_device], as shown in the following screenshot. Make sure that thesata_deviceandjournal_devicenames are separated by a space:
- If you are not using
10krpm_sasdisk OSDs and journals by disk path, comment the lines%osd-by-path-1% %journal-by-path-1%from the [10krpm_sas] section, as shown in the following screenshot:

- Add the VSM controller IP,
- Once you have made changes to the
manifest/server.manifest.samplefile, verify all the changes:$ cat server.manifest.sample | egrep -v "#|^$"
- Copy the
manifest/server.manifest.samplefile that we edited in the previous steps to all thevsm-nodes, that is,vsm-node {1,2,3}:$ cp server.manifest.sample 192.168.123.101/server.manifest $ cp server.manifest.sample 192.168.123.102/server.manifest $ cp server.manifest.sample 192.168.123.103/server.manifest
- Verify the manifest directory structure:
$ tree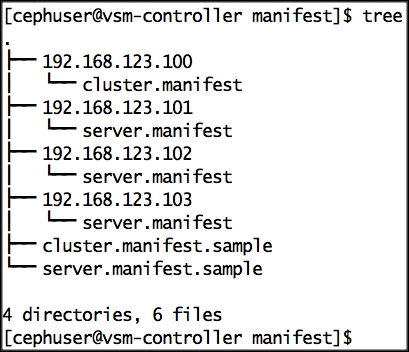
- To begin the VSM installation, add the execute permission to the
install.shfile:$ cd .. $ chmod +x install.sh
- Finally, install VSM by running the
install.shfile with the--check-dependence-packageparameter, which downloads packages that are necessary for the VSM installation from https//github.com/01org/vsm-dependencies:$ ./install.sh -u cephuser -v 2.0 --check-dependence-package
Note
The VSM installation will take several minutes. The installer process might require you to input the
cephuserpassword for thevsm-controllernode. In that case, please inputcephuseras the password.In case you encounter any errors and wish to restart the VSM installation, it is recommended that you clean your system before you retry it. Execute the
uninstall.shscript file for a system cleanup.You can also review the author's version of the VSM installation by checking the installation log file located in the
ceph-cookbookrepository path:ceph-cookbook/vsm/vsm_install_log. - Once the VSM installation is finished, extract the password for the user
adminby executingget_pass.shon thevsm-controllernode:$ ./get_pass.sh
- Finally, log in to the VSM dashboard,
https://192.168.123.100/dashboard/vsm, with the user,admin, and password that we extracted in the last step.
- The
vsm-dashboardlanding page looks like this:
The VSM Cluster monitoring option shows some nice graphs for IPOS, Latency, Bandwidth, and CPU utilization, which gives you the big picture of what's going on in your cluster.
