
JIRA was originally designed and intended as a tool for developers. It was also designed to be an issue-tracking tool to capture bugs and tasks as they build a software. However, its flexibility and extensibility allowed users to use and adapt it into almost any other use cases. Recognizing this and JIRA's potential, a new product called JIRA Service Desk from Atlassian has been released, which was built on top of the JIRA platform, transforming it into a fully-fledged service desk solution.
By the end of the chapter, you will learn the following:
- Installing the JIRA Service Desk
- Creating and branding a new service desk
- Defining and setting up service-level agreement
- Creating custom queues for agents to work from
- Integrating with Confluence to set up a knowledge base
In each of our previous chapters, we have been building JIRA as a support system, which is a part of our end of chapter exercise. While JIRA is more than capable of handling the requirements of a service desk, there are still a number of things left to be desired.
For example, the user interface is often too complicated and confusing for business users to simply create a support ticket. Despite our best efforts, there are still way too many options on the screen, most of which are not useful in a service desk environment. Another example will be the lack of ability to set up any sort of service-level agreement to ensure a consistent quality of service.
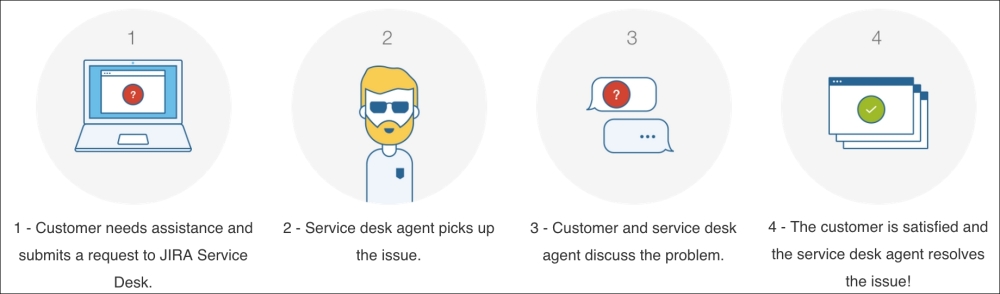
This is where JIRA Service Desk comes in. It addresses all the shortcomings of JIRA that is out of the box by providing a clean, intuitive, and user-friendly interface for both the end customers and support team. It also provides many features that you can expect from a service desk solution. As shown in the following screenshot, JIRA Service Desk lets you serve your customers in four easy steps:
JIRA Service Desk is a commercial add-on provided by Atlassian. JIRA provides an easy-to-use interface, called the Universal Plugin Manager (UPM), for administrators to find and install third-party add-ons. Perform the following steps to install JIRA Service Desk through the UPM:
- Log in as a JIRA administrator user.
- Browse to the JIRA administration console.
- Select the Add-ons tab and then the Find new add-ons option.
- Search for
JIRAServiceDeskin the search box. This will locate the add-on. - Click on the Free trial button if you want to evaluate JIRA Service Desk before purchasing, or click on the Buy now link to purchase directly. This will prompt the UPM to start downloading and installing the add-on.
- Click on the Get License button when prompted and follow the steps to either generate a trial license or purchase a full license.

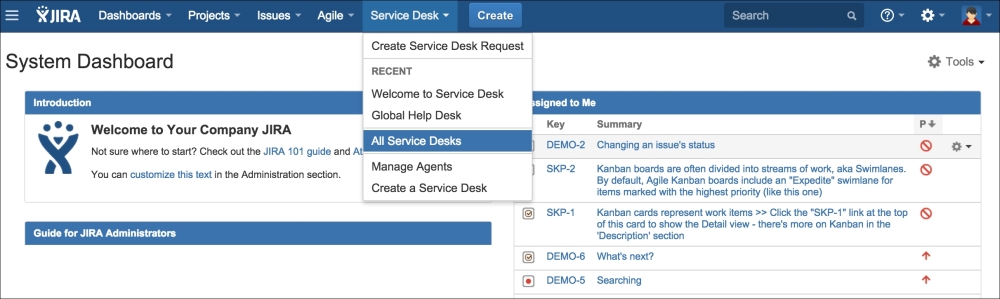
After you have successfully installed JIRA Service Desk, there will be a new item added to JIRA's top menu bar called Service Desk, as shown in the following screenshot:
Before we start using JIRA Service Desk, it is important to understand that we familiarize ourselves with a number of new terminologies introduced:
- Agents: Agents are members of your service support team that will be working on customer requests. They are your normal JIRA users that can perform actions such as editing, assigning, and closing requests.
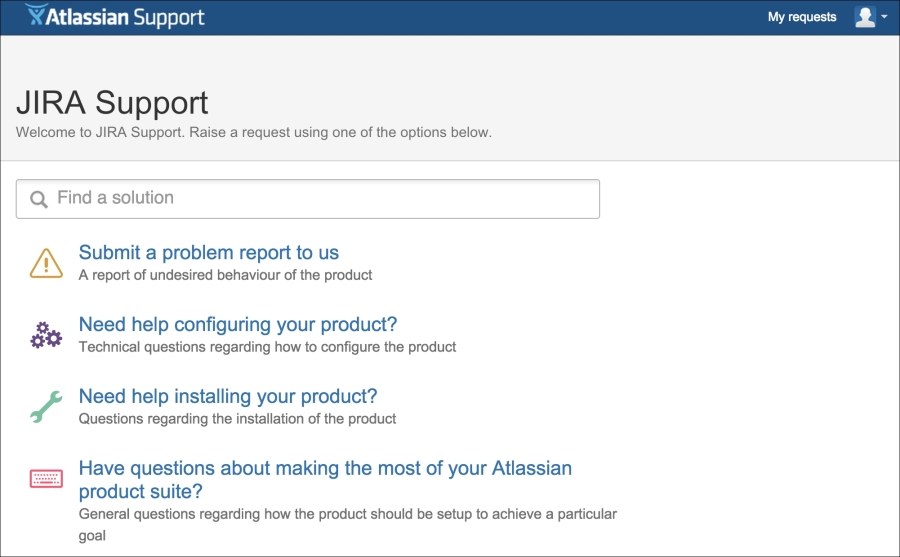
- Customer Portal: Customer portal is the main landing page for your customers. It is a simple, clean, and easy-to-use front interface for your service desk, without all the extra noise from the standard JIRA interface. The following screenshot shows the customer portal from Atlassian's support portal:
- Queues: Queues are like JIRA filters that show you a subset of issues that meet a certain criteria. Service desk agents use queues to prioritize and pick out requests to work on.
- Requests: Requests are what your end users (not agents), such as customers, submit to JIRA Service Desk. Under the hood, they are just normal JIRA issues. However, using the term request is less confusing in the context of a service desk environment.
As shown in the following screenshot, when customers interact with requests, the user interface is very different to what agents will see. It is much simpler to show only the key information, such as the request description and its status. Customers cannot make changes to the request details, and can only add new comments or attachments to the request.

The key information of service desk are as follows:
- Request Type: Request types represent the different types of requests customers can make. These can be anything including a problem report, help request, or general inquiry. When you create a new request type, JIRA creates a new issue type behind the scenes. One major feature of request type is that it allows you to specify a user-friendly name for it. While the actual issue type is called problem report, you can rename it and display it as Submit a problem report instead.
- Service Desk: The service desk is what agents will be working from. Each service desk has a front, customer-facing portal. Behind the scenes, a service desk is a JIRA project, controlled by JIRA permissions, workflows, and other schemes.
- SLA: Service-level agreement defines the quality of service that is being guaranteed to your customers. In JIRA Service Desk, SLAs are measured in time, such as response time, and overall time taken to resolve issues.
The first step to start working with JIRA Service Desk is to set it up. Since under the hood, a service desk is a JIRA project with a brand new user interface. You can either create a new service desk from scratch, or enable an existing project with service desk features. The second option is very useful if you have been using JIRA as a service desk in the past, and would like to upgrade the experience with JIRA Service Desk.
To create a new service desk, perform the following steps:
- Bring down the Service Desk menu from the top navigation bar and select the Create a Service Desk option.
- Select the New Service Desk Project option to create a new service desk from scratch. Enter a name and key for the service desk and click the Create button.
- Select the Enable for existing project option to use an existing JIRA project. Select the project and click the Enable button.
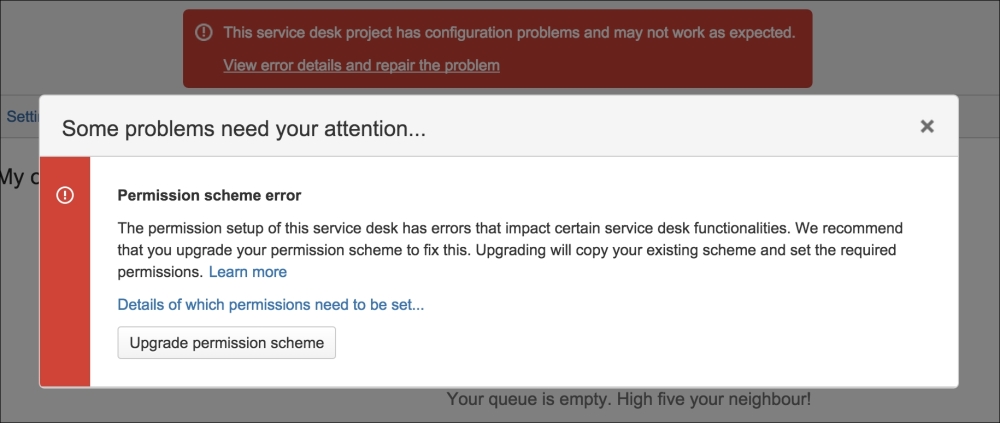
If you choose to use an existing JIRA project for your service desk, JIRA Service Desk will review your project configurations such as permissions to make sure they will be compatible. If a problem is found, you will be prompted with the incompatibility, as shown in the following screenshot, where we have an issue with the existing permission scheme used by the project. You can click on the Details of which permission need to be set… link to review the details of the problem, and then click on the Upgrade permission scheme button for JIRA Service Desk to automatically make the necessary changes.
Once your service desk is created, you will be taken to your service desk user interface, as shown in the following screenshot:
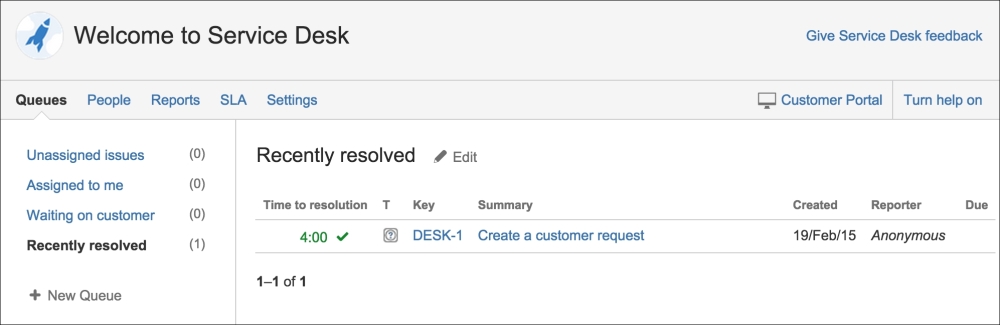
Every service desk has two interfaces. One that will be used by you as the admin and members of your support team called agents. The second interface is called the customer portal, which is what customers will see and use to create requests and interact with agents. As you make configuration changes for your service desk, you can always preview the change by clicking on the Customer Portal link on the top right-hand corner, which will show you what the customer portal will look like.
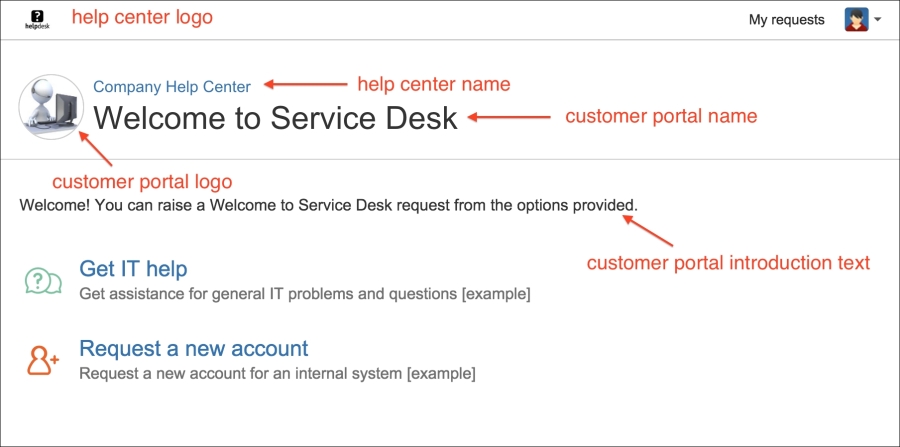
You can brand your customer portal for your service desk with:
- Help center name: The overall name for your help center. Think of this as the name for your JIRA instance.
- Help center logo: The logo for your help center. This is the logo that will appear on the top-left corner. Think of this as the logo for your JIRA. JIRA Service Desk will use this logo to automatically change and adjust the top bar color.
- Customer portal name: The name for a specific service desk portal.
- Customer portal introduction text: A welcome text that will be displayed for a specific service desk portal.
- Customer portal logo: The logo for a specific service desk portal.
The following screenshot illustrates each of these items on a sample customer portal:
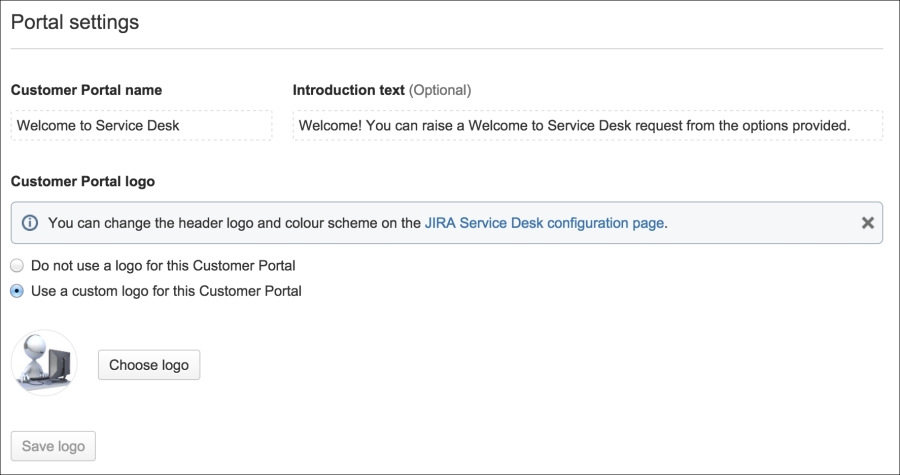
To configure a specific customer portal's branding, perform the following steps:
- Browse to the service desk you want to brand.
- Select the Settings tab and then Portal Settings from the left.
- Enter a name and welcome text in Customer Portal name and Introduction text, respectively.
- Check the Use a custom logo for this Customer Portal option and upload a logo for your customer portal.
If you want to also set up the overall help center branding, perform the following steps:
- Click on the JIRA Service Desk configuration page link from the Portal settings page. Please see the following tip if you do not see the link.
- Enter a name in the Help Center Name field.
- Check the Customize theme and branding for Help Center option and upload a logo for your help center.