
JIRA is a great system for tracking and managing issues, but one of the challenges is that it can be overwhelming at times for users who are not familiar with JIRA to get started quickly. Another challenge is that there is no simple way of taking advantage of JIRA's issue-tracking capability and making it available to other websites, such as an Intranet. Just like JIRA Agile, a new add-on, the issue collector has been created to address these issues. Issue collector is another add-on from Atlassian and is bundled with JIRA.
With the issue collector, you can embed a feedback form directly in your website, collect feedback from visitors, and automatically push that feedback into JIRA. The major advantages of using the issue collector are as follows:
- Visitors do not need to have a JIRA account. The extra step of having to create a new account can be a turn off for some people.
- Visitors can provide their feedback on the spot without having to go to JIRA. In fact, they may not even know that JIRA exists.
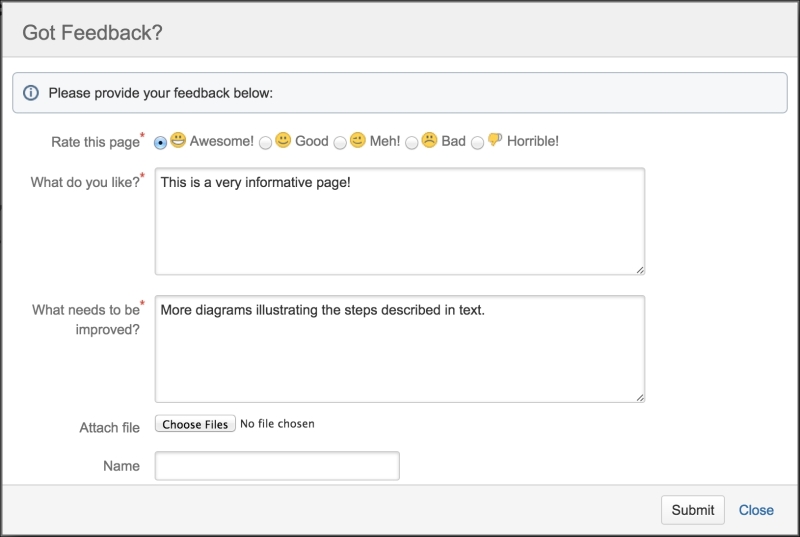
- The feedback form is very simple to use, unlike the create issue dialog box, which can be complicated.
When embedded, the feedback form is accessed via a trigger, usually a tab positioned at the edge of the web page. You can control the position of the trigger while adding an issue collector in JIRA. The following screenshot shows an issue collector dialog when triggered:
Issue collectors are created on a per-project basis, so when a user submits his/her feedback with the form, JIRA will know which project to create the issue in. Perform the following steps to set up a new issue collector for a project:
- Browse to the Project Administration console for the project you want to use an issue collector with.
- Select the Issue Collectors option from the left panel.
- Click on the Add Issue Collector button.
- Fill in the form (see the following table) and click on Submit.
The Add Issue Collector page is divided into three major sections. The first section requires you to provide some basic information for the issue collector. The most important parameter is Issue Type and Reporter. The following table lists all the parameters needed to create a new issue collector:
|
Field |
Description |
|---|---|
|
Name |
This specifies the name of the issue collector. You should use a name that conveys the purpose of the issue collector. |
|
Description |
This specifies more descriptive text about the issue collector. |
|
Issue Type |
This specifies the issue type for new issues created via the issue collector form. |
|
Reporter |
This specifies that the default user that will be used to create issues when issues are created. |
|
Match Reporter |
This specifies whether new issues should always be created with the issue reporter, or if JIRA should try to match the user with an e-mail, or if there is an active session with JIRA. |
|
Collect Browser Info |
This option specifies, if you want to collect additional information from the user's browser. |
|
Trigger Text |
This specifies the text that will be displayed on the Trigger tab. |
|
Trigger Style |
This decides where you would like the Trigger tab to appear on the page. If you choose the Custom option instead of creating a Trigger tab, you will get a JavaScript code snippet that will let you control and use other elements on the page as the trigger, by replacing the |
|
Template |
This chooses what the feedback form will look like. You can also create your own form by choosing the Custom option. |
|
Message |
This specifies the message that will be displayed in the info panel on the feedback form. |
There is also a Template Preview section at the bottom to help you visualize the final issue collector dialog.
After creating the new issue collector, you will be able to embed it in your website. JIRA offers two options to embed an issue collector, either through HTML or JavaScript.
Embedding through HTML requires you to have the ability to modify the HTML page you want to embed your issue collector into. If you want the issue collector to appear on every page on your website, you will need to have a common HTML page that can be included in all the pages such as a header HTML.
Embedding via JavaScript allows you to add the generated code as a part of an existing JavaScript file that has already been included in the page. Again, this requires you to have the ability to modify the JavaScript file. This option also requires the jQuery library to be available, so you will need to make sure you have included jQuery before calling the generated code, as follows:
<script src="http://code.jquery.com/jquery-latest.js"></script>
Perform the following steps to embed your issue collector in your website:
- Select either the Embed with HTML or Embed with JavaScript option under the Embed this Issue Collector section.
- Copy the contents from the Installation instructions text area and paste the code snippet into the appropriate location of your page.
You can also click on and expand the More Instructions section to get more details and examples on how to do this. The following screenshot shows an example of an issue collector embedded in Atlassian Confluence, an enterprise wiki solution:
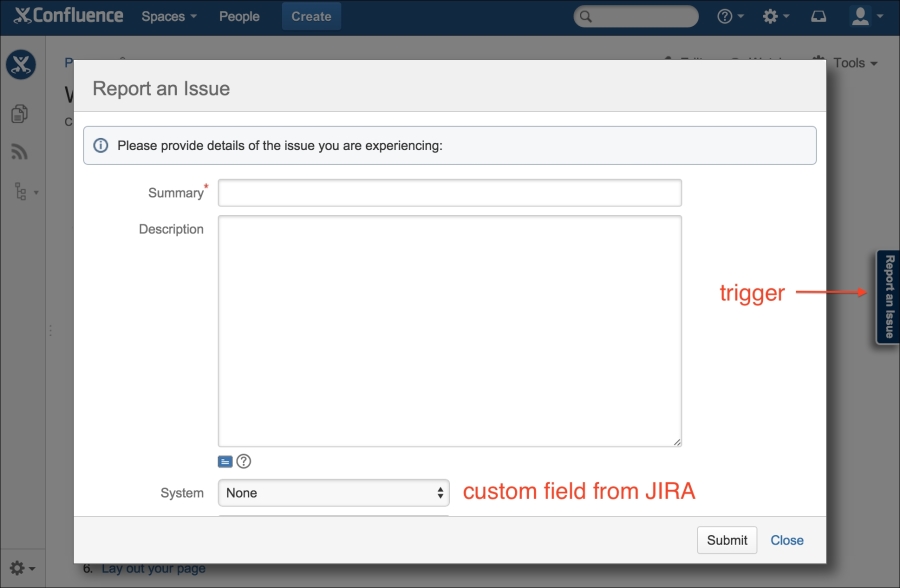
The issue collector shown in the preceding screenshot contains the Summary and Description field, and also a custom field called System from JIRA.
If you do not have Atlassian Confluence or another website handy, but still want to try out the issue collector, you can test this directly in JIRA using the announcement banner:
- Browse to the JIRA administration console.
- Select the Systems tab and then the Announcement Banner option.
- Cut and paste the issue collector code into the Announcement text box and click on the Set Banner button.
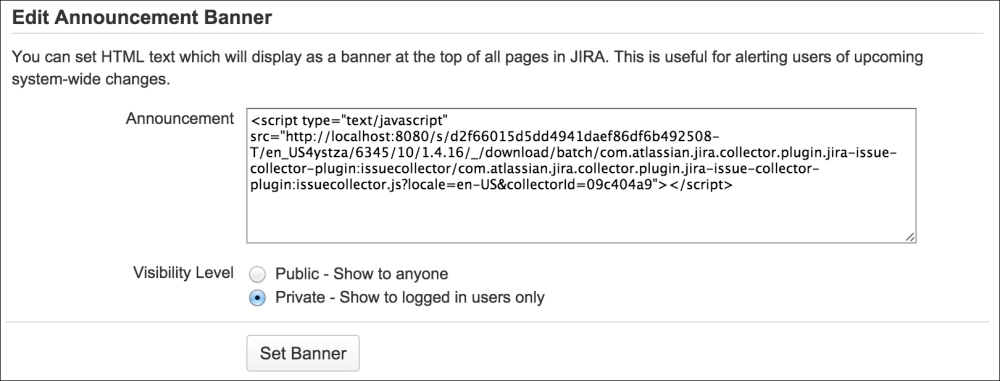
After you save the announcement banner, the issue collector will be displayed in normal JIRA pages such as the dashboard. It will not be displayed in the administration console.