
JIRA uses issue types to define the purpose of issues, while the JIRA Service Desk uses request types for the same purpose. In fact, each request type is mapped to an issue type behind the scenes. The one key difference between the two is that, a request type is what is shown to the customers, and a more descriptive display name is used. For example, an issue type is called Incident, and the corresponding request type will be called Report system outage. You can think of request types as issue types with a fancy display name.
To create a new request type for your service desk:
- Browse to the service desk you want to create a new request type for.
- Select the Settings tab and then Request Types from the left.
- Click on the icon to select a new icon for the request type.
- Enter a name for the request type. You can be as descriptive as possible with its name, so your customers can easily understand its purpose.
- Select the issue type that the request type is mapped to.
- Enter an optional description. The description will be displayed underneath the request name to help your customer decide what type of request to create.
- Select a group or groups this request type belongs to. We will talk about groups later in this section.
- Click the Add button to create the new request type.

You can reorder the request types by dragging them up and down the list. The order you set in the list will be reflected on the customer portal. Make sure you put some thoughts into this. For example, you can order them alphabetically or by placing the most common request types on the top.
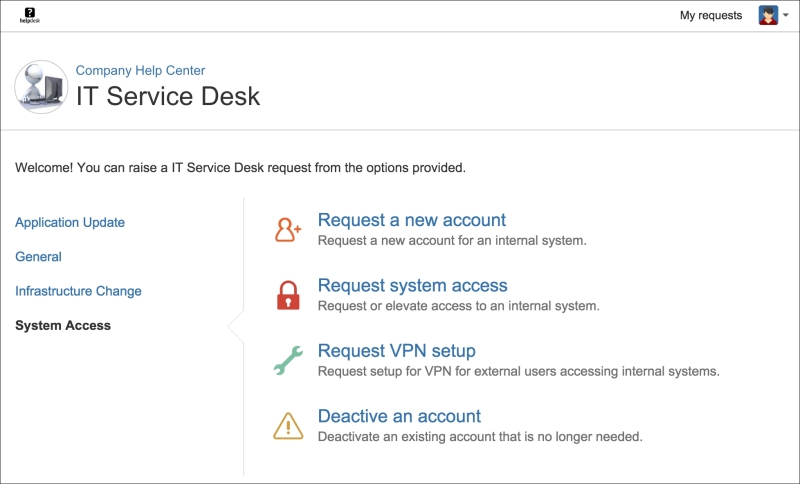
As the number of request types grows, you can group similar request types into groups. Therefore, when customers visit the portal, all the request types will be organized logically, making the navigation much easier. For example, as shown in the following screenshot of a customer portal, we have four request type groups: Application Update, General, Infrastructure Change, and System Access. When clicking on the System Access group, we have the four types of requests customers can raise.
As we have already seen in the Setting up request types section, you can add one or more groups to a request type. You can select one of the existing groups or create a new group by simply typing in the new group's name. When a request type belongs to two or more groups, it will be displayed when each of the group is selected on the portal.
JIRA Service Desk lets you set up different field layouts for each request type. The important thing to note here is that, when you are setting up fields for JIRA Service Desk, you are not creating new custom fields (as you would in JIRA), you are simply adding and removing existing fields onto the request form when customers create a new request. You can think of this as adding fields onto screens. If you want to add a field that does not yet exist, you will have to create a new custom field first, as described in Chapter 4, Field Management, and then make it available in the request form.
One of the more useful features JIRA Service Desk allows you to do with fields is the ability to let you create a custom display name, independent to the actual field's name. This means you can give a more descriptive and user-friendly name to the field, when it is displayed to customers. For example, for the JIRA field Summary, you can give it a display name of What is the problem you are having?. Since the display name is independent of the field's name, your existing filters and search queries will continue to work as they are.
To set up field layouts for a request type:
- Browse to the service desk you want to set up field layouts.
- Select the Settings tab and then Request Types from the left.
- Click on the Edit fields link for the request type you want to set up fields for. This will list all the fields that are currently displayed when customers create a new request.
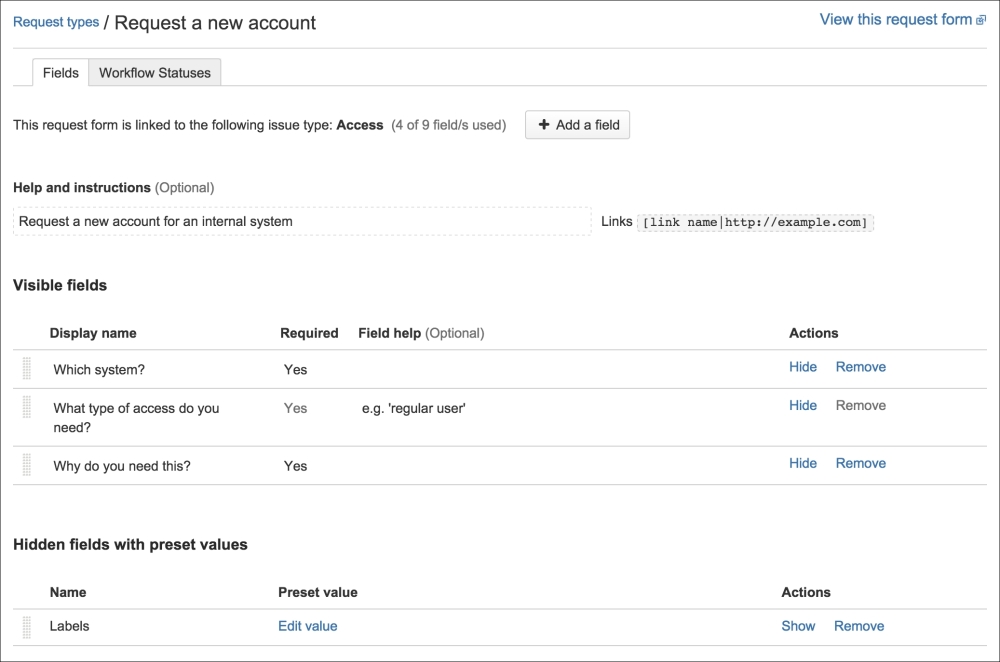
- Click on the Add a field button to select an existing field (both system and custom) to the request type so that it will be displayed.
- Click on the field's Display name to change what customers will see when the field is displayed. This does not change the field's actual name in JIRA, it only makes the display more user friendly.
- Change the field's mandatory requirement by clicking on the Required column. Note that you cannot change this value if it is grayed out.
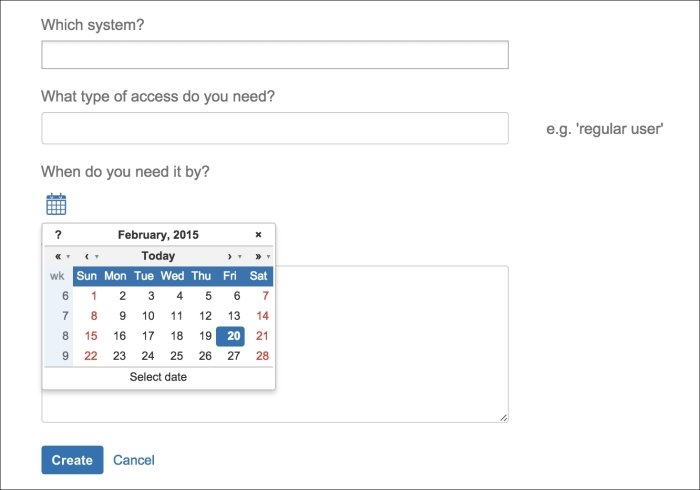
After you have set up your field layout for the request type, you can click on the View this request form link at the top to see a preview of the result. As shown in the following screenshot, we added the Due Date field to the form, but it is now displayed as When do you need it by?:
Just like with fields, you can also control how workflow statuses are displayed in JIRA Service Desk. Note that you cannot actually change the actual workflow, but you can make the workflow less confusing to your customers, so they know exactly how their requests are progressing.
To set up the workflow for a request type:
- Browse to the service desk you want to set up a workflow for.
- Select the Settings tab and then Request Types from the left.
- Click on the Edit fields link for the request type you want to set up a workflow for.
- Select the Workflow Status tab. This will list all the workflow statuses that are available in the workflow.
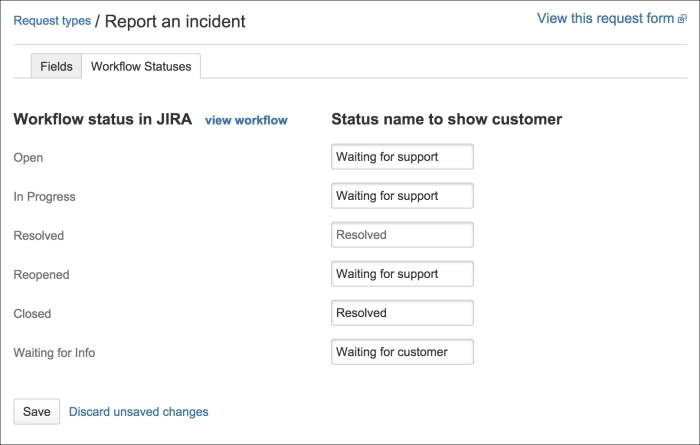
As we can see from the preceding screenshot, the actual JIRA workflow status names are listed in the left column. For each of the statuses, you can choose to give it a different display name that will be shown to the customers.
For example, the statuses Open, In Progress, and Reopened, are normal JIRA workflow terms, and represent that the request is currently with a support agent. However, these names can be confusing to customers, so we give them a new display name of Waiting for support.