
We have seen how you can configure JIRA to send e-mails to notify users about updates on their issues. Although, this is only half of the story when it comes to JIRA's e-mail support.
You can also set up JIRA for it to periodically poll mailboxes for e-mails and create issues based on the e-mails' subject and content. This is a very powerful feature with the following benefits:
For JIRA to retrieve e-mails and create issues from them, you need to add the POP/IMAP mail server configurations to JIRA. POP and IMAP are mail protocols used to retrieve e-mails from the server. E-mail clients, such as Microsoft Outlook and Mozilla Thunderbird, can use one of these protocols to retrieve your e-mails.
Unlike outgoing mail servers, JIRA allows you to add multiple incoming mail servers. This is because while you only need one mail server to send e-mails, you may have multiple mail servers or multiple mail accounts (on the same server) that people will use to send e-mails to. For example, you might have one dedicated to support and another one for sales. It is usually a good idea to create separate mail accounts to make it easier when trying to work out which e-mail can go into which project. For this reason, adding POP/IMAP mail servers can be thought of as adding multiple mail accounts in JIRA:
Perform the following steps to add an incoming mail server:
- Browse to the JIRA administration console.
- Select the System tab and then the Incoming Mail option; this will display the Incoming Mail page.
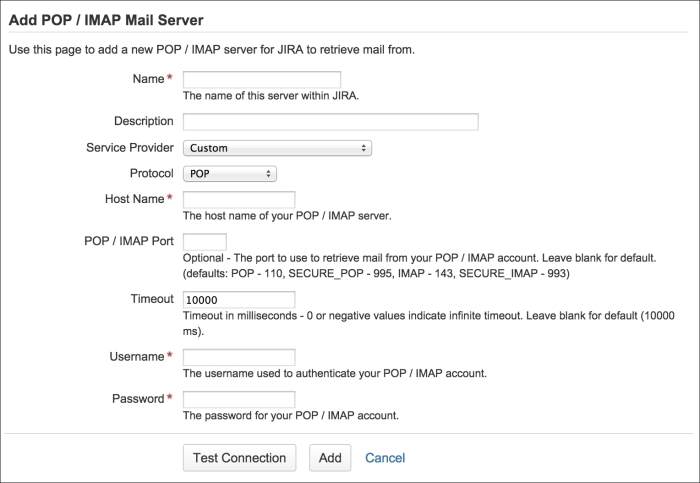
- Click on the Configure POP/IMAP mail server button. This will bring you to the Add POP/IMAP Mail Server page.
- Enter a meaningful name and description for the mail server.
- Select the type of mail service provider. For example, if you are using your own hosted mail service or one of the recognized cloud provider such as Google.
- Specify the host name of the POP/IMAP server if you are using your own (custom provider).
- Enter the username/password credentials for the mail account.
- Click on the Add button to create the POP/IMAP mail server:
Mail handlers are what JIRA uses to process retrieved e-mails. Each mail handler is able to process e-mails from one incoming mail server and periodically scan for new e-mails.
JIRA ships with a number of mail handlers, each with their own features. In the following sections, we will discuss each of the handlers in detail.
Creating a new issue or adding a comment to an existing issue mail handler (also known as the Create or Comment Handler in previous versions of JIRA) is the most used mail handler. It will create new issues from the received e-mails and also add comments to existing issues if the incoming e-mail's subject contains a matching issue key. If the subject does not contain a matching issue key, a new issue is created. The following table lists the parameters required when creating the mail handler:
This mail handler extracts text from an e-mail's content and adds it to the issue with a matching issue key in the subject. The author of the comment is taken from the From field.
It has a similar set of parameters to Create and Comment handler.
Adding a comment from the non-quoted e-mail body is very similar to the Full Comment handler, but only extracts non-quoted texts and adds them as comments. Texts that start with ">" or "|" are considered to be quoted.
It has a similar set of parameters to Create and Comment handler.
Creating a new issue from each e-mail message is very similar to Create and Comment handler, except this will always create a new issue for every received e-mail.
It has a similar set of parameters to Create and Comment handler.
Adding a comment before a specified marker or separator in the e-mail body is a more powerful version of the comment handlers. It uses regular expressions to extract texts from e-mail contents and add them to the issue:
You can set up as many mail handlers as you want. It is recommended that you create dedicated mailboxes for each project you wish to allow JIRA to create issues from e-mails. For each account, you will then need to create a mail handler. The mailbox you set up needs to be accessible through POP or IMAP.
Perform the following steps to add a mail handler:
- Browse to the Incoming Mail page.
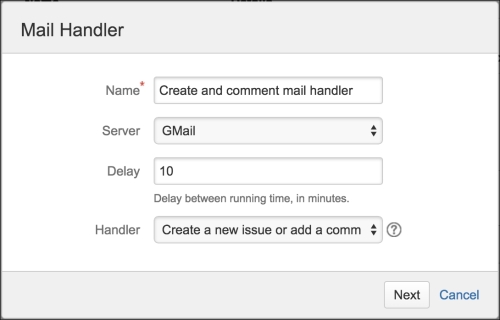
- Click on the Add incoming mail handler button. This will bring up the Mail Handler dialog box.
- Provide a meaningful name to the new mail handler.
- Select an incoming mail server or Local Files.
- Specify how long JIRA can wait to poll the mailbox for new e-mails (in minutes). You will want to keep this long enough to allow enough time for JIRA to process all the e-mails, but not too long as you may end up having to wait for a long time to see your e-mails converted into issues in JIRA.
- Select the type of handler you want to add.
- Click on the Next button:
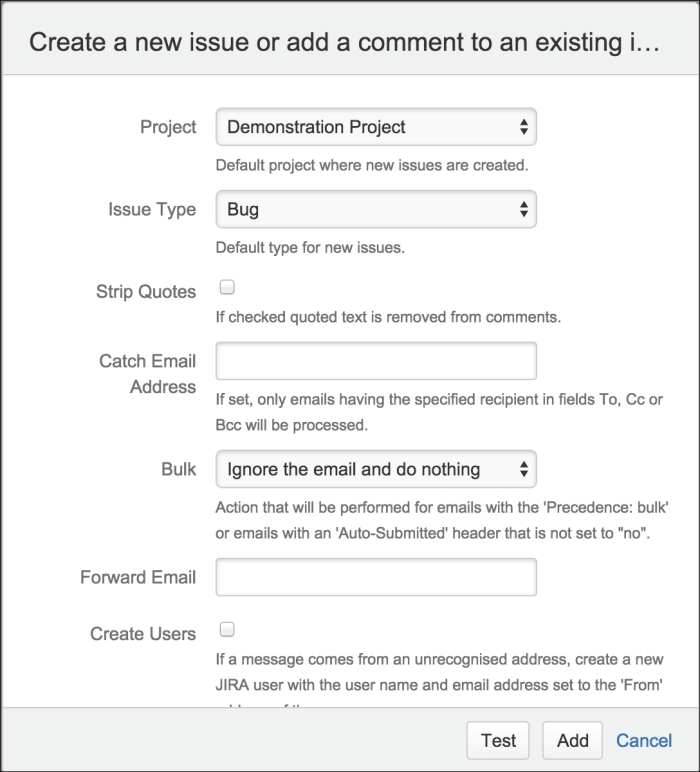
Depending on the handler type you select, the next screen will vary. On the next screen, you will need to provide the required parameters for the mail handler, as described in the preceding section. The following screenshot shows an example configuration dialog box, where new issues will be created in the Demonstration project as Bugs:
You can update the details of your mail handlers at any time. You will often need to tune your handler parameters a few times until you get your desired results. Perform the following steps to update a mail handler:
- Browse to the Incoming Mail page.
- Click on the Edit link for the mail handler you wish to update.
- Update the configure options.
Once updated, the changes will be applied immediately and JIRA will use the new handler parameters for the next polling run.
You can also delete mail handlers that are no longer required at any time. Perform the following steps to delete a mail handler: