Service-level agreement or SLA defines the agreement between the service provider and end user in terms of aspects of the service provided, such as its scope, quality, or turn-around time.
In the context of support service, an SLA will define different response times for different types of support requests. For example, severity 1 requests will have a response time of 1 hour, and severity 2 requests will have a response time of 4 hours.
JIRA Service Desk lets you define SLA requirements based on response time. You can set up the rules on how response time will be measured and goals for each rule.
JIRA Service Desk's SLA is divided into two components, the time measurement and goals to achieve. Time can be measured for a variety of purposes. Common examples include overall time taken for request resolution, and response time to customer requests. To set up SLA metric:
- Browse to the service desk you want to set up the SLA on.
- Select the SLA tab and then click on the New Metric button from the left.
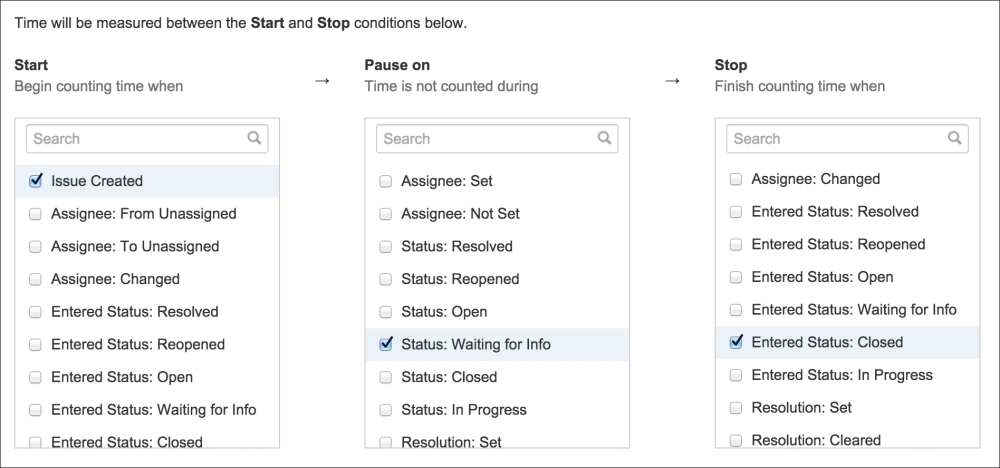
A simple example will be JIRA Service Desk will start counting time as soon as the request is created. Every time an agent requests for more information from the customer, the count will be paused until the customer responds back. Once the request is finally closed off, the count will be stopped. The following screenshot shows you how to set up an SLA time measurement for the simple example:
- For the Start column, we select the Issue Created option, indicating when it can start counting time as soon as the request is created
- For the Pause on column, we select the Status: Waiting for Info option, indicating that counting can be paused when the request enters the Waiting for Info status
- For the Stop column, we select the Entered Status: Closed option, indicating that counting will be stopped once the request is closed
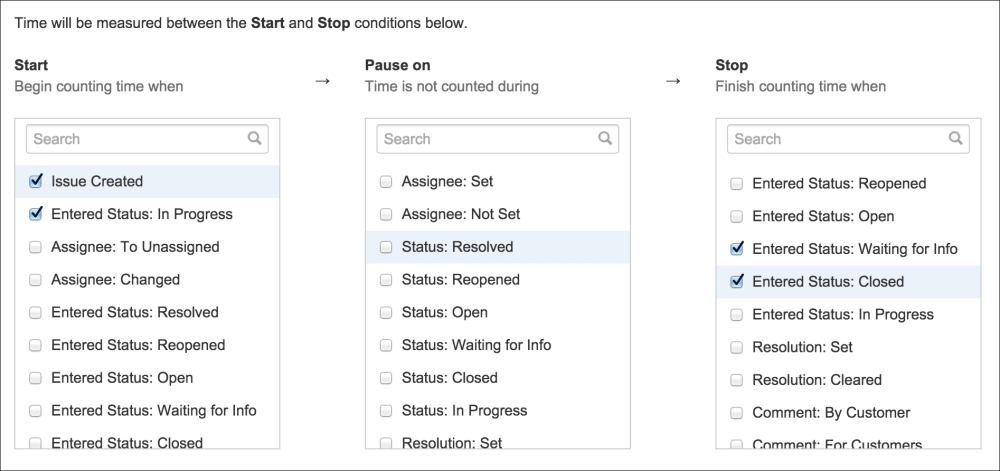
As you can see in the following screenshot, for each of the three columns, you can select more than one condition:
This allows you to set up multiple entry points for starting and stopping time. An example of this usage will be to measure response time. For example, you need to guarantee that an agent will respond to a new request within one hour. If the request is sent back to the customer for further information, a response time of one hour is also required as soon as the customer updates the request with the requested information. The following screenshot shows you how to set up the time measurement for this SLA:
- For the Start column, we select both the Issue Create option and Entered Status: In Progress option. Therefore, we will start counting when the issue is first created, and also when it is put back for our agents to work on.
- For the Stop column, we select both the Entered Status: Waiting for Info option and Entered Status: Closed option. Counting will stop when an agent sends the request back to the customer for more information or when it is closed for completion.
The difference between the two examples here is that, in the second example, we do not pause time counting when the request enters the Waiting for Info status; instead, we stop counting completely. This means that when the request enters the Waiting for Info status, the current counting cycle ends, and when the request enters the In Progress status, a new counting cycle will begin, as shown in the following screenshot:
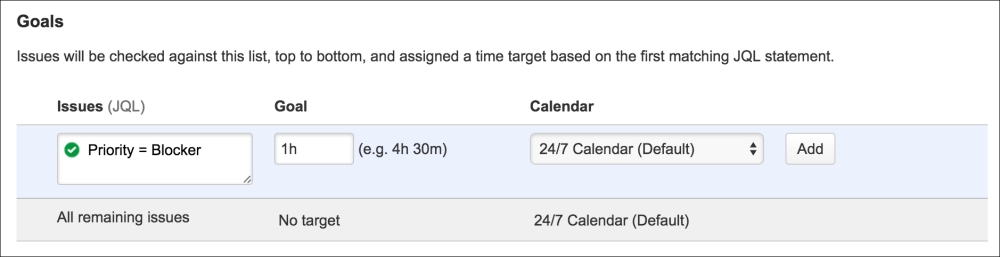
Once we defined how time can be measured, the next step is to set up the SLA goals. The SLA goals defines the amount of time allowed for each of the scenarios we have just set up. If we take the aforementioned response time example, we may set up our goals as shown in the following screenshot:
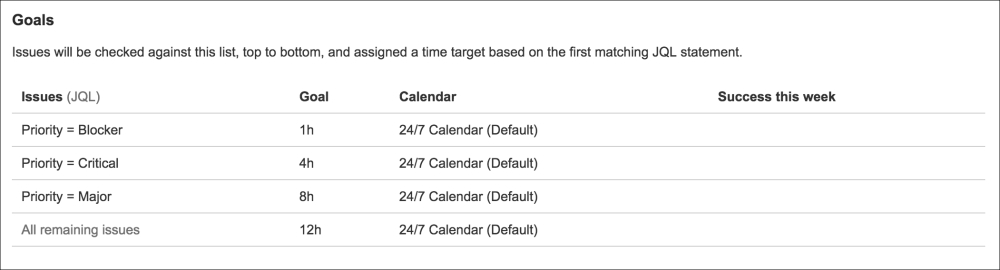
In our example, we defined that for requests with priority set to Blocker, the response time will be 1 hour, critical requests and major requests will have a response time of 4 and 8 hours, respectively. Everything else will be responded to within 12 hours.
As you can see, there are several components when it comes to define an SLA goal:
- Issues: Issues that will have the goal applied to them. Use JQL to narrow down the selection of issues.
- Goal: The time value for the goal. You can use standard JIRA time notation here, where 3h means 3 hours, 45m means 45 minutes, and 2h30m means 2 hours and 30 minutes.
- Calendar: Calendars define the working days and working hours SLA will be applied to. For example, 24/7 Calendar means that time will be counted every hour of every day. As we will see later, you can create your own custom calendars to define your working day, hours, and even holidays.
As we have seen, when setting up SLA, you can select a calendar, which defines the working days and hours that can be counted toward the goal. The JIRA Service Desk comes with two calendars out of the box:
You can create you own calendars as follows:
- Browse to the service desk you want to add a calendar for.
- Select on the SLA tab.
- Click the Calendar button from the left, and click the Add Calendar button from the Calendars dialog.
- Enter a name for the new calendar and configure the options.
- Click the Save button to create the calendar.
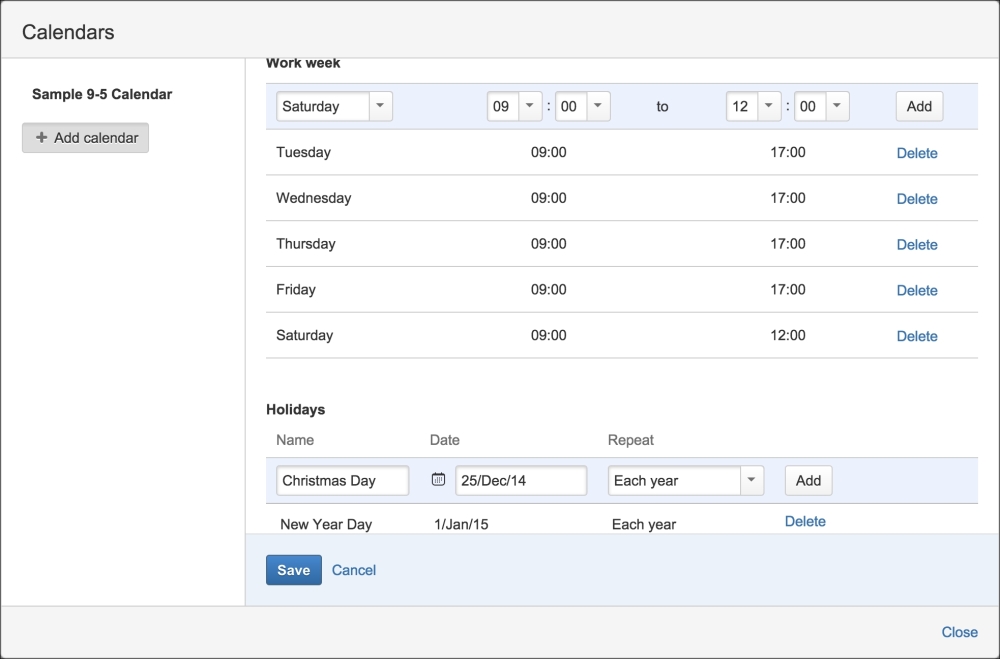
JIRA Service Desk lets you configure your calendar with the following options:
As shown in the following screenshot, we have set up our calendar to have working time between 9A.M. to 5P.M., from Tuesday to Friday, and 9A.M. to 12P.M. on Saturday. We also added Christmas Day and New Year Day as holidays, so SLA will not be applied on those 2 days.